There is honestly nothing on this earth that smells better than yeast blooming and truly good olive oil hitting a hot oven. Forget those fancy bakery loaves; once you realize how easy real Italian bread can be, you won’t look back. I’m talking about the kind of bread that doesn’t require kneading for hours! This recipe for Rustic Rosemary Garlic Focaccia is my weeknight go-to because it’s almost entirely hands-off. I wasted so much time years ago trying to punch down and reshape bread dough until it felt perfect, but I finally learned that for focaccia, you need to embrace the wet, slightly sticky nature of the dough. That wetness is the secret! Trust me on this: if you can mix ingredients in a bowl, you can make this bread, and it will be unbelievably delicious.
Why You Will Love This Rustic Rosemary Garlic Focaccia
Honestly, this recipe is what I turn to when I want that bakery-fresh taste without the bakery-fresh effort. My favorite part is how trusting the long rest times pays off so huge. You just can’t mess it up!
- The hands-on effort here is basically zero! You only spend about 15 minutes mixing, and the dough does all the hard work resting. It’s ideal for busy cooks.
- That signature flavor combination—fresh rosemary and pungent garlic swimming in good olive oil—is just heavenly. It smells like walking into a perfect Italian kitchen.
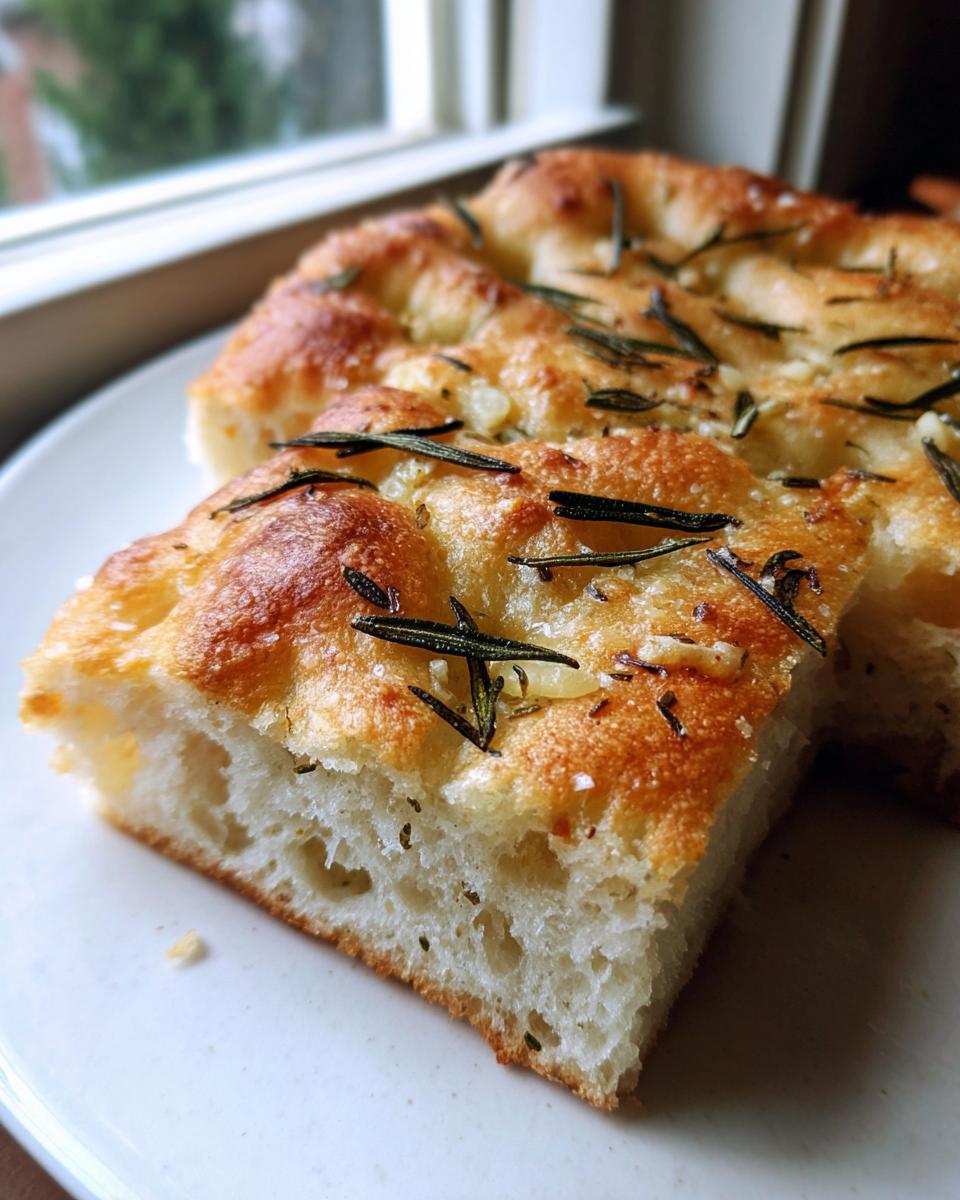
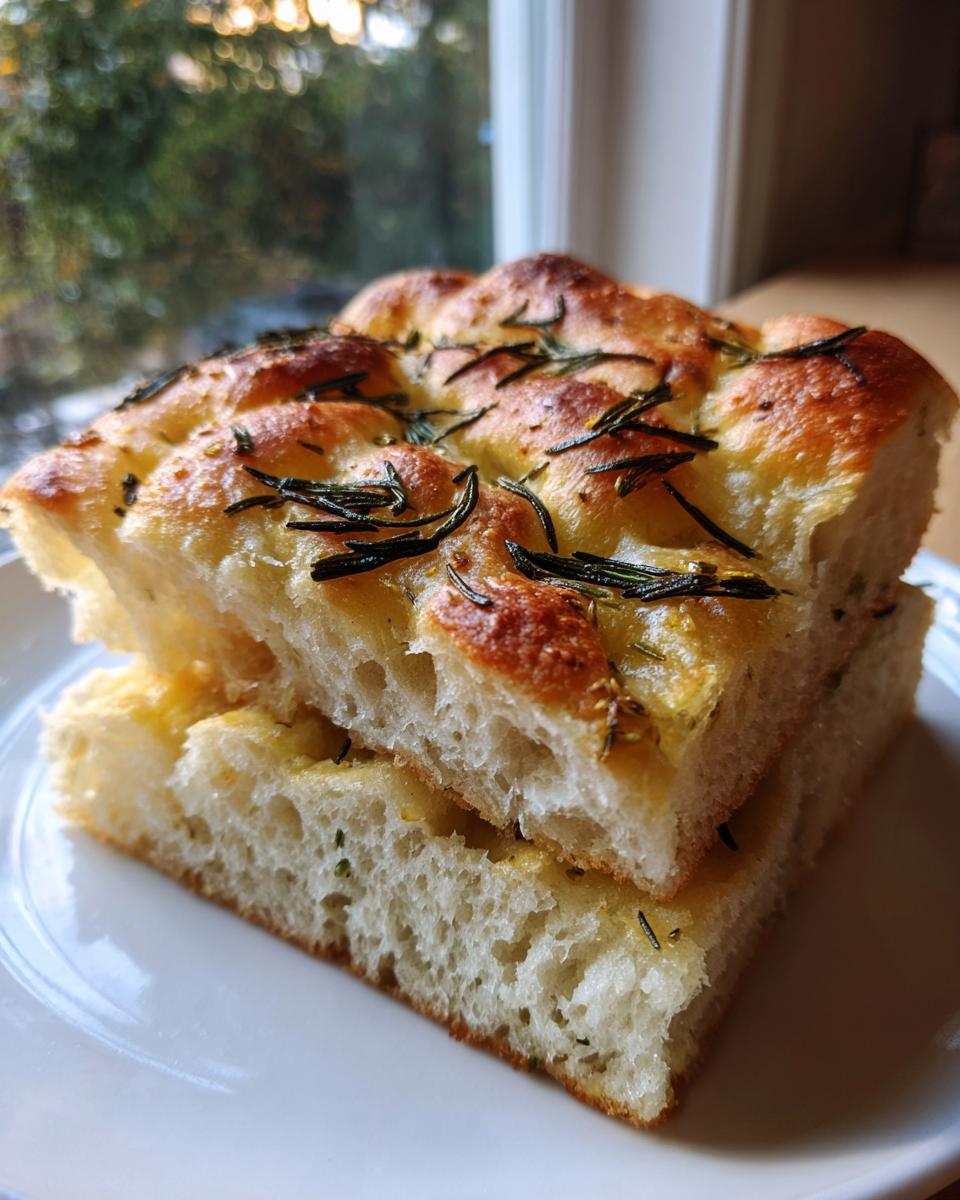
- You get that incredible texture combo: a soft, airy, spongy interior that practically melts in your mouth, paired with a delightfully crisp, golden-brown bottom crust.
- It’s incredibly flexible! While this recipe is stunning, you can easily swap out the herbs or add olives or sun-dried tomatoes if you’re feeling adventurous next time.
See? It’s perfect for serving alongside almost anything, or just tearing off huge chunks straight from the pan!

Essential Ingredients for Rustic Rosemary Garlic Focaccia
When I list the ingredients below, I want you to really pay attention to the olive oil. Don’t skimp on the quality here, because it coats everything and sinks right into those little dimples we make later. It makes or breaks the flavor profile!
Here’s what you’re going to need to gather up:
- 3 cups all-purpose flour (I use standard AP, but see my notes below!)
- 1 teaspoon instant yeast
- 1 1/2 teaspoons salt
- 1 1/4 cups warm water
- 1/4 cup olive oil, plus more for drizzling (and I mean a generous amount for drizzling!)
- 2 cloves garlic, minced (don’t even think about using the powdered stuff here!)
- 2 tablespoons fresh rosemary, chopped
- Flaky sea salt, for topping (this provides the crunch!)
A quick note on the water: You absolutely must use warm water, not hot water. Hot water will kill your yeast instantly, and you’ll end up with dense, sad bread instead of lovely airy focaccia. Warm water (think bathwater temperature, around 105–115°F) is just the right hug to wake up that instant yeast so it gets bubbling and does its job making the dough grow huge!
Ingredient Notes and Substitution Tips
While this recipe uses all-purpose flour beautifully for that classic soft middle, if you are desperate for something with a little more chew—you know, that slight resistance when you bite into a crusty bread—you can absolutely swap the flour. Just use bread flour instead. It has higher protein content which means more gluten development when mixed.
Also, I mentioned the flaky sea salt for topping, but if you want to kick the savory flavor up a notch, I sometimes add a tiny pinch of black pepper right in with the rosemary and garlic before it goes into the oven. It adds a really lovely background warmth to the whole experience. It’s optional, but seriously good!
The Easy Steps to Make Rustic Rosemary Garlic Focaccia
Okay, deep breaths! This bread looks complicated, but I promise you it comes together faster than you think. The real secret here, just like the tips for making sure my quick oat bread comes out right, is listening to the dough and respecting the resting times. Don’t rush it, and you’re golden!
Mixing the Dough and First Rise
First things first, grab a big bowl. In it, mix your flour, yeast, and salt together. Just a quick whisk so everything is evenly distributed. Then, you pour in that warm water. You’re not kneading this dough the way you would a standard pizza crust; you just mix until everything is incorporated, and it looks like a messy, shaggy ball. Don’t worry about making it smooth!
Now comes the easy part! Pour 2 tablespoons of that gorgeous olive oil right over the shaggy dough mass. Cover the bowl—I use plastic wrap, but you could use a clean tea towel, too—and leave it alone. Seriously, walk away! You need this dough to rest at room temperature for a full 2 hours. That’s when the yeast gets super active and starts doing all the heavy lifting for you.
Shaping and Topping Your Rustic Rosemary Garlic Focaccia
Once your dough has doubled, gently tip it out into a 9×13 inch baking pan that you’ve already generously coated with the rest of that olive oil. Make sure you get oil all the way into the corners! Then, cover it again and let it chill out for another 30 minutes while your oven gets nice and toasty. Preheat that oven to a roaring 400 degrees Fahrenheit.
This next step is crucial for texture: the dimpling! You need to use your oiled fingers to press the dough down gently all over the surface. Press deep, almost all the way to the bottom of the pan, but try not to poke right through! These dimples are what hold all that amazing olive oil, garlic, and rosemary right where they belong. They create those wonderful little internal bubbles.
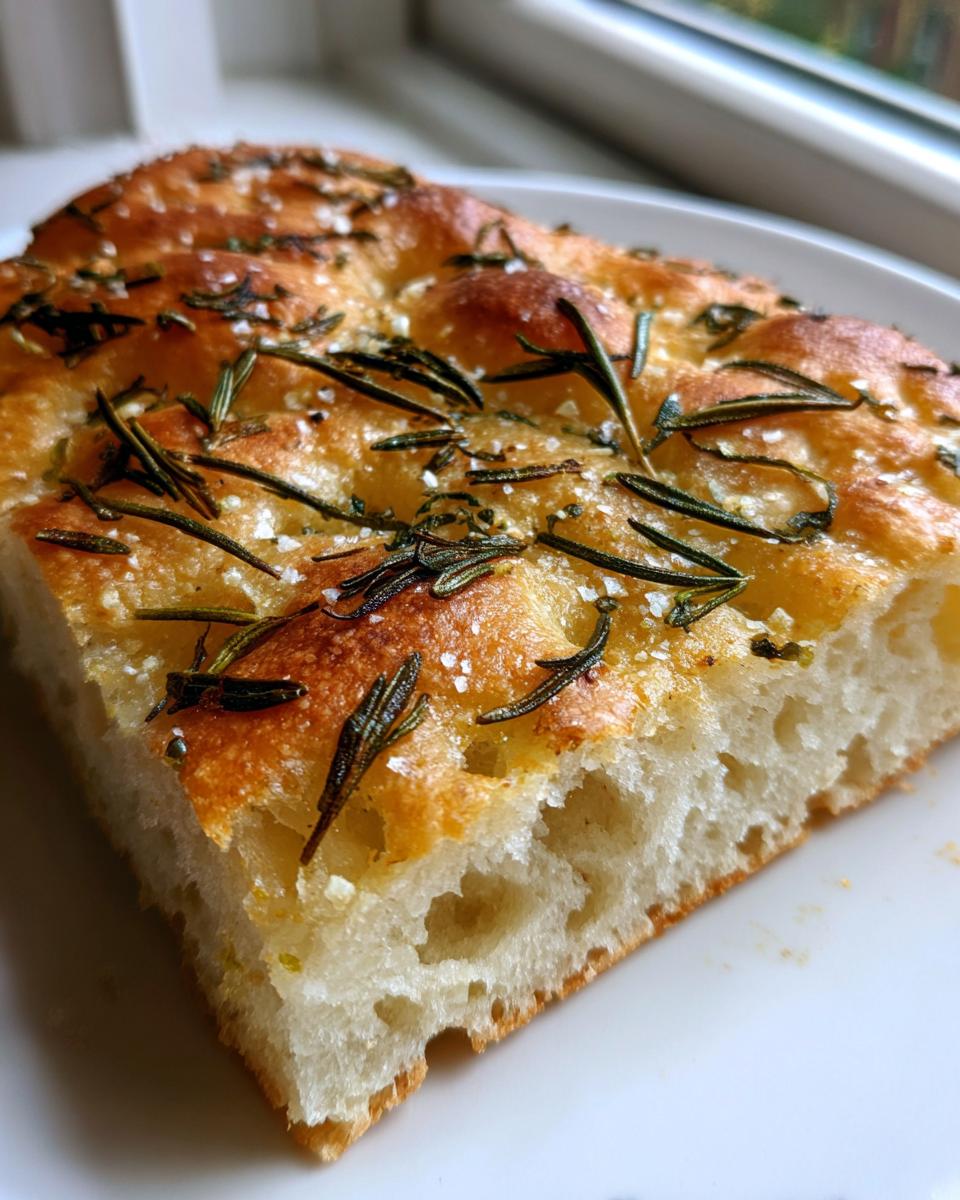
Once it’s dimpled beautifully, drizzle a little more olive oil over the top—don’t be shy! Then scatter your minced garlic and chopped rosemary evenly across the surface. Finally, sprinkle liberally with flaky sea salt for that perfect salty crunch. If you’re making something like puff pastry, texture is everything, and this topping process is your texture control center!
Baking to Golden Perfection
Pop that beautiful creation into your preheated 400°F oven. It only takes about 20 to 25 minutes. You’re really looking for color here. When the edges are a deep, rich golden brown and the top looks set and slightly blistered, it’s done. If you’re in doubt, gently tap the middle; if it sounds slightly hollow, pull it out!
Let it cool in the pan for just a few minutes—maybe 5 or 10 minutes—before slicing. It’s almost impossible to wait, I know, but slicing it piping hot can sometimes make it deflate a tiny bit. A little patience right at the end guarantees that soft, airy crumb we’ve been working towards.
Tips for Perfecting Your Rustic Rosemary Garlic Focaccia
Even though this bread is famously easy, there are just a couple of tiny things I’ve figured out over the years that elevate it from “good” to “I can’t stop eating it.” It really comes down to managing that high hydration when you’re working with it.
First, let’s talk hydration—that’s just a fancy word for how wet the dough is. Since this recipe calls for a lot of water, the dough will feel sloppy. Resist the urge to add more flour! If you add flour to make it less sticky during the stretch-out phase, you are destroying the open, airy crumb that makes good focaccia so amazing. If you need to handle sticky dough, just oil your hands or the pan surface really well. Think of your hands like metal tools that just need a little slick layer of oil.
Second tip is all about that oven spring and crust! If you’re serious about getting that super crispy bottom—the kind that fractures slightly when you slice it—try this little trick I picked up. After the oven is fully preheated, place your baking pan right onto the bottom rack for the first 10 minutes of baking. Putting the pan directly on the hot metal helps conduct that intense heat straight into the bottom of the dough, guaranteeing a superior crust before the top even starts browning too hard. You can move the pan to the middle rack for the rest of the bake time.
My final piece of advice, which is huge for flavor depth, involves that olive oil drizzled right before baking. Don’t just scatter five drops across the top. It should look like the surface is wet! After you dimple the dough, pour the remaining olive oil right into those little valleys. This oil essentially fries the outside of the bread in the oven, giving you that distinct, slightly chewy, savory, golden layer that just screams artisanal. It’s almost as essential as the fermentation time itself. You can serve it with something amazing like my homemade guacamole if you ever feel like mixing cuisines!
Serving Suggestions for Rustic Rosemary Garlic Focaccia
This Rustic Rosemary Garlic Focaccia is honestly so good on its own that you could just sit there and eat the whole pan plain (don’t judge me, I’ve done it). But since it is so sturdy and soaked in flavor, it’s the absolute perfect accompaniment to so many things without stealing the show.
My absolute favorite way to serve this, especially on a chilly evening, is right alongside a big, steaming bowl of soup. It’s perfect for dipping! Forget plain old crackers; you want a slice of this bread to soak up every last drop of broth. I love pairing it with something rich, like my recipe for cozy Italian sausage soup—the rosemary cuts through the richness perfectly.
If you’re serving it mid-day, think freshness! This focaccia slices up beautifully thick, making it an ideal base for an open-faced sandwich or just served beside a big, vibrant salad. Try serving it with a simple Caprese salad—tomatoes, fresh mozzarella, and basil—as the garlic notes in the bread complement the fresh vegetables wonderfully.
And finally, because it’s dripping with olive oil and seasoned so boldly, it doesn’t need much else! We often just serve chunks of it on a board with some creamy dips, like whipped ricotta cheese or even a simple balsamic vinegar reduction for dipping. It truly elevates any casual gathering!
Storage and Reheating Instructions for Rustic Rosemary Garlic Focaccia
No matter how big you think you’re making this bread, you always end up with leftovers, right? It’s just the rule of delicious homemade bread! The good news is that this Rustic Rosemary Garlic Focaccia holds up pretty well compared to other breads, but we need to store it right to keep that soft interior from getting stale too fast.
If you have any leftover, handle it gently. You want to store it at room temperature, not in the fridge. Putting bread in the refrigerator is my biggest baking sin, because it dries it out faster, and we definitely don’t want that sad, stiff texture.
Just wrap the cooled loaf tightly in an airtight container or a large zip-top bag. If you’re just saving it for a day or two, tightly wrapping it in plastic wrap and then covering that with foil works wonders to keep the moisture in. It stays wonderfully soft on the counter for about two or maybe three days max.
The Secret to Reheating Focaccia
Now, let’s talk about reheating. This is essential if you want that crunch back! Toasting slices in a toaster oven works fine for a small piece, but if you have a bigger chunk of Rustic Rosemary Garlic Focaccia, you need the real oven power.
Take your slice (or slices) and place them directly onto the oven rack. That’s right, no plate underneath! Preheat your oven to about 350 degrees Fahrenheit. You only need to warm it for about 4 to 6 minutes. That brief blast of dry heat pulls the moisture out of the crust that might have softened during storage, making the top crisp up again while warming that airy inside perfectly.
If you’re serving it with soup and want it piping hot and soft all the way through, you can cover the whole piece loosely with foil during the reheating process. Just uncover it for the last minute if you want to revive a little bit of that original crust texture. Trust me, reheating is infinitely better than eating it cold the next day!
Frequently Asked Questions About Rustic Rosemary Garlic Focaccia
I get so many wonderful questions whenever I post pictures of this bread because everyone wants to know my secrets! Making good classic Italian pasta salad requires planning, and so does timing your focaccia perfectly. Here are some of the most common things readers ask when they are planning to bake their own batch of this amazing rustic bread.
Can I use dried rosemary instead of fresh in this Rustic Rosemary Garlic Focaccia?
Oh yes, you absolutely can! Life happens, and sometimes we don’t have fresh herbs on hand, and that’s totally fine. If you are using dried rosemary, you need to adjust the amount because the dried version is much more concentrated in flavor.
For this recipe calling for 2 tablespoons of fresh chopped rosemary, I would only use about 2 teaspoons of dried rosemary. Start small! You can always add a little more, but you can’t really take it out if you accidentally overpower the beautiful subtle garlic notes. Toss the dried herb in when you add the other toppings.
What is the best way to get a crispy bottom on my Rustic Rosemary Garlic Focaccia?
This is one of my top priorities, honestly. A soft, soggy bottom on focaccia is a cooking tragedy! I already mentioned moving the pan to the bottom rack during the bake, but here is another trick that locks in that crispness: the pan choice matters.
If you have a dedicated, lighter-colored metal baking sheet—the kind that isn’t super thick—use that instead of a glass or dark non-stick pan. Dark pans absorb more heat and can sometimes scorch the bottom before the center is cooked. Also, make absolutely sure that 1/4 cup of olive oil you drizzle into the pan before stretching the dough is spread evenly right to the edges. That oil acts as a deep-fry medium for the bottom crust as it bakes, giving you that perfect little crunch.
Can I make this dough ahead of time and bake it later?
Absolutely! This recipe is fantastic for make-ahead because the flavor actually gets deeper the longer the dough ferments slowly in the cold. Instead of letting the dough sit on the counter for 2 hours after the first mix (step 3), cover it tightly and stick the whole bowl in the refrigerator. You can let it cold-proof for up to 48 hours!
When you are ready to bake, pull the dough out of the fridge and let it sit at room temperature for about 90 minutes just to take the chill off before you gently stretch it into the oiled pan. It might take the full 30 minutes of the second rest time, just waiting for it to feel soft enough to successfully dimple without tearing!
What if I don’t have a 9×13 inch pan?
If your pan size is different, you just need to adjust the depth, which means adjusting the baking time! The recipe yields enough dough for that 9×13 classic, but if you use a 10×10 square pan, the dough will be thicker, so you need to bake it for about 5 to 8 minutes longer than the recipe calls for. Always check that center!
If you want really thin, cracker-like focaccia—which is great for serving with dips, maybe even something like my arancini di riso—use a larger sheet pan, like a half-sheet pan, and spread the dough out thinner. It will bake faster, usually only taking about 18 minutes.
Nutritional Estimates for This Rustic Rosemary Garlic Focaccia
Okay, so because this bread is so rich with olive oil and flour, we need to be realistic about the nutrition! I always tell people that bread is one of those things where exact numbers are hard to nail down because how much oil *you* drizzle on top makes a huge difference. But based on the recipe as written, here are the general estimates I put together for flavor lovers like us.
Please keep in mind, this is just an estimate based on 8 equal slices, and if you eat two slices in one go (which I don’t blame you for!), you double these numbers. This deliciousness comes with a little richness!
- Serving Size: 1 slice
- Calories: 220
- Fat: 9g (Note: This counts all that necessary good olive oil!)
- Saturated Fat: 1g
- Carbohydrates: 30g
- Protein: 5g
- Fiber: 2g
- Sugar: 1g
- Sodium: 350mg
It’s a vegetarian recipe, which is nice, and you get a decent amount of fiber for a simple white flour bread. The fat content is high, yes, but honestly, that fat is what makes the crust crispy and the crumb so tender! You’re paying for flavor, and this Rustic Rosemary Garlic Focaccia delivers big time!
Share Your Homemade Rustic Rosemary Garlic Focaccia Experience
Now comes the best part—seeing what you all create! Baking is all about sharing, and I genuinely want to see the gorgeous, bubbly, rosemary-studded Rustic Rosemary Garlic Focaccia you pull out of your ovens. It makes my day when someone tries a recipe and loves it!
I seriously encourage you to head down to the comments section below and tell me how it went. Did you get those huge dimples? Did you use bread flour for an extra chew? Or did you stick to the simple AP flour for that melt-in-your-mouth texture? Don’t be shy about sharing your tips or any little tweaks you made. We’re all learning together here, and I love hearing your kitchen stories!
If you snapped a photo of that golden, glistening loaf—maybe sitting next to some of my arancini di riso—please share it on social media! Tag me so I can see your beautiful work. There is nothing more rewarding than seeing someone else’s kitchen smell like fresh rosemary and garlic.
Happy Baking, everyone! I truly hope this simple bread brings a little bit of sunny Italian tradition right to your dinner table.
Print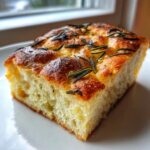
Rustic Rosemary Garlic Focaccia
- Total Time: 2 hours 40 minutes
- Yield: 8 servings 1x
- Diet: Vegetarian
Description
A simple recipe for making flavorful focaccia bread topped with rosemary and garlic.
Ingredients
- 3 cups all-purpose flour
- 1 teaspoon instant yeast
- 1 1/2 teaspoons salt
- 1 1/4 cups warm water
- 1/4 cup olive oil, plus more for drizzling
- 2 cloves garlic, minced
- 2 tablespoons fresh rosemary, chopped
- Flaky sea salt, for topping
Instructions
- Combine flour, yeast, and salt in a large bowl.
- Add warm water and mix until a shaggy dough forms.
- Pour 2 tablespoons of olive oil over the dough, cover the bowl, and let it rest at room temperature for 2 hours, or until doubled in size.
- Gently stretch the dough into a 9×13 inch baking pan coated with olive oil.
- Cover the pan and let the dough rest for 30 minutes.
- Preheat your oven to 400 degrees Fahrenheit (200 degrees Celsius).
- Dimple the dough surface deeply with your fingers.
- Drizzle the remaining olive oil over the dough.
- Sprinkle the minced garlic and chopped rosemary evenly over the top.
- Sprinkle with flaky sea salt.
- Bake for 20 to 25 minutes, until golden brown.
- Cool slightly before slicing and serving.
Notes
- If you prefer a chewier crust, use bread flour instead of all-purpose flour.
- You can add a pinch of black pepper with the rosemary for extra flavor.
- Prep Time: 15 minutes
- Cook Time: 25 minutes
- Category: Bread
- Method: Baking
- Cuisine: Italian
Nutrition
- Serving Size: 1 slice
- Calories: 220
- Sugar: 1
- Sodium: 350
- Fat: 9
- Saturated Fat: 1
- Unsaturated Fat: 8
- Trans Fat: 0
- Carbohydrates: 30
- Fiber: 2
- Protein: 5
- Cholesterol: 0
Keywords: focaccia, rosemary, garlic bread, rustic bread, homemade bread, Italian bread