Honestly, nothing beats scooping up a pile of homemade dip right out of your own kitchen. Store-bought is fine in a pinch, but when you want that truly silky texture and flavor that knocks your socks off? You have to make it yourself. That’s exactly how I feel about this incredible Roasted Garlic Hummus. Forget the sharp, aggressive flavor of raw garlic, because roasting it changes everything! It turns those cloves into sweet, buttery little pearls of flavor that completely transform the chickpea base. Seriously, this small step elevated my hummus game from basic to boss-level overnight. You just watch how unbelievably creamy this batch turns out!

Why This Roasted Garlic Hummus Recipe Stands Out (Experience & Expertise)
Look, I’ve made hummus with raw garlic before, and let’s just say my mouth felt like it was singing the national anthem way too loudly! Roasting the garlic is absolutely non-negotiable here. It completely mellows out that intense bite and replaces it with this gorgeous, sweet, caramelized depth. That’s the secret to truly unforgettable Roasted Garlic Hummus.
My main goal when I make this dip is peak smoothness—I mean, you can practically pour it! We’re talking ultra-creamy, almost like velvet. Achieving that texture separates the good hummus from the great hummus, and the slow roast on those cloves ensures everything blends beautifully without any scratchiness. Trust me, once you toast that garlic, you won’t go back.
Ingredients for Perfect Roasted Garlic Hummus
Honestly, getting the ingredients ready is half the fun, especially when you know something this delicious is coming! We’re keeping this simple, high-quality, and focused on maximizing that glorious roasted garlic flavor. You’ll only need seven core items, plus some cold water to adjust things at the end.
Make sure you grab that one whole head of garlic—yes, the whole thing! We’re roasting that sucker until it’s practically pudding. The chickpeas need to be thoroughly drained and rinsed; don’t just dump them in from the can. If you really want that professional-level, super-silky texture that melts in your mouth, you’ll want to peel the chickpeas before you blend them. It takes a minute, but when you’re aiming for the best Roasted Garlic Hummus, every little bit of effort pays off!
Here’s what you need:
- 1 (15-ounce) can chickpeas, drained and rinsed
- 1 whole head garlic
- 1/4 cup tahini
- 2 tablespoons fresh lemon juice
- 2 tablespoons olive oil, plus more for serving
- 1/2 teaspoon salt
- 1/4 teaspoon ground cumin
- 2-4 tablespoons cold water
Step-by-Step Instructions for Roasted Garlic Hummus
Okay, time to get cooking! This recipe really splits into two clear stages: the hands-off roasting and the quick blending. Don’t rush the garlic roasting part though; that warmth is what builds up all the sweet flavor we’re after for this amazing dip. I usually get the garlic going first, then I prep the other ingredients while it’s doing its thing in the oven.
Roasting the Garlic for Sweet Flavor
First things first, crank that oven up to 400 degrees Fahrenheit, which is about 200 Celsius. You need that heat!
Take your whole head of garlic and grab a sharp knife. You need to slice off just the top quarter inch. Think of it like giving the garlic head a little haircut, just enough so you can see all those individual cloves peaking out. This is key for getting the heat in there properly.
Now, drizzle just a tiny bit of olive oil right over those exposed tops. You just want a light coating. Once that’s done, wrap the entire head super tight in aluminum foil. This creates a little steam pocket that cooks the garlic gently and makes it soft. Pop that foil packet into the oven and let it roast for a solid 30 to 40 minutes. You’ll know they’re done when the cloves are tender and look beautifully golden brown when you peek—they should practically be falling apart!
Let them cool just enough so you don’t burn yourself. Then, you just gently squeeze the soft, roasted garlic right out of its papery skin. It should pop out like butter. See? No painful peeling required for the roasting phase! Now you’re ready for the next step, and you can see how much easier this is than trying to chop raw garlic for salsa.
Blending the Ultimate Roasted Garlic Hummus
This is where we bring it all together! Get out your food processor. If you don’t have one, don’t panic—a high-powered blender will work just fine too, just might take a tiny bit more scraping.
Squeeze all those gorgeous, browned garlic cloves directly into the food processor bowl. Then, toss in the drained chickpeas, the tahini, the fresh lemon juice, those initial 2 tablespoons of olive oil, the salt, and the cumin. Everything goes in!
Start processing! You need to run that machine until it looks really smooth. You’ll definitely need to stop every minute or so to scrape down the sides with a spatula. This ensures every single bit of chickpea gets incorporated into that creamy dream. Don’t worry if it looks a little thick at this stage; that’s normal.
Now for the magic finisher: the cold water. Add it in one tablespoon at a time while the processor is running. You’ll watch the Roasted Garlic Hummus transform. Keep adding water, spoon by spoon, until you hit that really luxurious, smooth consistency you want. You might use two tablespoons, you might need four—just stop when it looks perfect for dipping!
Tips for Making the Smoothest Roasted Garlic Hummus
If you really want to impress people at your next get-together, there are just a couple of extra little secrets to making this Roasted Garlic Hummus unbelievably smooth. Remember how I mentioned peeling the chickpeas? Seriously, do that if you can! It sounds tedious, but removing those thin skins makes a huge difference between perfectly fine hummus and *restaurant-quality* hummus. It’s all about texture, right?
Here is one of my favorite little cheats for extra fluffiness and creaminess: use ice-cold water, or if you’re really desperate for volume without losing that thick feel, drop in one or two tiny ice cubes while you’re blending! The ice melts quickly and whips a ton of airiness into the mix, making your Roasted Garlic Hummus extra light. It’s a game-changer for airy texture every single time. Happy dipping!
Serving Suggestions for Your Roasted Garlic Hummus
Now that you’ve made this amazingly creamy Roasted Garlic Hummus, the real challenge is figuring out the best way to eat it all! Don’t just stop at chips, okay? This dip is too good for that standard stuff.
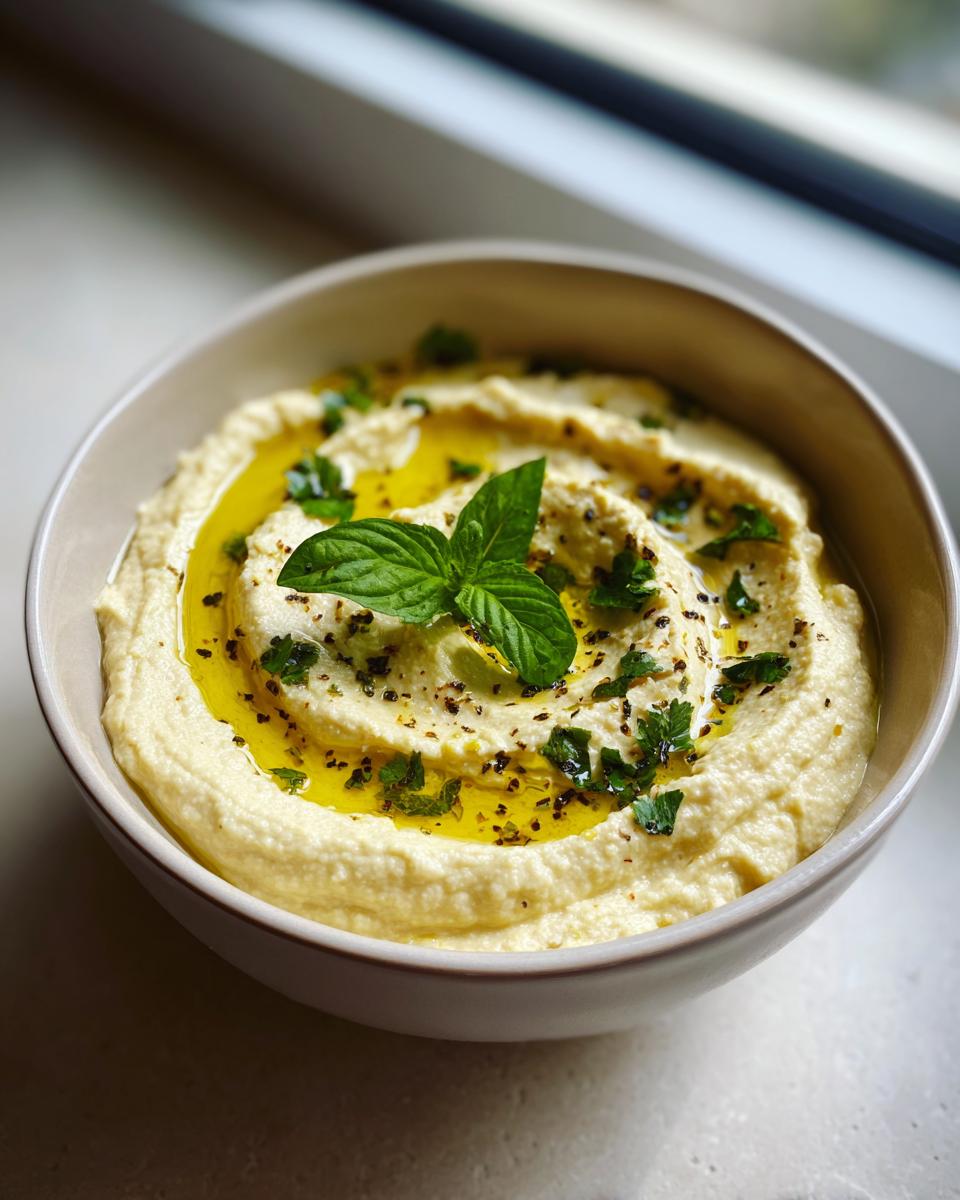
Of course, nothing beats tearing off warm, pillowy pita bread and scooping out a huge dollop. But I love to set up a colorful veggie platter too. Think crisp carrot sticks (instead of chips!), crunchy cucumber spears, and bright red or yellow bell pepper slices. The freshness from the raw veggies is such a nice contrast to the rich, sweet garlic flavor.
Also, don’t forget about sandwiches! I often use leftover Roasted Garlic Hummus as a spread instead of mayo on turkey wraps or veggie sandwiches. It adds moisture and so much more flavor than plain condiments. You could even dollop some on top of a warm baked sweet potato—wow, that’s a fantastic lunch!
Storage and Reheating Instructions for Roasted Garlic Hummus
This amazing Roasted Garlic Hummus is so good, you’ll definitely have leftovers, even if you try really hard to finish it all! Store any extra dip in a completely airtight container in the refrigerator. Honestly, it stays perfectly good for at least four to five days. That’s great news for easy lunches!
Just one little heads-up: since it’s full of tahini, it gets a bit thick and stiff when it’s chilled down. That’s totally normal! Before you serve it the next day, just let it sit on the counter for about 15 minutes to loosen up a bit. Or, if you’re in a real rush, stir in just a tiny splash of cold water—maybe half a teaspoon at a time—until your Roasted Garlic Hummus is back to that perfect, creamy dipping consistency. You won’t believe how fresh it tastes!
Frequently Asked Questions About Roasted Garlic Hummus
I always get so many questions about this recipe because roasting garlic seems a bit specialized, but I promise it’s super easy once you get the hang of it! Here are some things folks usually ask me when they’re making their first batch of homemade Roasted Garlic Hummus.
Can I make Roasted Garlic Hummus without a food processor?
You absolutely can, but you might need a little extra elbow grease or a good machine! If you don’t have a food processor—which is what I use for that super smooth texture—a high-powered blender works great, just make sure you stop frequently to scrape the sides. If you only have a standard blender, I highly recommend peeling those chickpeas first like I mentioned. That extra step helps the standard blender blades grab everything without leaving chunks behind in your chickpea dip.
How much stronger is the garlic flavor in Roasted Garlic Hummus?
It’s wonderfully different! If you use raw garlic, it punches you in the mouth, right? Roasting takes all that harsh, aggressive ‘bite’ right out. What you’re left with is this deep, slightly nutty, wonderfully sweet flavor. It blends perfectly with the tahini without overwhelming the whole appetizer. It’s rich, not ruthless!
Can I substitute the lemon juice in this Roasted Garlic Hummus?
You can definitely use lime juice if that’s what you have on hand! Lime gives it a slightly different zest, but it still does the job of providing the necessary acid to cut through the richness of the olive oil and tahini. However, I really suggest trying it with fresh lemon juice first. The traditional zest of the lemon is what beautifully balances the deep, caramelized tones of the roasted garlic, keeping that perfect Middle Eastern flavor profile intact.
Estimated Nutritional Data for Roasted Garlic Hummus
Now, I’m certainly not a nutritionist—I just mix things until they taste amazing, you know? But I always like to give you an idea of what’s in our delicious homemade Roasted Garlic Hummus, just so you know what you’re munching on!
Keep in mind that this is just an estimate because where you get your chickpeas and how much tahini you drizzle in definitely changes things. This data is based on the recipe yielding about 1.5 cups total. We settled on a serving size of about a quarter cup, which seems like a good dipping amount!
For that 1/4 cup serving of our creamy goodness, you’re looking at roughly:
- Calories: Around 150
- Total Fat: About 10 grams
- Protein: A solid 5 grams
- Carbohydrates: Roughly 12 grams
The great thing about making your own chickpea dip is that you control the salt and oil. If you’re watching sodium, you can dial back that salt measurement easily. It’s all homemade, all delicious!
Share Your Homemade Roasted Garlic Hummus Experience
I truly hope you loved making this Roasted Garlic Hummus as much as I love eating it! Honestly, when you put care into roasting that garlic and getting that perfect, velvety texture, I want to know how it turned out for you!
Did you achieve that buttery smoothness? Were your guests fighting over the last scoop? Don’t keep all that deliciousness to yourself!
Please leave a star rating right below this section—it really helps other folks know that this recipe is a winner. And if you have a moment, drop a comment too! Tell me what you served it with, or if you tried my tip about peeling the chickpeas. I read every single comment, and sharing your version builds up the community here.
If you snapped a photo of your beautiful spread, tag me on social media! Seeing pictures of your amazing homemade dips makes my day every time. If you need anything at all while you’re cooking, feel free to reach out through the contact page. Happy dipping!
Print
Roasted Garlic Hummus
- Total Time: 55 min
- Yield: About 1.5 cups 1x
- Diet: Vegan
Description
A simple recipe for creamy hummus flavored with sweet roasted garlic.
Ingredients
- 1 (15-ounce) can chickpeas, drained and rinsed
- 1 whole head garlic
- 1/4 cup tahini
- 2 tablespoons fresh lemon juice
- 2 tablespoons olive oil, plus more for serving
- 1/2 teaspoon salt
- 1/4 teaspoon ground cumin
- 2–4 tablespoons cold water
Instructions
- Preheat your oven to 400 degrees Fahrenheit (200 degrees Celsius).
- Cut off the top quarter inch of the garlic head, exposing the cloves. Drizzle the cut surface with a little olive oil.
- Wrap the garlic head tightly in aluminum foil. Roast for 30 to 40 minutes, or until the cloves are soft and golden brown. Let cool slightly.
- Squeeze the roasted garlic cloves out of their skins into a food processor.
- Add the drained chickpeas, tahini, lemon juice, 2 tablespoons of olive oil, salt, and cumin to the food processor.
- Process until smooth, scraping down the sides as needed.
- Add cold water, one tablespoon at a time, until you reach your desired smooth consistency.
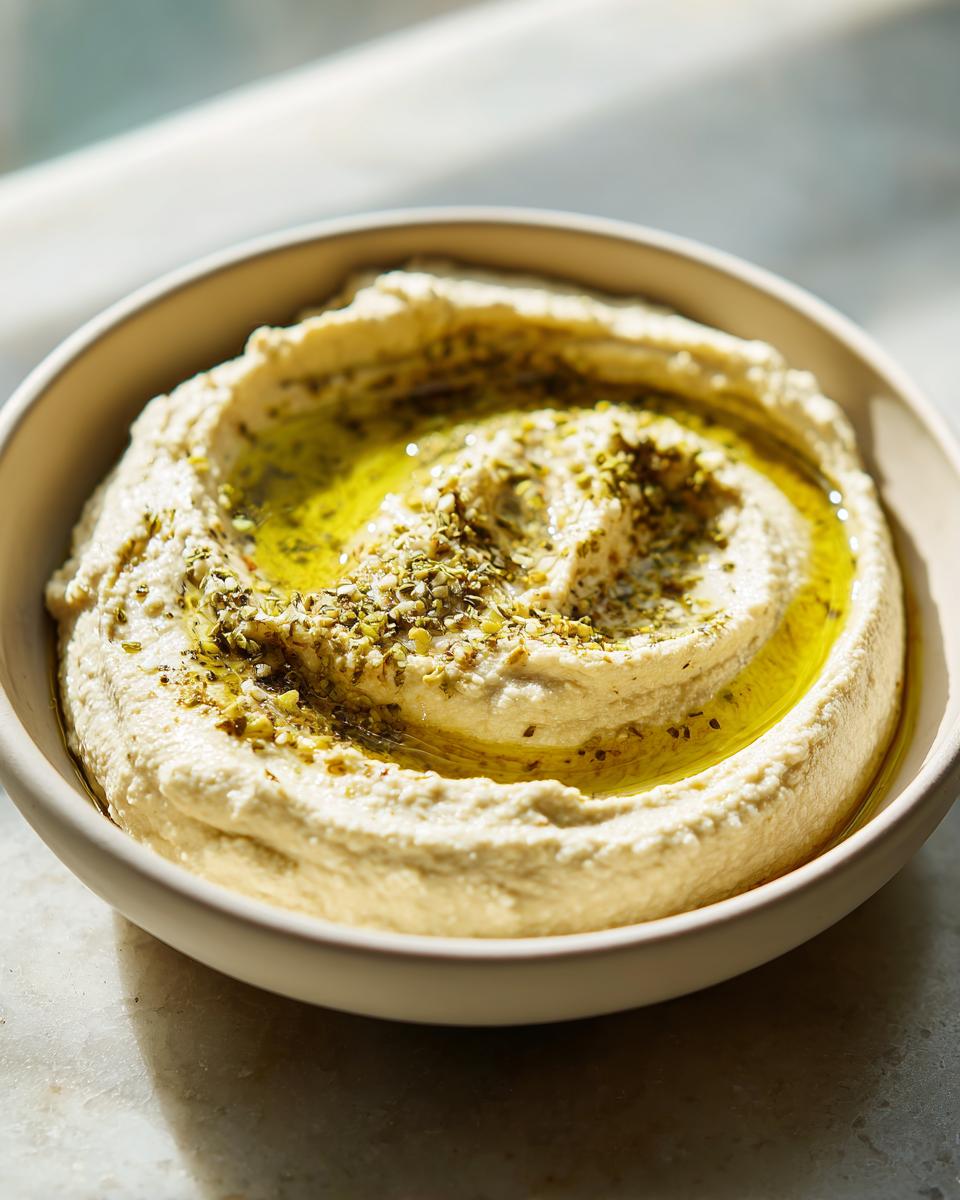
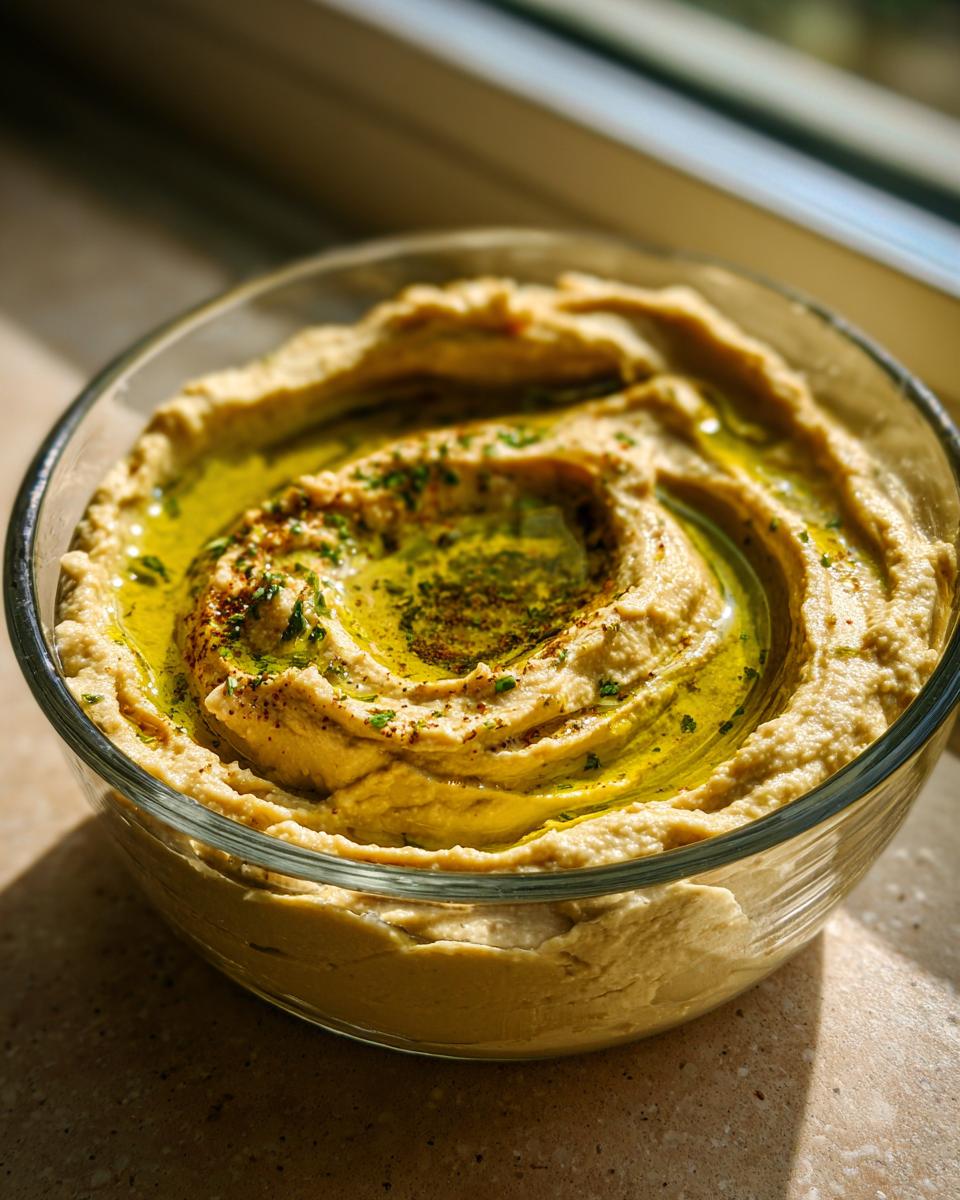
- Transfer the hummus to a serving bowl. Drizzle with extra olive oil before serving.
Notes
- For smoother hummus, peel the chickpeas before blending.
- If you do not have a food processor, a high-powered blender can also work.
- Prep Time: 15 min
- Cook Time: 40 min
- Category: Appetizer
- Method: Blending
- Cuisine: Middle Eastern
Nutrition
- Serving Size: 1/4 cup
- Calories: 150
- Sugar: 1
- Sodium: 250
- Fat: 10
- Saturated Fat: 1.5
- Unsaturated Fat: 8.5
- Trans Fat: 0
- Carbohydrates: 12
- Fiber: 4
- Protein: 5
- Cholesterol: 0
Keywords: roasted garlic hummus, homemade hummus, chickpea dip, tahini, vegetarian appetizer