Okay, gather ’round, friends, because I’m about to share one of my all-time favorite kitchen victories: making **Homemade Candy Bars**! Seriously, forget the store-bought stuff for a minute. There’s just something ridiculously satisfying about whipping up your own batch of these little squares of joy right in your own kitchen. It’s like a secret superpower, honestly. I remember the first time I tried this – I was craving a specific candy bar like *crazy*, but didn’t want to run to the store. So, I dug through some old recipes and tinkered around. What came out was so much better than I ever expected!
These aren’t just *any* candy bars; these are *your* candy bars. Made with love, a little bit of mess (because that’s how we roll here!), and ingredients you actually know. Plus, the smell that fills your house? Pure happiness. It’s the kind of recipe that makes you feel like a total kitchen wizard, even if you’re just starting out. Get ready to impress everyone (and yourself!) with these incredible **Homemade Candy Bars**.

Why You’ll Love These Homemade Candy Bars
So, why bother making Homemade Candy Bars when you can just grab one at the checkout? Trust me, there are SO many reasons!
- First off, they’re ridiculously easy. Seriously, no fancy equipment needed, and you don’t even have to turn on your oven. Win!
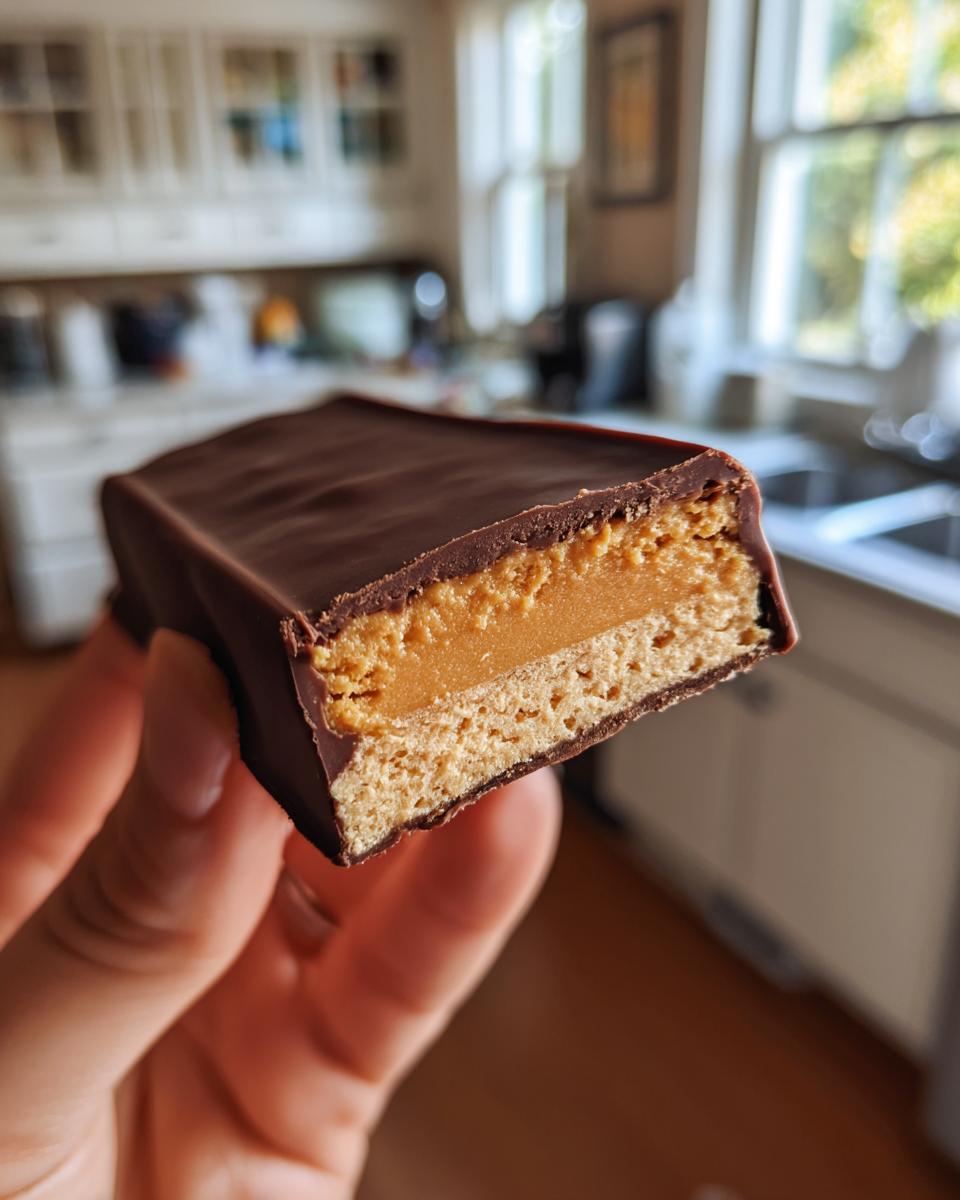
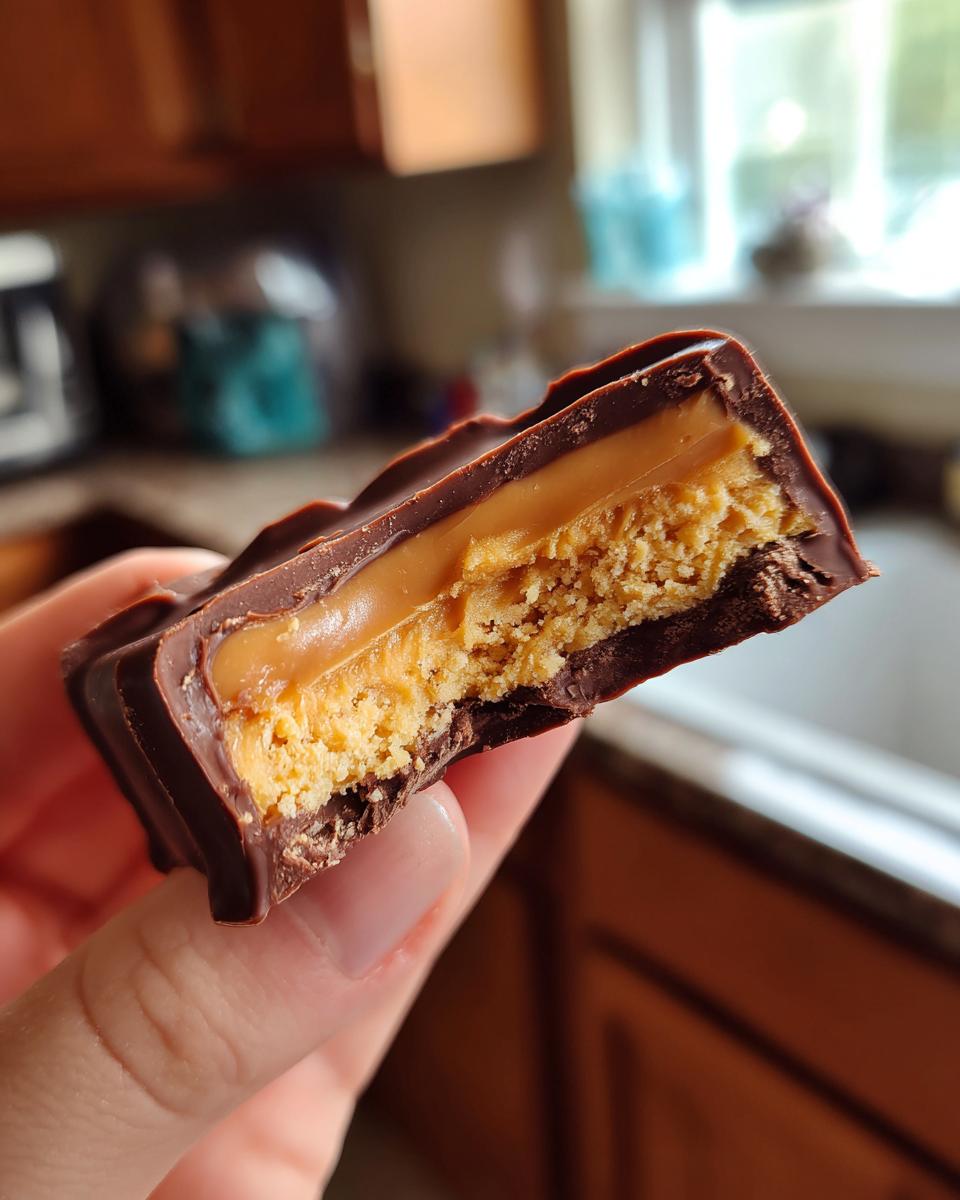
- The taste? Oh my goodness. They have that perfect balance of salty peanut butter and sweet, smooth chocolate. It’s pure comfort food in a bite.
- And the best part? That feeling of accomplishment! Telling someone, “Yep, I made these Homemade Candy Bars myself!” is pretty awesome.
- Plus, you know exactly what’s going into them. No weird, unpronounceable stuff here!
They’re quick, they’re delicious, and they just make people happy. What’s not to love?

Gathering Your Ingredients for Homemade Candy Bars
Alright, let’s talk ingredients! This is where the magic starts for our Homemade Candy Bars. You don’t need a ton of stuff, which is another reason I love this recipe. But getting the *right* stuff makes a difference.
You’ll need a cup of creamy peanut butter. I usually just grab my favorite jar from the pantry – smooth is key here for that perfect, no-lump base. Then, a cup of powdered sugar. Give it a quick sift if it looks clumpy; nobody wants powdered sugar rocks in their candy bar! We also need half a cup of melted unsalted butter. Unsalted is great because you can control the saltiness later if you want, and melted butter helps bind everything together beautifully.
Don’t forget a teaspoon of pure vanilla extract! It adds that little extra something that takes these from good to “wow.” For the chocolate coating, grab about 12 ounces of semi-sweet chocolate chips. And just a quarter cup of vegetable shortening – this is my little secret for getting that chocolate super smooth and easy to pour, and it helps it set up nicely without being brittle. See? Simple stuff, but together, they create pure bliss!
Essential Equipment for Making Homemade Candy Bars
Okay, you’ve got your ingredients ready! Now for the tools. The great news is, you probably have everything you need already. You’ll definitely want an 8×8 inch baking pan – this size is perfect for getting the right thickness for our Homemade Candy Bars. A couple of mixing bowls are essential for whipping up the peanut butter base and melting the chocolate. Of course, measuring cups and spoons are a must for getting those ingredient ratios just right.
And finally, you’ll need something to melt your chocolate in. A simple microwave-safe bowl works like a charm, or if you’re feeling fancy, a double boiler (or just a heatproof bowl set over a pot of simmering water) is another great option. See? Nothing complicated! Just the basics to get these delicious Homemade Candy Bars made.
Crafting Your Delicious Homemade Candy Bars: Step-by-Step Guide
Alright, this is where the fun really begins! Making these Homemade Candy Bars is seriously straightforward. Just follow these steps, and you’ll be biting into pure deliciousness before you know it. It’s all about mixing, pressing, melting, and waiting (the hardest part, I know!).
We’ll start with that amazing peanut butter layer, then move on to the glorious chocolate coating, and finally, the crucial chilling step that turns it all into perfect bars. Don’t overthink it; just enjoy the process!
Preparing the Peanut Butter Base for Your Homemade Candy Bars
First up, let’s get that peanut butter base ready! Grab a good-sized mixing bowl. Toss in your creamy peanut butter, that sifted powdered sugar, the lovely melted butter, and the splash of vanilla extract. Now, get in there (with a spoon or spatula, not your hands… yet!) and mix it all together. Keep stirring until everything is completely combined and it forms kind of a thick, dough-like consistency. It should hold together when you press it.
Next, grab that 8×8 inch pan. I like to line mine with parchment paper first, leaving some overhang. Trust me, it makes getting the finished Homemade Candy Bars out SO much easier. Spoon the peanut butter mixture into the lined pan. Now, using the back of a spoon, or even your hands (clean ones, of course!), press the mixture down firmly and evenly into the bottom of the pan. Get it nice and flat from edge to edge. This is important for getting uniform bars later!
Melting and Pouring the Chocolate Coating for Homemade Candy Bars
Time for chocolate! Put your chocolate chips and shortening into a microwave-safe bowl. Pop it in the microwave on medium power, heating in 30-second intervals, stirring really well after each one. Go slow! Chocolate can seize up if it gets too hot. You want it smooth and glossy, with no lumps. Alternatively, you can use a double boiler – just melt it gently over simmering water, stirring constantly until smooth.
Once your chocolate is perfectly melted and smooth, carefully pour it over the pressed peanut butter layer in your pan. Use a spatula or the back of a spoon to gently spread it out, making sure it completely covers the peanut butter base right to the edges. You want a nice, even layer of chocolate for that classic candy bar look and feel.
Chilling and Cutting Your Homemade Candy Bars
Okay, the hardest part: waiting! Once the chocolate is poured, carefully transfer the pan to the refrigerator. It needs to chill and firm up completely. This usually takes at least an hour, sometimes a little longer depending on how cold your fridge is. You’ll know it’s ready when the chocolate is firm to the touch and doesn’t budge when you gently press it.
Once firm, lift the whole block out of the pan using the parchment paper overhang. Place it on a cutting board. Now, for cutting! Use a sharp knife. I find warming the knife slightly under hot water and drying it helps get cleaner cuts without cracking the chocolate too much. Cut the block into squares or rectangles – however you like your Homemade Candy Bars! Clean the knife between cuts for the neatest bars. And there you have it – your very own Homemade Candy Bars, ready to enjoy!
Tips for Perfect Homemade Candy Bars Every Time
Making these Homemade Candy Bars is pretty simple, but a few little tricks can make them go from great to absolutely perfect! First off, that chocolate melting step? Be patient! Don’t blast it on high heat in the microwave. Lower power and stirring often is your friend here. Overheated chocolate gets grumpy and won’t pour smoothly.
Also, make sure your butter is melted but not screaming hot when you mix the base. And your peanut butter should be at room temperature – cold, hard peanut butter is a nightmare to mix evenly! Finally, when it comes time to cut your chilled Homemade Candy Bars, that trick of warming your knife slightly under hot water really helps. It slices through the chocolate cleanly instead of having it snap and crack. Little things, I know, but they make a big difference!
Variations and Serving Ideas for Your Homemade Candy Bars
One of the best things about making your own Homemade Candy Bars is that you can totally play around with them! Want to jazz them up? Go for it! A super easy variation is adding some crunch to that peanut butter layer. Mix in some chopped salted peanuts, crunchy pretzels, or even rice krispies before you press the base into the pan. It adds such a fun texture!
Not a peanut butter person? No problem! You can absolutely swap out the peanut butter for almond butter or even sunflower seed butter for a different flavor profile. Just make sure it’s a creamy variety. As for serving, honestly, just put them on a plate and watch them disappear! They’re perfect for parties, lunchboxes, or just a little treat for yourself. You can arrange them on a nice platter or even wrap individual Homemade Candy Bars in wax paper for a cute, rustic look. They’re always a hit!
Storage and Reheating Instructions for Homemade Candy Bars
Okay, so you’ve made your amazing Homemade Candy Bars, and hopefully, you have a few left over (if not, time to make more!). Storing them is super easy. Just pop them into an airtight container. You can stack them, but sometimes I like to put a little piece of parchment or wax paper between the layers so they don’t stick together. Keep them in the refrigerator – they’ll stay fresh and delicious for about a week. Honestly, they probably won’t last that long anyway! No need to reheat these beauties; they’re perfect straight from the fridge.
Frequently Asked Questions About Homemade Candy Bars
Got questions about making these awesome Homemade Candy Bars? Don’t worry, I’ve probably thought of them too! Here are a few things people often ask:
Q: Can I use crunchy peanut butter?
A: You totally can! It’ll give your Homemade Candy Bars a fun, extra-nutty texture. Just know the base won’t be completely smooth, which is perfectly fine!
Q: Why did my chocolate crack when I cut the bars?
A: This is super common! It usually means the chocolate was either too brittle (maybe not enough shortening?) or it was too cold when you cut it. Letting it sit at room temperature for 5-10 minutes before slicing can help, and using a warm, sharp knife is key for neat cuts.
Q: Can I use milk chocolate or dark chocolate?
A: Absolutely! Semi-sweet is my go-to, but milk chocolate will make them sweeter, and dark chocolate gives a richer, slightly less sweet homemade chocolate bar. Experiment and see what you like best!
Q: How long do these last?
A: Stored in an airtight container in the fridge, your Homemade Candy Bars should be good for about a week. But honestly? They usually disappear way faster than that!
Estimated Nutritional Information
Now, I’m not a nutritionist, and honestly, when I’m biting into one of these Homemade Candy Bars, the last thing I’m usually thinking about is the exact numbers! But I know some folks like to have an idea, so here’s a rough estimate based on the ingredients. Just remember, this is totally approximate! The exact calories and stuff can change depending on the specific brands of peanut butter, chocolate, and butter you use.
Think of this as a ballpark figure, okay? These Homemade Candy Bars are definitely a treat, meant for enjoying! Don’t stress too much about the specifics; just savor every delicious bite you made yourself.
Share Your Creation
Alright, you’ve made them! How did they turn out? I seriously want to know! Leave a comment below and tell me what you thought. Did you add any fun variations? Don’t forget to rate the recipe! And PLEASE, if you snap a pic of your gorgeous Homemade Candy Bars, share it on social media and tag me! I love seeing your kitchen triumphs!
Print
Amazing 1 Hour Homemade Candy Bars Recipe
- Total Time: 20 minutes
- Yield: 16 bars 1x
- Diet: Vegetarian
Description
Make your own delicious candy bars at home.
Ingredients
- 1 cup peanut butter
- 1 cup powdered sugar
- 1/2 cup melted butter
- 1 teaspoon vanilla extract
- 12 ounces chocolate chips
- 1/4 cup shortening
Instructions
- Combine peanut butter, powdered sugar, melted butter, and vanilla extract in a bowl.
- Press mixture into an 8×8 inch pan.
- Melt chocolate chips and shortening in a microwave or double boiler.
- Pour melted chocolate over peanut butter mixture.
- Chill in the refrigerator until firm.
- Cut into bars.
Notes
- You can substitute almond butter for peanut butter.
- Add chopped nuts or pretzels for extra crunch.
- Prep Time: 15 minutes
- Cook Time: 5 minutes
- Category: Dessert
- Method: No-Bake
- Cuisine: American
Nutrition
- Serving Size: 1 bar
- Calories: 300
- Sugar: 25g
- Sodium: 100mg
- Fat: 20g
- Saturated Fat: 10g
- Unsaturated Fat: 8g
- Trans Fat: 0g
- Carbohydrates: 30g
- Fiber: 2g
- Protein: 5g
- Cholesterol: 15mg
Keywords: homemade candy bars, peanut butter bars, chocolate bars, candy recipes