There are cozy dishes, and then there is the kind of meal that feels like a warm hug right when you need it most. For me, that’s always been a bubbling, savory classic, and nothing beats my authentic **Grandmas Chicken Pot Pie**. I remember sneaking into the kitchen when I was little, the scent of thyme and bubbling broth filling the air, just watching her gently lay down the top crust. That rich, golden, flaky crust is the absolute signature of this dish—it separates this recipe from every other bland, soggy version you’ve ever tried. Trust me, using her exact method makes all the difference in delivering that perfect, comforting bite every single time.
Why This Grandmas Chicken Pot Pie Recipe is a Keeper
I know there are a million chicken pot pie recipes floating around out there, but you truly need to try this one. It’s the one that tastes exactly like childhood, and it never lets me down, even on the busiest weeknights. It’s all about striking that perfect balance between savory flavor and incredible texture. If you are looking for the ultimate comfort food that guests absolutely rave about, this is it. Honestly, once you master this, you won’t look twice at store-bought soup versions again!
Here’s why this recipe stands head and shoulders above the rest. If you want to see how people use different pastry here, check out this guide on using puff pastry, though I stick to the classic for Grandma’s version.
Flaky, Golden Crust Perfection
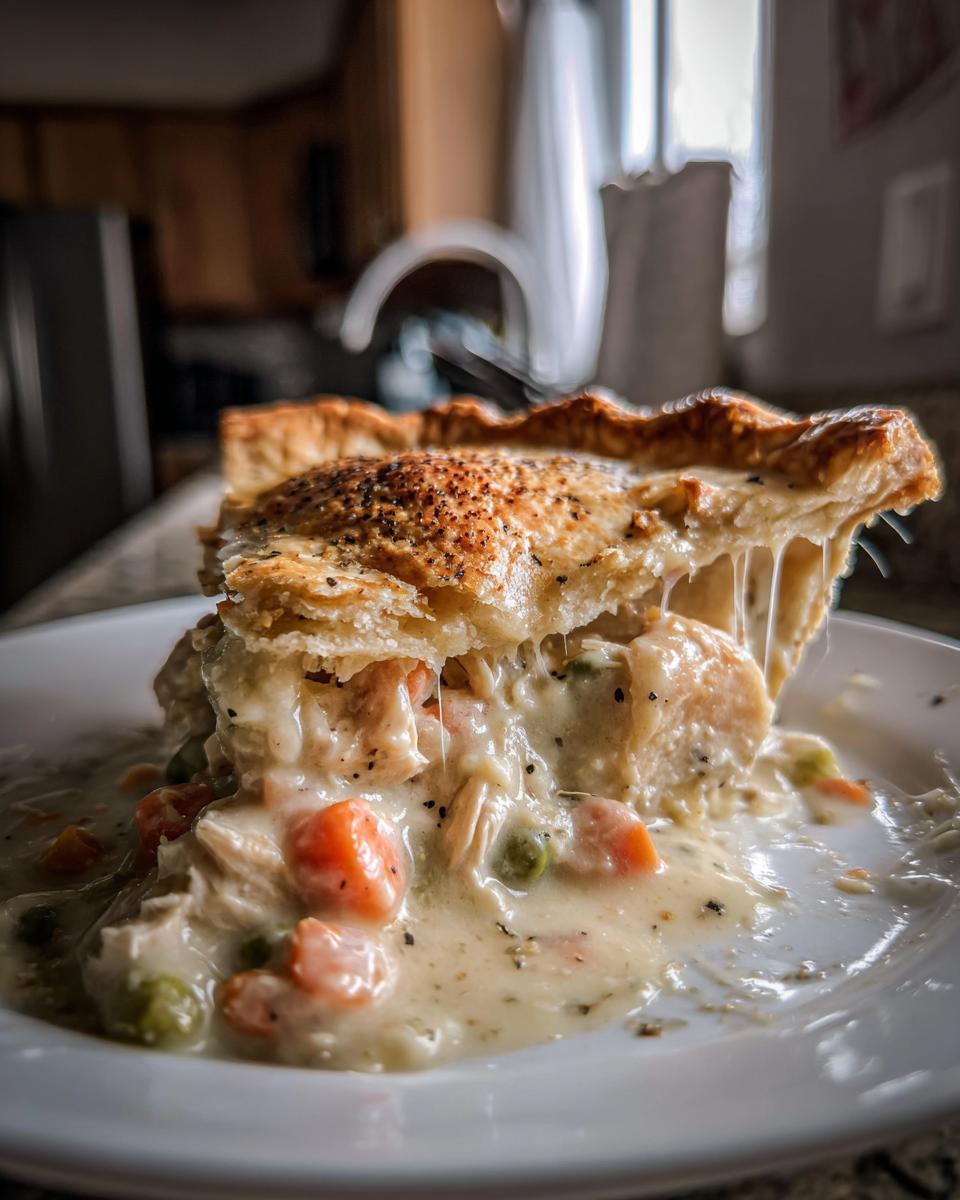
Forget dense, tough pastry! The crust on this pie is legendary. We stick to refrigerated pie crusts because Grandma always said that cutting corners on time shouldn’t mean sacrificing texture here. When you bake it at the higher temperature, you get these wonderful layers that shatter perfectly when you cut into them. It bakes up beautifully golden brown and never gets soggy on the bottom if you follow the baking tips later on!
Rich and Savory Filling for Your Grandmas Chicken Pot Pie
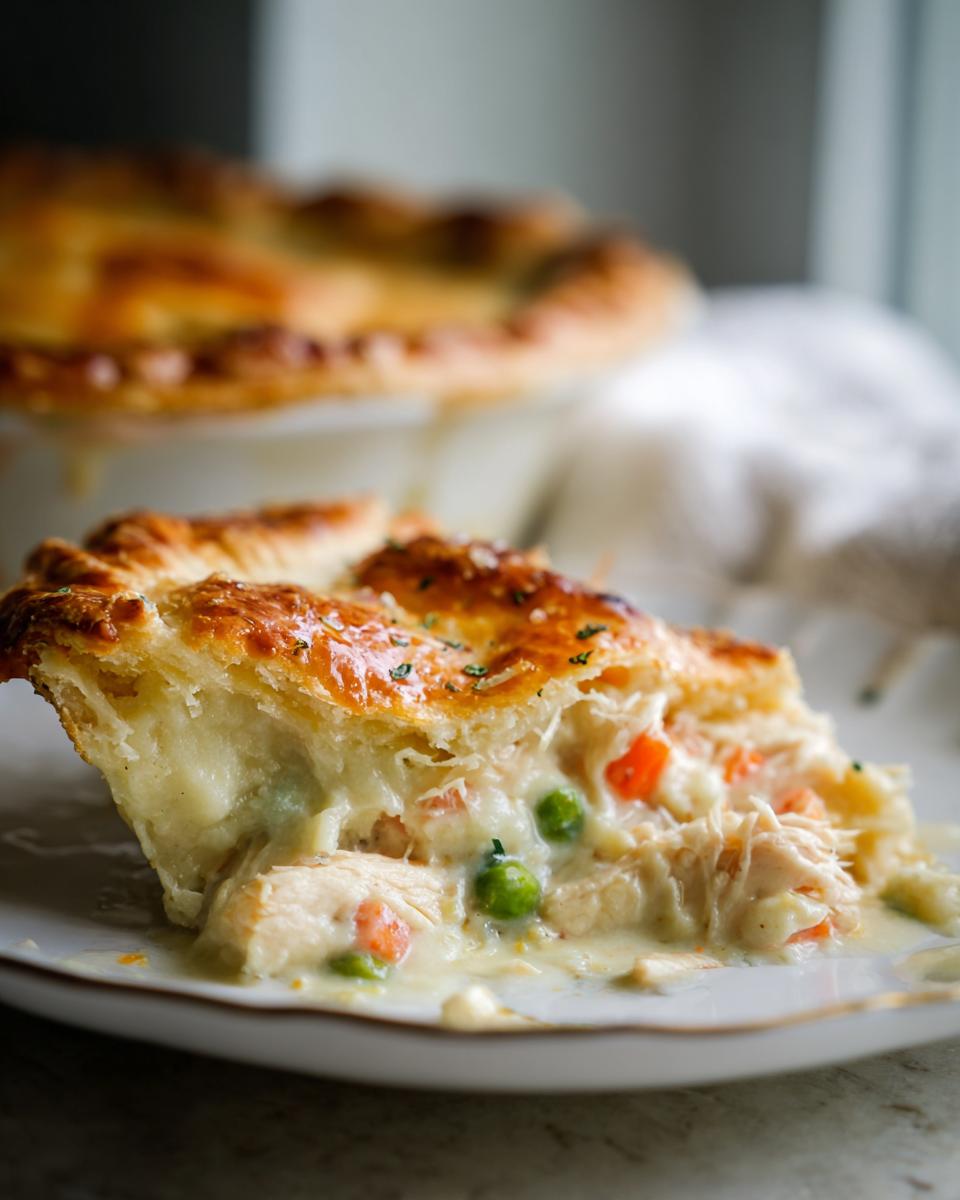
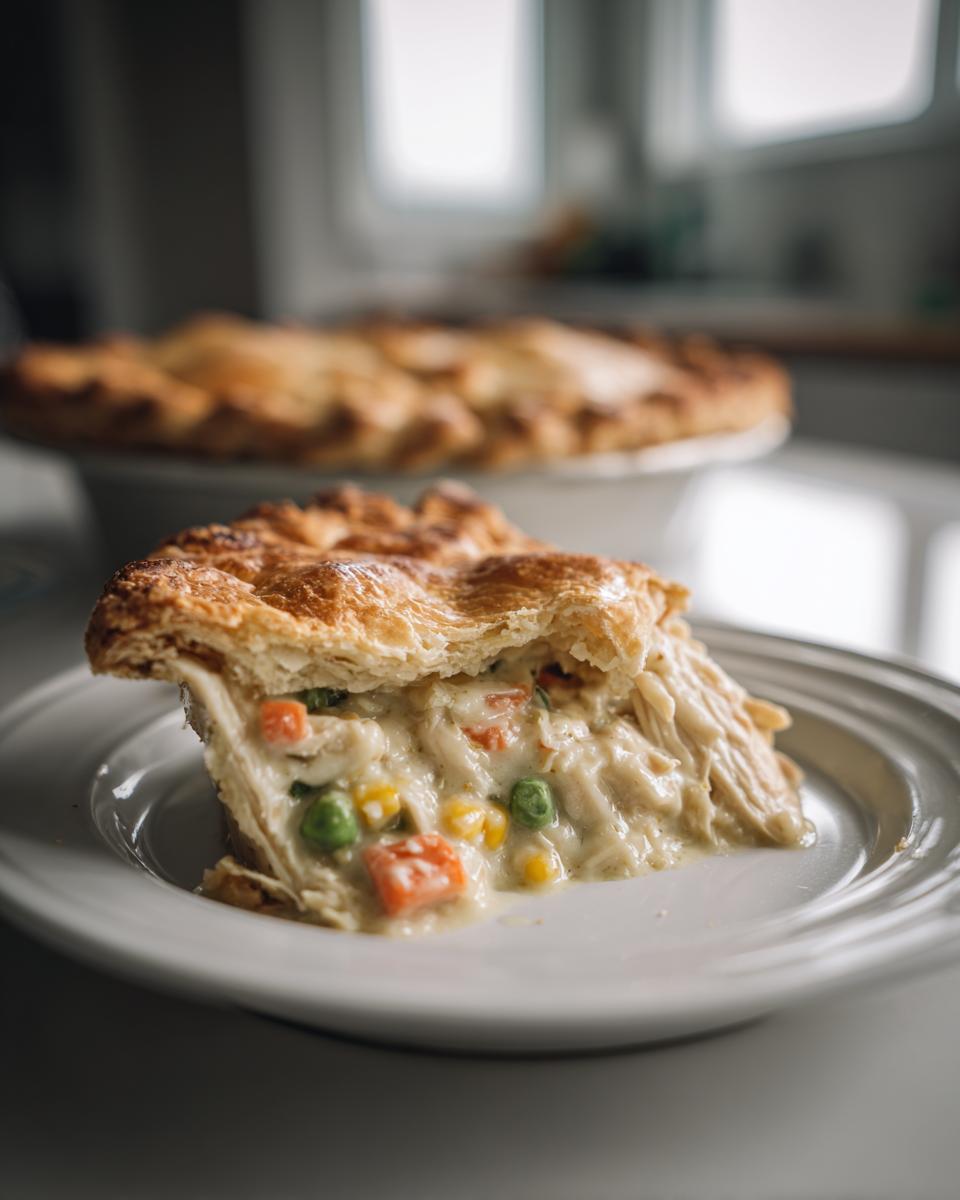
This filling is everything. It’s thick, creamy, and absolutely loaded with tender shredded chicken and sweet garden vegetables—carrots, corn, and peas. We use simple seasonings like thyme, salt, and pepper, but the way everything blends in that rich, buttery sauce is pure magic. It’s seasoned just right so it tastes savory without needing heavy cream every time. This is the heart of authentic **Grandmas Chicken Pot Pie**.

Ingredients for the Ultimate Grandmas Chicken Pot Pie
Gathering your ingredients is almost as satisfying as eating the finished pie, I swear! For this recipe to truly taste like Grandma’s, we need to be precise about how we measure everything, especially the thickening agents and the broth. I always lay everything out on the counter before I even turn on the stove. If you’re wondering about making homemade dairy products, I have a neat guide on how to make heavy cream at home, though standard milk works just fine here!
Don’t try to substitute the flour for a thickener unless you have to; the roux we make is what gives this savory pie its signature velvety texture.
For the Savory Filling Base
This is where the deep, comforting flavor starts. You’ll need:
- 2 tablespoons butter – just the standard good quality stuff.
- 1 medium onion, finely chopped. Don’t cry about chopping it; it’s worth it later!
- 2 carrots, chopped into small, uniform pieces.
- 2 celery stalks, also chopped small. We want flavor, not big bites of raw vegetable!
- 1/2 cup all-purpose flour—this is key for thickening.
- 1 teaspoon salt and 1/2 teaspoon black pepper.
- A hefty 1/4 teaspoon of dried thyme. This is the backbone flavor, don’t skip it!
- 2 cups chicken broth – use low sodium if you can, because we control the final salt level.
- 1 cup milk – whole milk is best for creaminess!
- 2 cups cooked, shredded chicken. If you’re using rotisserie chicken, make sure it’s nicely shredded.
The Vegetables and Crust Components
The remaining ingredients bring the color and structure:
- 1 cup frozen peas (no need to thaw them beforehand).
- 1 cup frozen corn.
- 2 refrigerated pie crusts. Yes, chilled dough from the store! Grandma was practical, and this keeps the prep fast without sacrificing that wonderful flakiness in your **Grandmas Chicken Pot Pie**.
Expert Tips for Making Grandmas Chicken Pot Pie
Honestly, just reading the recipe isn’t enough sometimes! Kitchen magic happens when you follow the little secrets that aren’t always written number one, two, three on the card. I’ve made this pie so many times, and I’ve learned exactly where folks tend to mess up the texture. We aren’t just making dinner; we’re aiming for legendary comfort food status here, so pay attention to these key handling steps for your **Grandmas Chicken Pot Pie**!
If you are dealing with leftover chicken that might be a bit dry, I highly recommend checking out my tips for an easy chicken marinade, even though the filling is moist, adding pre-seasoned chicken just boosts the flavor!
Achieving the Perfect Roux for Grandmas Chicken Pot Pie Filling
This is the make-or-break moment for that gorgeous, creamy sauce. When you add that flour to the melted butter and veggies, you’re creating what cooks call a roux, which thickens everything up lovely. But here’s the trick Grandma always drilled into me: you have to cook that flour out for a full minute—no less! Stir it constantly until it smells slightly nutty, but before it starts taking on any color at all. If you rush this, your filling tastes chalky. If you brown it too much, your beautiful sauce turns brown and tastes heavy. Pale gold is the goal. It keeps that filling tasting bright and savory, exactly how it should be in real **Grandmas Chicken Pot Pie**.
Crust Handling and Steam Release
You’ve got two crusts to worry about: the bottom and the top. For the bottom, make sure you press it gently into the pie plate so there are no air pockets forming underneath where the liquid filling will sit. Then, when you put the top crust on, you really have to commit to sealing the edges. Crimp them firmly with a fork or pinch them closed—you want a tight seal so that hot, bubbly filling stays put and doesn’t leak out and burn onto your oven rack. Oops!
And please, for the love of perfectly baked pastry, cut vents! I usually cut four nice slits in a cross shape right in the center of the top crust. These vents let the steam escape. If the steam can’t get out, it builds up pressure and essentially puffs up your crust, often making it collapse right in the middle when it cools. We want golden lift, not a sunken disaster!
Step-by-Step Instructions for Grandmas Chicken Pot Pie
Alright, this is where we bring it all together! Remember, patience is key when you’re building richness. We’re moving fast, but we aren’t rushing the cooking process. If you’re making your chicken ahead from scratch, a slow cooker method like the one I use for crockpot angel chicken works fantastically for getting that tender, shreddable meat!
We start hot because we want that crust to puff up quickly. Make sure your oven is blazing hot at 425 degrees F (220 degrees C) before you even grab that saucepan.
Preparing the Aromatic Vegetables
First up, get your large saucepan on medium heat and melt those 2 tablespoons of butter. Once it’s shimmering, toss in your chopped onion, those two carrots, and the celery stalks. You need to let these cook down until they are properly soft and fragrant. This usually takes about a good 5 minutes. We’re softening them up so they integrate beautifully into the finished sauce, so don’t rush them off the heat!
Thickening the Creamy Sauce
This is the roux step we talked about—don’t let it skip! Stir in your flour, salt, pepper, and dried thyme right over the veggies. Cook that mixture gently for one full minute, stirring so it doesn’t stick. Now, here comes the crucial part for thickness: very gradually, whisk in that 2 cups of chicken broth and then the 1 cup of milk. Keep whisking constantly until the whole mixture is smooth and dramatically thickens up. It should coat the back of a spoon nicely.
Assembling and Baking Your Grandmas Chicken Pot Pie
Once your sauce is thick, take it off the heat! Stir in your 2 cups of cooked chicken, the cup of frozen peas, and the cup of frozen corn. Now, pour all that wonderful filling right into one of those pie crusts settled in your 9-inch pie plate. Lay the second crust right over the top. Pinch those edges together tightly to seal them—remember, no leaks! And please, cut several good slits right in the middle of that top crust for steam release.
Pop this masterpiece into your preheated oven. Bake it for about 30 to 35 minutes total, or until that crust is a gorgeous golden brown and you can see the filling bubbling happily underneath. Seriously, let it cool for at least 10 minutes once it comes out. Those few minutes let the filling set up so you don’t end up with soup on your plate!
Ingredient Notes and Substitutions for Grandmas Chicken Pot Pie
When I use this recipe, I always try to follow Grandma’s guiding principles, but I’m also not afraid to make smart swaps when life gets busy. The beauty of a classic like this is that it can adapt! The recipe notes are gospel truth, but I’ve added a few personal tweaks over the years that you might want to try out, especially if you’re short on time.
For instance, if you have leftover rotisserie chicken sitting around, grab it! That technically cooked and shredded meat is perfect for cutting down your prep time significantly. Don’t feel guilty about the shortcut; Grandma was all about efficiency when it served the family.
Using Half-and-Half for Richer Flavor
The recipe calls for milk, which keeps this dish relatively lighter for a classic comfort food. But if you want that true, decadent, restaurant-quality creaminess in your filling, swap out the cup of milk for a cup of heavy cream or, even better, half-and-half. It makes the sauce unbelievably silky. The difference isn’t huge in terms of steps, but the payoff in richness is amazing. Just remember, if you use heavier cream, you might let the roux cook a touch longer, just to make sure it handles the extra fat load properly.
The Crust Upgrade: Puff Pastry Talk
While I mentioned we stick to refrigerated pie crusts for the classic feel of **Grandmas Chicken Pot Pie**, if you want an absolute showstopper crust that’s lighter and puffier, you can substitute those two pie crusts for two sheets of frozen puff pastry. It bakes up wildly different—fluffier, more delicate layers—but it works beautifully with this savory filling. If you go this route, you might want to reduce the baking temperature slightly, maybe by 25 degrees, just so the pastry has time to fully puff without burning on top before the inside is hot.
If you want to see what that looks like, I’ve got a full breakdown of making pot pies with that lighter dough over here: classic chicken pot pie puff pastry. It’s a fun change of pace for a Saturday night dinner!
Serving Suggestions for Grandmas Chicken Pot Pie
This pie is a powerhouse meal all on its own, being packed with protein, veggies, and carbs! But if you want to dress up your plate for company or just add a little extra green, keep the sides super simple. A crisp green salad with a light vinaigrette is just perfect to cut through that richness.
Also, nothing beats roasted vegetables. Since we already have carrots inside, why not try some of my favorite honey roasted carrots on the side? They bring a lovely sweetness that complements the savory thyme in the filling. Ten minutes of oven time while the pie is cooling is all you’ll need for a great partner!
Storage and Reheating Instructions for Leftover Grandmas Chicken Pot Pie
Oh man, I always make sure there are leftovers because these pies taste even better the next day! That thick, savory filling soaks up all the wonderful herbs overnight. You’ve got to handle leftovers carefully, though, especially that bottom crust. We want to save that flaky texture for round two!
If you have any pie left, the first thing you must do is let it cool completely on the counter—don’t try to cover a hot pie! Once it’s fully cooled down (that’s usually about an hour or two), wrap the whole plate tightly in plastic wrap or aluminum foil. You can keep this amazing **Grandmas Chicken Pot Pie** in the refrigerator for about three to four days. Seriously, try to eat it within three days if you can; the moisture in the filling starts working on that bottom crust after day four.
The Best Way to Reheat to Avoid Soggy Bottoms
This is crucial. Never, ever microwave a slice of this pie if you want any real crust left! The microwave steams the pastry and guarantees a soggy bottom. We need dry heat to bring the crust back to life.
Set your oven to a nice, moderate temperature, around 350 degrees F. If you are just reheating a single slice, slide it onto a small baking sheet lined with parchment paper. It might take 15 to 20 minutes for a full slice to heat all the way through to the center. If you’re reheating half the pie from the dish, cover the edges loosely with foil (just the edges!) so the crust doesn’t burn while the middle heats up. This usually takes about 25 to 35 minutes, depending on how cold your filling was when you started.
The goal is to heat it until the filling is bubbly again. Taking the time to reheat it slowly in the oven is what preserves the integrity of that lovely pastry top and bottom. It’s worth the wait, I promise!
Frequently Asked Questions About Grandmas Chicken Pot Pie
You guys always have the best questions bubbling up about this classic! It’s wonderful that you all are looking to keep this tradition alive. I’ve gathered a few of the things I get asked most often about making this dish just right. Don’t worry if you’re a beginner; this recipe is forgiving, but knowing these little secrets helps make it even more foolproof.
Can I make the filling for Grandmas Chicken Pot Pie ahead of time?
Yes, absolutely, and I highly recommend it if you are having people over! The filling is actually fantastic when made a day ahead. Once it’s completely cooled down, just store it in an airtight container in the fridge. You can keep it good for about two days. When you’re ready to bake, just pour that cooled filling into your bottom pie crust, and top it with the second crust as usual. Just make sure the filling isn’t ice cold when you top it, or the crust won’t bake evenly!
What is the best way to avoid a soggy bottom crust?
Soggy bottoms haunt our dreams! The number one reason the bottom crust gets soggy is that the filling is too soupy, or the crust doesn’t have enough time to cook properly under all that wonderful liquid. First, make sure you cooked that roux for the full minute we talked about to thicken it properly. My favorite trick, especially for a show-stopping savory pie like this, is to give the bottom crust about 8 to 10 minutes in the oven by itself before I pour in the filling. Just bake the bottom crust until it looks slightly dry and opaque—it doesn’t need to brown yet. Then, fill it and top it and bake as directed. It sets that foundation perfectly!
Is this considered a healthy comfort food option?
Well, it’s definitely top-tier as far as comfort food goes—it’s warm, satisfying, and tastes like home! If you look at the nutrition details, we actually list this as ‘Low Fat’ compared to some other creamy casseroles, mainly because we use milk instead of heavy cream in the base recipe. But let’s be real, it’s still a buttery crust wrapped around gravy; it’s meant to be rich!
If you are trying to bump up the health factor next time, skip the refrigerated crusts and use a whole wheat crust recipe instead, or use even more vegetables than the recipe calls for! Every little bit helps when indulging in your favorite comfort food.
Nutritional Estimates for This Classic Comfort Food
Now, I know some of you lovely folks are counting macros or keeping an eye on certain ingredients, and since this is such a classic, hearty dish, I wanted to share the estimated nutritional breakdown. Remember, because we’re using real butter, real chicken, and the type of refrigerated crust you buy can change things a little, these numbers are just a good guideline!
This guide is based on dividing the entire **Grandmas Chicken Pot Pie** into 6 generous servings. It’s packed with protein, making it a truly satisfying dinner.
- Serving Size: 1 slice
- Calories: Approximately 450 per slice
- Fat: Around 25g (with about 10g being saturated fat—that’s the butter working its magic!)
- Protein: A whopping 25g! Great for feeling full.
- Carbohydrates: Approximately 35g
- Sugar: Low, around 5g, mostly from the carrots and corn.
- Sodium: This one runs a little higher at about 650mg; if that worries you, definitely use low-sodium broth!
Enjoy this dish knowing it’s a balanced classic comfort food. These estimates don’t account for any sneaky extra butter you might use to grease your pan, so bake carefully!
Print
Grandma’s Chicken Pot Pie
- Total Time: 55 min
- Yield: 6 servings 1x
- Diet: Low Fat
Description
A classic, comforting chicken pot pie recipe with a flaky crust.
Ingredients
- 2 tablespoons butter
- 1 medium onion, chopped
- 2 carrots, chopped
- 2 celery stalks, chopped
- 1/2 cup all-purpose flour
- 1 teaspoon salt
- 1/2 teaspoon black pepper
- 1/4 teaspoon dried thyme
- 2 cups chicken broth
- 1 cup milk
- 2 cups cooked, shredded chicken
- 1 cup frozen peas
- 1 cup frozen corn
- 2 refrigerated pie crusts
Instructions
- Preheat your oven to 425 degrees F (220 degrees C).
- Melt butter in a large saucepan over medium heat.
- Add onion, carrots, and celery; cook until soft, about 5 minutes.
- Stir in flour, salt, pepper, and thyme. Cook for 1 minute.
- Gradually whisk in chicken broth and milk until the mixture thickens.
- Stir in cooked chicken, peas, and corn.
- Pour the filling into one pie crust placed in a 9-inch pie plate.
- Top with the second pie crust. Crimp the edges to seal and cut several slits in the top crust for steam release.
- Bake for 30 to 35 minutes, or until the crust is golden brown and the filling is bubbly.
- Let the pie cool for 10 minutes before serving.
Notes
- If you have leftover rotisserie chicken, use that for quick preparation.
- For a richer flavor, use half-and-half instead of milk.
- Prep Time: 20 min
- Cook Time: 35 min
- Category: Dinner
- Method: Baking
- Cuisine: American
Nutrition
- Serving Size: 1 slice
- Calories: 450
- Sugar: 5
- Sodium: 650
- Fat: 25
- Saturated Fat: 10
- Unsaturated Fat: 15
- Trans Fat: 0
- Carbohydrates: 35
- Fiber: 3
- Protein: 25
- Cholesterol: 75
Keywords: chicken pot pie, comfort food, baked pie, savory pie, classic dinner