Oh, I just LOVE a cake that tells a story, don’t you? And this Four Generations Wedding Photo Cake for Christmas? It’s like a holiday hug and a family reunion all rolled into one edible masterpiece! My family has always gone all-out for Christmas, and we have this tradition of pulling out old photo albums and reminiscing. So, when I first thought about a wedding cake that could capture that same feeling, but for a Christmas wedding, my mind just lit up! Imagine a stunning wedding cake, all elegant and festive, but then you see these little touches – maybe tiny fondant figures or even edible photos – representing each generation of the family. It’s not just a dessert; it’s a centerpiece that truly celebrates love, family, and the magic of the holidays all at once. It makes the whole celebration feel so much more personal and, honestly, so much more *us*.

Crafting Your Four Generations Wedding Photo Cake for Christmas
Alright, buckle up, because we’re about to bring this beautiful vision to life! Honestly, the process is just as magical as the final cake. We’re going to break it down step-by-step so it feels totally doable, even if you’re not a pro baker. Think of it like building a little edible family tree, but way more fun and with way more sugar! We’ll go from getting our ingredients just right, to baking those sturdy cake layers, and then to the really fun part – decorating it to tell your family’s story with all those gorgeous Christmas touches.
Essential Ingredients for Your Four Generations Wedding Photo Cake for Christmas
Okay, first things first, let’s talk ingredients. You’ll want to grab 2 cups of all-purpose flour, make sure it’s sifted for a nice light cake. Then, 1 cup of unsalted butter, softened – this is key for creaming! We need 3 large eggs, and having them at room temperature really makes a difference, trust me. A teaspoon of vanilla extract is a must for that classic flavor, along with 1 cup of granulated sugar and 1/2 cup of milk. Don’t forget 1 teaspoon of baking powder for a little lift and a pinch of salt to balance everything. For the filling, you’ll need 8 ounces of cream cheese, also softened, and for the frosting, we’ll use 4 cups of powdered sugar, another 1/2 cup of softened butter, and about 1/4 cup of milk. Oh, and of course, you’ll need your red and green food coloring, about 2 pounds of white fondant, some edible gold dust for that fancy shimmer, edible silver dragees for sparkle, and all those cute Christmas-themed edible decorations you love!
Step-by-Step Preparation of Your Four Generations Wedding Photo Cake for Christmas
Now for the fun part – putting it all together! It might seem like a lot, but we’ll take it one step at a time.
Baking the Cake Layers
First, preheat your oven to 350°F (175°C). Get your cake pans ready, greased and floured, or lined with parchment. Mix up your batter according to your favorite cake recipe – I usually go for a sturdy vanilla or almond base for these kinds of cakes. Pour the batter evenly into your prepared pans and bake until a toothpick inserted into the center comes out clean. This usually takes about 30-35 minutes for standard layers, but keep an eye on them! Once they’re baked, let them cool in the pans for about 10 minutes before turning them out onto a wire rack to cool completely. Patience here is key – warm cakes and frosting are a recipe for disaster!
Preparing the Frostings
While the cakes cool, let’s whip up those frostings. For the cream cheese filling, just beat that softened cream cheese until it’s smooth and creamy. Then, gradually add about 2 cups of the powdered sugar and a splash of vanilla until it’s nicely spreadable. For the buttercream, cream that softened butter until it’s light and fluffy, then slowly beat in the remaining powdered sugar and milk until you get a smooth, spreadable consistency. You can divide this and tint portions red and green if you like!
Assembling and Crumb Coating
Once those cake layers are totally cool – and I mean *completely* cool – it’s time to stack! Level off your cake layers if they have domes. Spread a generous layer of that cream cheese filling between each cake layer. Then, give the whole assembled cake a thin coat of buttercream frosting. This is your “crumb coat,” and it traps all those little crumbs so they don’t mess up your final fondant layer. Pop the whole thing in the fridge for at least 30 minutes, or until that crumb coat is firm to the touch.
Fondant Application and Base Decoration
Now for the smooth canvas! Lightly dust your work surface with powdered sugar or cornstarch. Roll out your white fondant until it’s large enough to cover your entire cake, nice and even. Gently lift and drape the fondant over the chilled, crumb-coated cake. Smooth it down from the top, working your way down the sides, easing out any air bubbles or pleats. Trim off any excess fondant at the base. Once it’s covered, take your edible gold dust, mix it with a tiny bit of clear alcohol like vodka (it evaporates completely, leaving just the shimmer!), and paint on those elegant scrollwork or patterns. This is where the magic really starts to happen!
Decorating Your Four Generations Wedding Photo Cake for Christmas for Maximum Festive Impact
This is where your cake truly comes alive and tells your family’s beautiful story, sprinkled with all the holiday cheer!
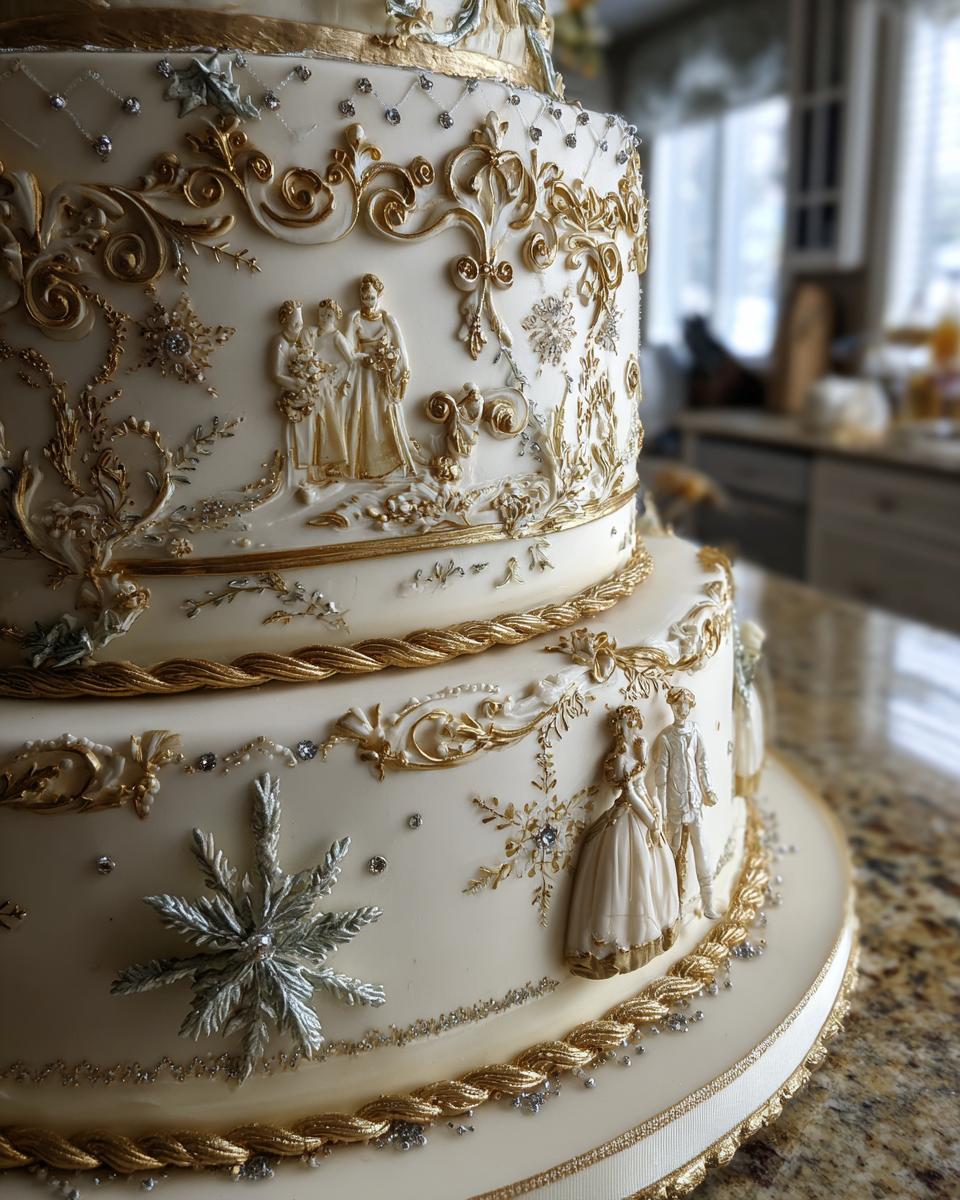
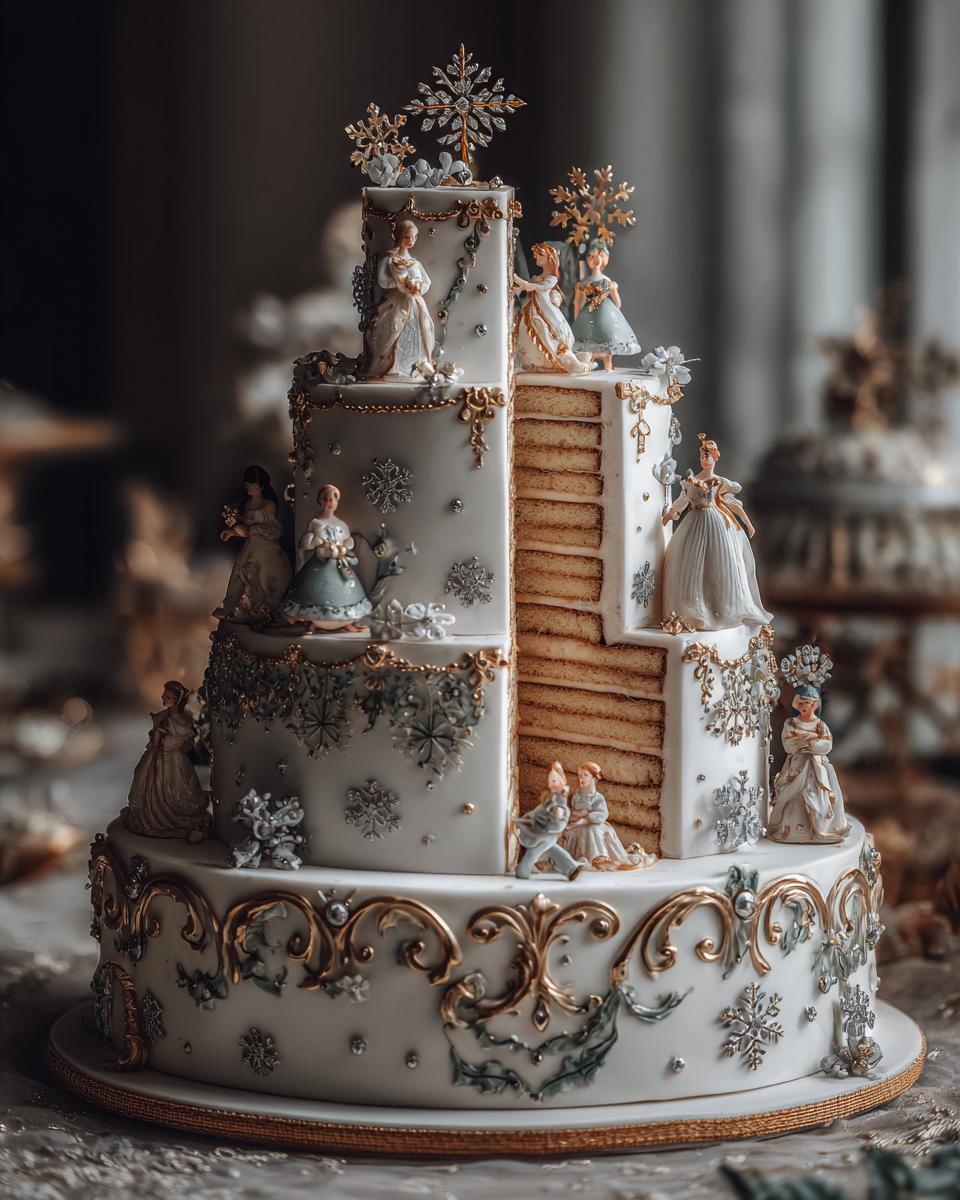
Representing Four Generations
This is the heart of your cake! You have a few ways to do this. You could use edible image printers to get photos of each generation printed on edible paper – just trim them to size and gently adhere them to the fondant with a tiny bit of water or edible glue. Or, you can get creative with fondant! Sculpt little figures representing each generation – maybe a bride and groom, parents, grandparents, and even great-grandparents. You can add little details like tiny glasses or specific hairstyles to make them unique. Another lovely idea is to use edible gold leaf or plaques where you can write names or dates. Place these thoughtfully on different tiers, perhaps staggering them for visual interest. It’s all about making it personal and heartwarming!
Adding Festive Christmas Touches
Now let’s get this cake looking like a Christmas dream! Use those red and green food colorings to tint some fondant. Roll out small pieces of green fondant and cut out little holly leaves, then add tiny red fondant balls for berries. You can also cut out delicate white snowflakes from thin fondant or use edible glitter. For that extra sparkle, carefully place edible silver dragees around the cake, maybe dotting them along the edges of the tiers or nestled amongst the holly. You can also add little fondant bows or even some edible gold stars. Just remember to attach them gently with a dab of water or edible glue, making sure they look like they belong!
Final Touches and Topper
Almost there! Take a look at your beautiful creation. Are there any spots that need a little extra sparkle or a tiny touch-up? Now’s the time to add that perfect cake topper. It could be a traditional bride and groom, or maybe something more symbolic like a little family tree made of fondant, or even a beautiful Christmas star. Make sure it’s securely placed. Sometimes, a final light dusting of edible gold or silver glitter can give it that extra holiday magic. Just a little sprinkle goes a long way!
Tips for a Perfect Four Generations Wedding Photo Cake for Christmas
Making this cake is such a joy, and a few little tricks can make all the difference. When you’re working with fondant, make sure your cake is *really* cold after the crumb coat. It makes the fondant so much easier to smooth out without tearing. And for those edible photos or fondant figures, a tiny dab of water or edible glue is all you need to attach them – don’t go overboard, or you’ll make a mess! For the Christmas decorations like holly and berries, a little bit of edible glue on the back is perfect for sticking them on securely, especially if you’re adding them to the sides of the cake. And for the structure, especially if you have more than two tiers, don’t forget those cake dowels! They’re like the hidden backbone that keeps everything stable and prevents the top tiers from squishing the bottom ones. Trust me, you want your beautiful family story to stand tall and proud!
Variations for Your Four Generations Wedding Photo Cake for Christmas
While the classic vanilla and cream cheese is divine, don’t be afraid to play around! For flavors, maybe a rich chocolate cake with a raspberry filling would be lovely for a winter wedding, or a spiced gingerbread cake to really lean into that Christmas vibe. You could even do a lemon-cranberry cake for a festive tang! Color-wise, instead of just white fondant, imagine a soft winter blue or a deep forest green as your base, then add the gold details on top. If edible photos aren’t your thing, consider using different colored frostings to create an ombre effect on each tier, perhaps representing different eras of your family. Or, instead of fondant figures, you could pipe intricate family crests or monograms in elegant gold buttercream. The possibilities are endless to make this cake uniquely yours!
Serving and Storage for Your Four Generations Wedding Photo Cake for Christmas
When it’s time to serve this masterpiece, let it sit at room temperature for about 30-60 minutes before slicing. This really helps the frosting and cake flavors meld together beautifully. Use a sharp, thin knife – maybe even warm it slightly in hot water and wipe it dry between cuts – for the cleanest slices, especially through the fondant. As for storing leftovers, wrap any remaining cake tightly in plastic wrap and then place it in an airtight container. It should stay fresh in the refrigerator for about 3-4 days. Since this cake has cream cheese frosting and fondant, it definitely needs to be refrigerated. If you want to enjoy a slice later, just let it come back to room temperature for about an hour before digging in. I wouldn’t recommend reheating it, as that can make the fondant gummy, but honestly, leftovers rarely last long enough to worry about!
Frequently Asked Questions about the Four Generations Wedding Photo Cake for Christmas
Q: How do I make sure my fondant goes on smoothly without tearing?
Make sure your cake is completely chilled after the crumb coat! It gives the fondant a firm surface to stick to. Work in a cool room if you can, and don’t be afraid to use a little extra powdered sugar or cornstarch on your surface when rolling. Gently lift and drape the fondant, starting from the top and smoothing down the sides. Use a fondant smoother tool if you have one; it really helps get rid of air bubbles!
Q: What’s the best way to attach edible images or fondant figures to the cake?
Just a tiny bit of moisture is all you need! You can use a small brush dipped in water or edible glue. Dab a very thin layer on the back of your edible image or figure where it will touch the fondant, then gently press it into place. Don’t use too much liquid, or it can make the fondant sticky or cause colors to run.
Q: My cake has several tiers. Do I need special support?
Absolutely! For any cake with more than two tiers, you’ll definitely need cake dowels. Think of them like internal supports. You’ll insert several dowels into the bottom tier, cutting them so they’re flush with the top of the frosting. Then, you’ll place your next tier on top. This prevents the weight of the upper tiers from crushing the ones below. It’s super important for stability, especially for a wedding cake!
Q: How long will this Christmas wedding cake last, and how should I store it?
Because it has buttercream and cream cheese frosting, and is covered in fondant, it really needs to be stored in the refrigerator. Wrap it well in plastic wrap and then pop it into an airtight container. It should stay lovely for about 3-4 days. Before serving, just let it sit out at room temperature for about an hour to soften up a bit – it makes all the flavors so much better!
Sharing Your Four Generations Wedding Photo Cake for Christmas Creation
I would absolutely LOVE to see your beautiful Four Generations Wedding Photo Cake for Christmas! Did you try out some of these ideas? Did you add your own special family touches? Share a picture or tell me all about it in the comments below – I can’t wait to see your holiday family magic!
Print
Amazing Four Generations Christmas Wedding Cake
- Total Time: 4.5 hours plus chilling time
- Yield: 20-25 servings
- Diet: Vegetarian
Description
A beautiful and festive Christmas cake designed to represent four generations of a family, perfect for a wedding celebration during the holiday season. This cake combines traditional wedding cake elegance with Christmas cheer.
Ingredients
- Flour
- Sugar
- Eggs
- Butter
- Milk
- Baking Powder
- Vanilla Extract
- Salt
- Cream Cheese
- Powdered Sugar
- Buttercream Frosting
- Red Food Coloring
- Green Food Coloring
- White Fondant
- Edible Gold Dust
- Edible Silver Dragees
- Christmas-themed Edible Decorations (e.g., snowflakes, holly, berries)
Instructions
- Prepare your favorite cake recipe for a multi-tiered cake. Bake the cake layers and let them cool completely.
- Prepare cream cheese frosting for filling and buttercream frosting for decorating.
- Assemble the cake tiers, filling each layer with cream cheese frosting. Crumb coat the cake with buttercream frosting and chill until firm.
- Cover the cake with white fondant.
- Using edible gold dust, paint elegant scrollwork or patterns on the fondant.
- Create fondant figures or edible images representing four generations of the family. Place them on the cake tiers.
- Decorate the cake with Christmas-themed elements like fondant holly, berries, snowflakes, and edible silver dragees.
- Add a festive topper, such as a bride and groom figure with a family tree or a Christmas star.
- Chill the cake until ready to serve.
Notes
- Ensure all edible decorations are food-safe and appropriate for consumption.
- Consider the size and weight of the cake when planning the structure and support.
- You can customize the cake flavors to suit your preferences.
- The “four generations” aspect can be represented through edible photos, fondant figures, or engraved plaques.
- Prep Time: 3 hours
- Cook Time: 1.5 hours
- Category: Celebration Cake
- Method: Baking and Decorating
- Cuisine: American
Nutrition
- Serving Size: 1 slice
- Calories: 450
- Sugar: 50g
- Sodium: 150mg
- Fat: 25g
- Saturated Fat: 15g
- Unsaturated Fat: 10g
- Trans Fat: 1g
- Carbohydrates: 55g
- Fiber: 2g
- Protein: 5g
- Cholesterol: 80mg
Keywords: Christmas wedding cake, four generations cake, family photo cake, holiday wedding cake, festive cake, custom cake, fondant cake, multi-tiered cake