Oh, falafel! That warm, herby, perfectly seasoned little bite of heaven. I absolutely adore it, but let’s be honest, deep-frying takes you right out of the kitchen and leaves you scrubbing oil splatter for an hour. No, thank you! I spent way too many evenings dealing with that greasy mess before I finally cracked the code.
Trust me, you deserve that incredible texture without standing over a sputtering pot of oil. That’s why I’m obsessed with sharing my recipe for truly Crispy Baked Falafel. It took me weeks of testing different oven temperatures and seasoning blends, but I nailed it. These patties come out golden, beautifully textured, and they hold together perfectly, all while being so much easier and lighter!

Why This Recipe Delivers the Best Crispy Baked Falafel
I truly believe this baking method is superior for home cooks. We aren’t aiming for a thick, cakey ball; we want that perfect Middle Eastern exterior. We want flavor without the fryer labor. Check out why this version is my go-to recipe:
- My technique ensures you get that amazing crunch without absorbing gallons of oil. It just works!
- If you’re looking for similar crunch without frying, you absolutely must try my crispy Parmesan zucchini next time, too!
Perfect Texture: Crispy Outside, Tender Inside
It’s all about that tiny bit of flour we toss in! It acts like a binder and helps draw just enough moisture to the surface during baking so it browns up. We’re building a shell around the soft, herby chickpea interior. Seriously, the results for Crispy Baked Falafel feel almost magical given how little oil we use.
Healthier Alternative to Frying
This is huge for me. Traditional deep-frying uses up so much oil, and honestly, cleanup is the worst part. Using the oven cuts the fat way down while keeping all that wonderful flavor from the cilantro and cumin intact. It’s just a sensible way to enjoy one of my favorite vegetarian meals.
Essential Ingredients for Flavorful Crispy Baked Falafel
The beauty of falafel is that it’s made from pantry staples, which means you probably have most of this stuff sitting around already! But listen carefully—the quality and state of these simple ingredients make the difference between okay falafel and the best Crispy Baked Falafel you’ve ever made. Everything here is meant to be combined raw, which speeds everything up!
You’ll need:
- One (15-ounce) can of chickpeas—and please, make sure they are rinsed *and* fully drained. We don’t want extra liquid hanging around!
- A hearty helping of fresh herbs: ½ cup of packed fresh parsley and ¼ cup of packed fresh cilantro. These need to be packed in there to give us that bright green color and essential flavor.
- About ½ a small onion, roughly chopped so the food processor can handle it easily.
- Two cloves of garlic—don’t be shy!
- My favorite spices: 1 teaspoon of ground cumin and ½ teaspoon of ground coriander. A little kick from ¼ teaspoon of cayenne pepper is non-negotiable for that warmth.
- Finally, for structure, we need ½ teaspoon of salt, ¼ teaspoon of black pepper, 2 tablespoons of all-purpose flour, and 1 tablespoon of olive oil.
Once these are mixed up, you’ll want to think about sides! A homemade tahini sauce or maybe some creamy homemade guacamole if you’re feeling adventurous, makes the perfect dipping partner for these little guys.
Ingredient Preparation Notes
Okay, one crucial thing: we are using canned chickpeas here, *not* dried ones that you’ve soaked overnight. Dried chickpeas, even when soaked, yield a much different, often heavier texture when baked this way. Stick to canned for these quick Crispy Baked Falafel patties. Also, take the time to pack those herbs in the measuring cups; fresh herbs are key to that vibrant, earthy taste that makes falafel taste authentic. Seriously, don’t skimp on the parsley!
Step-by-Step Instructions for Perfect Crispy Baked Falafel
I know timing is everything when you bake something you usually fry, so let’s get organized. The great news is that there is virtually no downtime here—we go straight from mixing to baking. I always tell people this part is faster than watching a commercial break. If you need a refresher on oven cooking, remember my guide on oven-baked meatballs uses similar high-heat principles!
First things first: Get your oven preheated to 400 degrees Fahrenheit (200 Celsius). While that’s heating up, line a baking sheet with parchment paper. This paper is your best friend; it keeps the delicate bottoms from sticking, which is key for getting that uniform crispness on your Crispy Baked Falafel.
Processing the Falafel Mixture
Now for the food processor! Toss in your drained chickpeas, all that lovely parsley and cilantro, the onion chunks, garlic, and all your dry spices—cumin, coriander, cayenne, salt, and pepper. Hit the pulse button! You need to *pulse* it until the mixture is coarsely ground. I stress this: do not let it turn into hummus! If you over-process it, you’ll lose the crumb structure, and these won’t be Crispy Baked Falafel, they’ll be dense disks.
Once it looks like coarse green sand, scrape it into a bowl. Stir in that 2 tablespoons of flour and the 1 tablespoon of olive oil right until they disappear. Don’t overmix it after adding the dry bits!
Shaping and Baking Your Crispy Baked Falafel
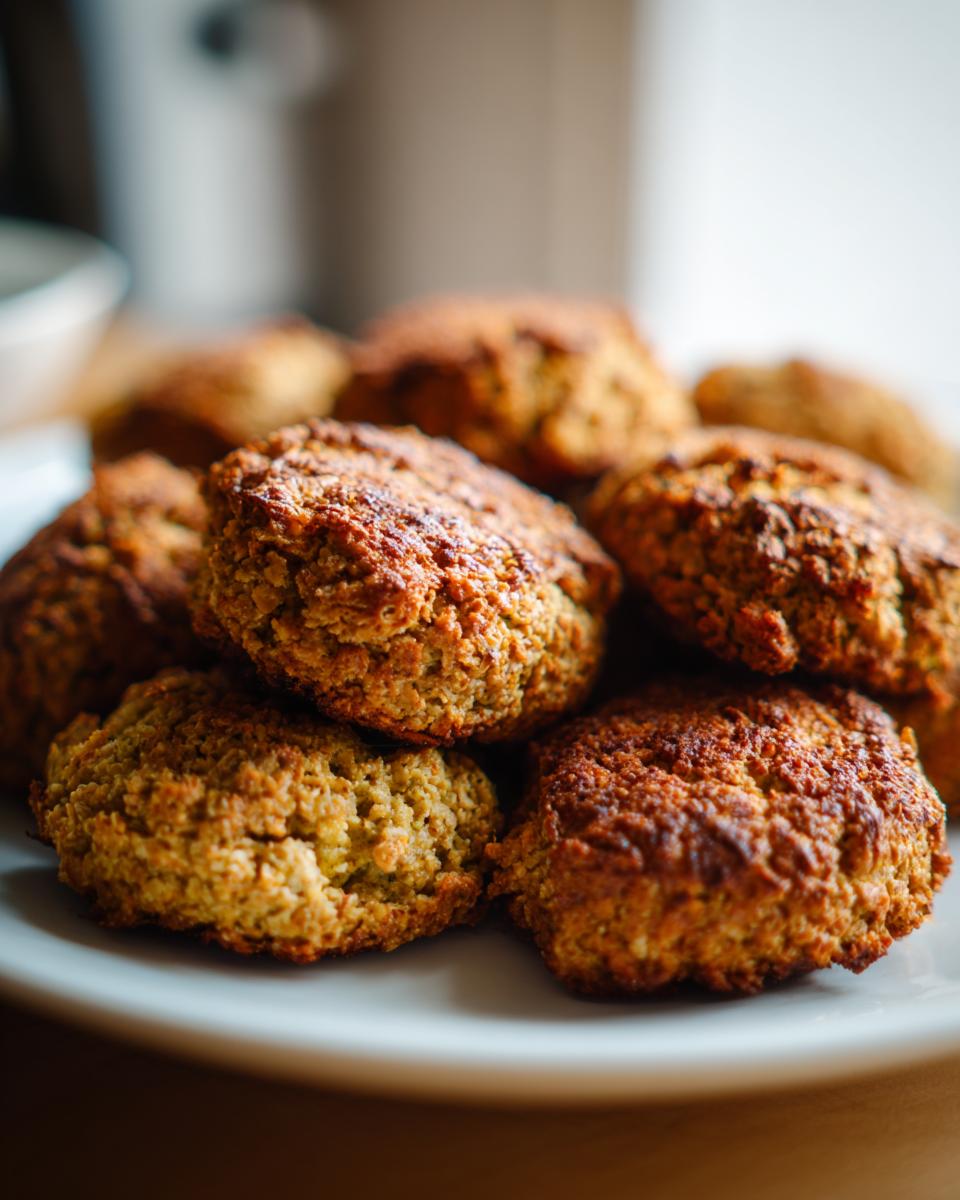
Grab a tablespoon and scoop out your mixture. Roll them lightly into small patties or neat little balls—whichever you prefer! Lay them out on your prepared baking sheet, making sure they aren’t touching too much. Bake these beauties for 20 to 25 minutes total. The flip is important for even color, so halfway through baking, gently turn each one over. They are done when they look deeply golden brown all over and feel wonderfully crispy to the touch!

Tips for Achieving Maximum Crispy Baked Falafel Results
Making them is one thing, but making sure they are shatteringly crispy the first time around? That’s where the experience comes in! I’ve tested every single variable in my kitchen so you don’t have to. A few small adjustments at the beginning can make the difference between a slightly soft falafel and one that truly stands up to any dipping sauce.
If you want to jazz them up after they come out of the oven, try dusting them with some of my favorite homemade blend—it’s fantastic on everything, including these patties! Check out the recipe for perfected French fry seasoning; just a tiny sprinkle on these warm vegetarian bites is incredible.
Troubleshooting Wet Mixtures for Crispy Baked Falafel
This is the most common issue. If you followed the recipe perfectly, your mixture should hold its shape easily. But maybe your can of chickpeas had a little extra water clinging to them, or maybe your herbs were exceptionally juicy. If you find that when you scoop the mixture, it’s slumping immediately and doesn’t look like it will hold a patty shape, don’t panic and don’t reach for the frying oil!
Remember that note I put in the recipe details? If it seems too wet, just stir in one more teaspoon of flour until it firms up slightly. We don’t want to dump too much in, because that will make them gummy, but that tiny spoonful is usually all it takes to get them ready for the pan so they convert into beautiful Crispy Baked Falafel.
Baking Sheet Preparation Matters for Crispy Baked Falafel
We already mentioned parchment paper, and that’s essential for non-stick insurance. But if you want to cheat a little and encourage extra browning on the bottom—which is where most of the crunch happens—you can lightly brush the parchment paper itself with a whisper of olive oil before placing your patties down. We’re talking maybe half a teaspoon total spread thinly across the whole sheet.
The goal isn’t to fry them; it’s just to create a non-stick surface that traps a *little* bit of conductive heat right underneath them as they bake. That minimal direct contact really helps firm up the base so that when you flip them over, you see an even deeper, crispier crust forming on the bottom side. Every little bit helps achieve that maximum crunch for your Crispy Baked Falafel!
Serving Suggestions for Your Homemade Crispy Baked Falafel
So, your Crispy Baked Falafel are perfectly golden and hot out of the oven—congratulations! Now comes the best part: figuring out how glorious you want to make the final plate. Traditional serving styles are honestly my favorites because they let the flavor of the herbs and spices really shine through.
The absolute non-negotiable partner for falafel is tahini sauce. It’s creamy, slightly nutty, and cuts through the earthiness of the chickpeas beautifully. I usually whisk together tahini paste, a squeeze of lemon juice—freshly squeezed, please!—some crushed garlic, salt, and thin it out with cold water until it’s the perfect drizzling consistency. It’s so simple, yet essential for authentic flavor.
If you want to make a full meal, stuffing them into pita bread is the way to go. Use warm, soft pita pockets and layer in whatever fresh veggies you have handy. Thinly sliced cucumber, crunchy shredded lettuce, maybe some diced tomato, and perhaps a few pickled turnips if you can find them for that lovely pink color and tang.
For a lighter, salad-focused approach, try crumbling them right over a bed of finely chopped parsley, mint, and tomatoes—that’s basically a deconstructed tabbouleh, and it’s amazing. If you’re feeling like something spicy on the side, though everything is great, you could try pairing it alongside some homemade dips. I know this isn’t Middle Eastern, but honestly, none can resist dipping these patties into a fresh bowl of homemade salsa if they happen to have some lying around!
However you serve them, the goal is contrast: crispy texture against creamy sauce, and warm falafel next to cool, crisp vegetables. It makes every single bite exciting!
Storage and Reheating Crispy Baked Falafel
Okay, sometimes you just make too much! That’s the best problem to have when dealing with something this delicious. Thankfully, these vegetarian patties store really well, but you have to be careful how you wake them up the next day. Nobody wants a sad, soggy reheated falafel, right?
The key to keeping your leftover Crispy Baked Falafel tasting nearly as good as fresh is twofold: proper storage and the right reheating method. Forget the microwave—it’s the fastest way to turn that beautiful crisp crust into rubbery sadness.
For storage, let the falafel cool completely on a wire rack first. If you seal them up while they are still warm, the trapped steam will immediately soften that crisp exterior we worked so hard to achieve. Once they are totally cool, you can put them in an airtight container. I usually line the bottom with a paper towel just to absorb any residual moisture overnight. These keep great in the fridge for about four days.
When it’s time for round two, you need dry heat to bring that crunch back. The oven works perfectly, just like when we baked them the first time. Set the oven to about 350 degrees Fahrenheit—a little lower than the initial bake. Pop the falafel directly on a baking sheet (no need for parchment this time, unless your pan is truly ancient and sticky) and heat them for about 8 to 10 minutes. They should be hot all the way through and nicely crisp again.
If you are lucky enough to have an air fryer, that is my *favorite* method for reheating. It takes less time! Toss the cooled falafel in the basket—don’t crowd them—and cook at 375 degrees Fahrenheit for just 4 or 5 minutes. They come out tasting like they just came out of the ‘fresh batch’! Re加热ing is essential, especially if you plan on packing them up for lunches later on. If you’re looking for other dishes that pack well for lunch, you should check out my recipe for easy chicken tostadas—they handle reheating beautifully!
Frequently Asked Questions About Crispy Baked Falafel
When I first started messing around with baking these, I had a million questions too! People always ask me about texture and substitutions, so I figured I’d gather the top ones here for everyone. It’s all about getting that perfect crunch every single time you make them.
Can I use dried chickpeas instead of canned for Crispy Baked Falafel?
This is a big one! For this specific recipe, I strongly recommend using canned chickpeas that you’ve rinsed and drained really well. When you use dried chickpeas, even if you soak them overnight, they absorb much more water and they release it slower during the baking process. That extra moisture fights against us trying to get that lovely crisp exterior you want in Crispy Baked Falafel.
If you *must* use dried chickpeas—maybe you prepped them for another recipe—you would need to cook them fully first. Then, you have to dry them out as much as possible afterward. Honestly, for the speed and guaranteed result of this baked recipe, stick to the can and save your pre-soaked chickpeas for making a slow-cooked stew or maybe even testing out my vegetarian lentil burger recipe next!
How can I make these falafel even crispier?
If you’re aiming for that ultimate crunch factor—and I totally support that mission—here’s my absolute last-minute trick, right before they go into the oven. Pat your shaped patties (or balls) with a clean paper towel one more time. Just a quick dab!
Then, gently flatten them just a little bit more than you think you need to. If they are too thick, the inside steams itself before the outside can fully crisp up. Making them slightly flatter increases the surface area exposed to the hot oven air, which just means more crunch for you! This slight flattening, combined with that 400-degree heat, really guarantees you get the best results for your Crispy Baked Falafel.
What is the ideal size for the falafel balls?
I found when they are too big, the center stays a bit soft even after 25 minutes of baking. You want them about the size of a large marble or a small walnut. If you use a tablespoon measure to scoop them, they come out perfect. They are small enough to heat all the way through quickly but large enough to hold that nice, herby interior together when you flip them for the second half of the bake time.
Why do I need to add flour if I’m using chickpeas?
That flour isn’t for volume, it’s strictly for science! Since we aren’t deep-frying, we don’t have that oil bath to instantly harden the outside. The flour acts as a very gentle binder and helps absorb any surface moisture left over from rinsing the canned chickpeas. Without it, the patties tend to crumble when you try to flip them, and nobody wants that disaster for their supposed Crispy Baked Falafel!
Nutritional Estimate for Crispy Baked Falafel
I always try to keep the nutrition facts handy because it helps me understand what I’m eating, but I need to give you a little disclaimer right up front. Since this is a home recipe and we aren’t weighing everything down to the milligram, these numbers are a general estimate. These estimates are based on the recipe yielding about 12 falafel patties in total.
So, for a standard serving size of 2 patties, here is the approximate breakdown:
- Calories: around 180
- Fat: about 6 grams
- Saturated Fat: 1 gram
- Unsaturated Fat: 5 grams
- Protein: 8 grams
- Carbohydrates: 28 grams
- Fiber: A fantastic 7 grams!
- Sugar: Only 1 gram—that all comes naturally from the chickpeas.
- Cholesterol: Zero, because we are keeping it plant-based!
See? That’s why I love baking these Crispy Baked Falafel! It’s a hearty, vegetarian meal that gives you a huge boost of fiber and protein without all the heavy saturated fat you’d get from true deep-frying. Enjoy knowing you made something delicious *and* wholesome!
Share Your Crispy Baked Falafel Experience
Okay, that’s truly everything you need to know to get the absolute best Crispy Baked Falafel right out of your own oven! I hope you feel as excited about this recipe as I do. It changed my weeknight vegetarian game, and I just know it will change yours, too.
Now I need to hear from you! Did they turn out perfectly crispy on the first try? Did you pair them with a killer tahini sauce, or maybe you tried stuffing them into something wild, like those easy easy roll-ups I love making? I absolutely cherish hearing how you adapt my family’s favorite recipes to fit your own kitchen style.
Please come back here and leave a star rating—it really helps other home cooks decide if they should dive in. And if you snap a picture of your golden beauties piled high on a platter, tag me on social media! I love seeing your success stories. Happy baking, my friends!
Print
Crispy Baked Falafel
- Total Time: 40 min
- Yield: About 12 falafel 1x
- Diet: Vegetarian
Description
A recipe for making crispy falafel in the oven instead of deep-frying.
Ingredients
- 1 (15-ounce) can chickpeas, rinsed and drained
- 1/2 cup fresh parsley, packed
- 1/4 cup fresh cilantro, packed
- 1/2 small onion, roughly chopped
- 2 cloves garlic
- 1 teaspoon ground cumin
- 1/2 teaspoon ground coriander
- 1/4 teaspoon cayenne pepper
- 1/2 teaspoon salt
- 1/4 teaspoon black pepper
- 2 tablespoons all-purpose flour
- 1 tablespoon olive oil
Instructions
- Preheat your oven to 400 degrees Fahrenheit (200 degrees Celsius). Line a baking sheet with parchment paper.
- In a food processor, combine the chickpeas, parsley, cilantro, onion, garlic, cumin, coriander, cayenne pepper, salt, and black pepper. Pulse until the mixture is coarsely ground but still holds together. Do not over-process into a paste.
- Transfer the mixture to a bowl. Stir in the flour and olive oil until just combined.
- Scoop tablespoon-sized amounts of the mixture and shape them into small patties or balls. Place them on the prepared baking sheet.
- Bake for 20 to 25 minutes, flipping them halfway through, until they are golden brown and crispy.
Notes
- Serve the baked falafel with tahini sauce or in pita bread with fresh vegetables.
- If the mixture seems too wet, add one more teaspoon of flour.
- Prep Time: 15 min
- Cook Time: 25 min
- Category: Main Dish
- Method: Baking
- Cuisine: Middle Eastern
Nutrition
- Serving Size: 2 patties
- Calories: 180
- Sugar: 1
- Sodium: 350
- Fat: 6
- Saturated Fat: 1
- Unsaturated Fat: 5
- Trans Fat: 0
- Carbohydrates: 28
- Fiber: 7
- Protein: 8
- Cholesterol: 0
Keywords: baked falafel, crispy falafel, chickpea patties, vegetarian, Middle Eastern