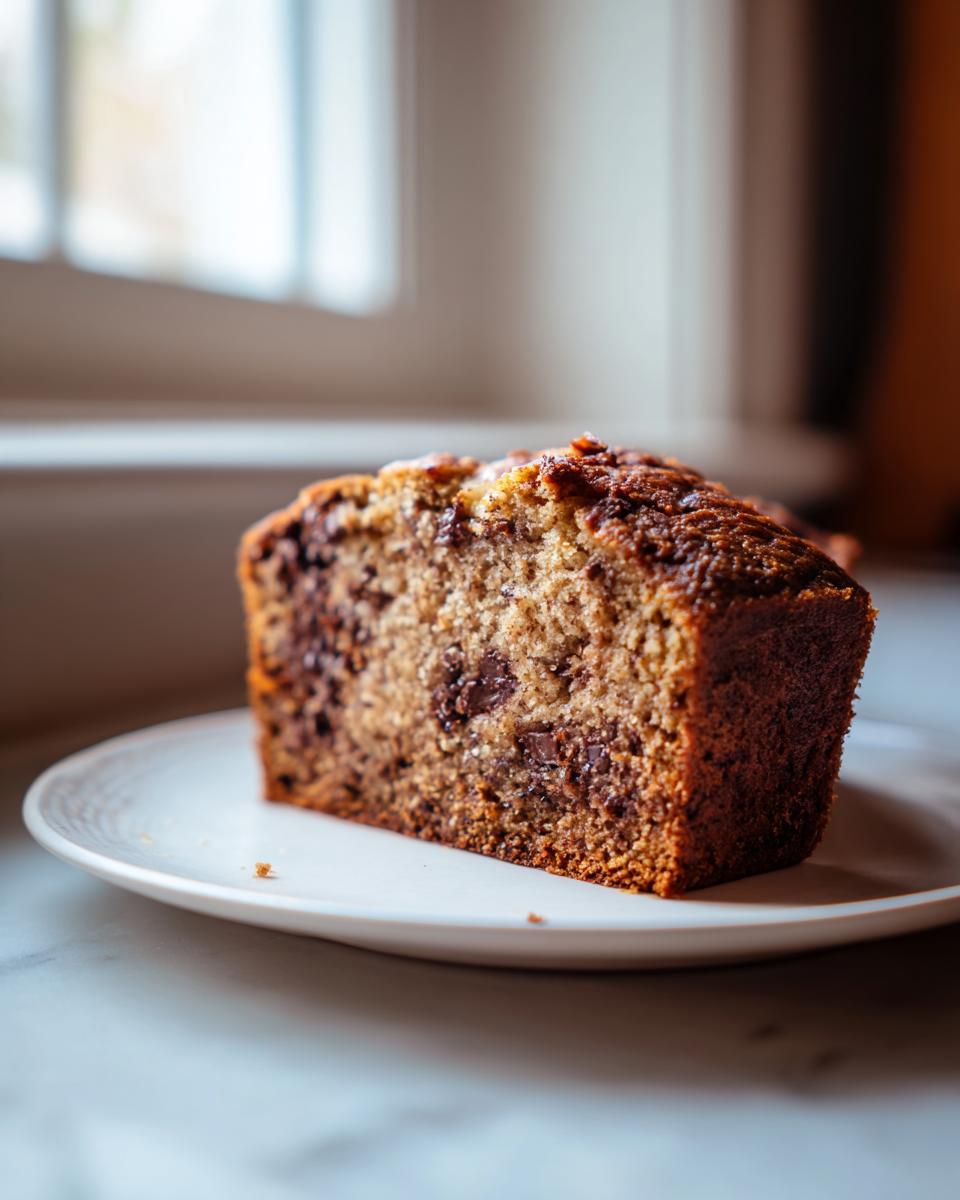
There’s just something magical about a good quick bread, isn’t there? They come together in a flash, and the house smells incredible! But I have to tell you, my absolute favorite thing to whip up—especially when those bananas in the fruit bowl start looking decidedly sad—is this Simple Chocolate Banana Bread. Forget dry, crumbly loaves; this recipe focuses entirely on achieving that perfect, deep moisture you dream about.

Trust me, I’ve thrown out more flops than I care to admit trying to get this just right. We’ve nailed the ratios of butter to sugar and the exact amount of banana mash needed. After probably twenty attempts over the years, I finally landed on this version. It’s the easiest, most foolproof way to get that rich, deeply flavorful chocolate banana bread every single time. You’re going to love how reliable it is!
Why This Chocolate Banana Bread Recipe Works So Well
It’s not just another recipe thrown together; this one proves that simple ingredients, treated right, make all the difference. I’ve streamlined the process so much that even if you’re just starting out, you’ll feel like a pro. What makes this quick bread stand above the rest boils down to two main things we focus on.
- Unbeatable Moisture: Say goodbye to dry slices!
- Foolproof Steps: Seriously hard to mess up, even if you’re rushing.
- Deep Flavor: The chocolate melts right into the banana base.
If you want to see another favorite moist bread, check out my other classic banana bread recipe—it’s an old treasure!
Achieving Ultimate Moisture
The secret to moisture here is absolutely the bananas. You want them almost black, honestly! When they’re that ripe, they are full of sugar and moisture that melts right into the cake. Plus, we use a decent amount of butter, which coats the flour particles and keeps everything tender, not tough.
Simple Mixing Technique for Perfect Chocolate Banana Bread
This is where most people go wrong with any quick bread, and that’s on the mixing button! Once you combine the wet ingredients (bananas and eggs) with the dry ones (flour and leavening agents), you must stop mixing the second you don’t see flour streaks. Overmixing develops gluten, and gluten gives you a tough, chewy result in your wonderful Chocolate Banana Bread.
Gathering Ingredients for Your Chocolate Banana Bread
Okay, let’s get our supplies ready! Baking is only fun when you’re not running to the store mid-recipe. I’ve kept this list super simple because I want you to be able to make this anytime the craving hits. We need the basics, of course, but pay close attention to the state of those bananas!
You’ll need:
- Two cups of all-purpose flour.
- A teaspoon of baking soda and just half a teaspoon of salt.
- Half a cup of butter, softened—and I mean actually softened, not half-melted!
- Three-quarters cup of regular granulated sugar.
- Two large eggs, just standard size is perfect.
- One teaspoon of that lovely vanilla extract.
- One full cup of mashed bananas—that’s usually about three medium ones, but measure them after mashing!
- And finally, half a cup of chocolate chips. Oh, the decision-making starts now!
If you happen to be out of something bulky like heavy cream, maybe you can check out this neat trick for making heavy cream at home. It uses pantry staples, which is always a win.
Ingredient Notes and Substitutions for Chocolate Banana Bread
Remember what I said? Use the spotty, almost black bananas. If they look okay on the outside but are still firm inside, they won’t give you the flavor or moisture we need in this banana bread recipe. That ripeness is non-negotiable for the best flavor!
When it comes to the chocolate chips, feel free to swap them out. Semi-sweet is my go-to because it cuts the sweetness of the bread perfectly. But if you’re feeling like a darker, richer bake, use dark chocolate chips. Or—and this is for my serious chocolate lovers—you can use just a tablespoon of cocoa powder mixed into your dry ingredients and skip the chips entirely for a rich, deep chocolate flavor throughout.
Essential Equipment for Baking Chocolate Banana Bread
You don’t need a whole arsenal of specialized gadgets for this recipe, which is another reason I love it! Having the right basic tools makes the mixing process so much smoother. Trust me, trying to cream butter with a tiny spoon is just asking for trouble.
Here is what you absolutely need to have handy before you start creaming that butter:
- A sturdy 9×5 inch loaf pan. This is the standard size, and the baking time is set for it. If you use a slightly smaller pan, you’ll need to bake longer!
- Two good mixing bowls—one medium for your dry stuff and a large one for the butter, sugar, and bananas.
- A reliable whisk for the flour ingredients and a hand mixer or a very strong wooden spoon for creaming the butter and sugar. I still prefer my hand mixer for speed, but Grandma did hers all by hand!
- Finally, you need something to check if it’s done. A wooden skewer or a thin metal knife works perfectly for testing the center.
That’s it! No fancy stand mixers or pastry blenders required. Keep your tools simple, and you keep your cleanup simple, too.
Step-by-Step Instructions for Perfect Chocolate Banana Bread
Alright, here is the playbook! If you follow these steps exactly, you’re halfway to the best banana bread you’ve ever made. The whole process moves pretty fast once you get going, so make sure you have everything measured out first. We’re aiming for speed and gentleness here.
First things first: get that oven preheated to 350 degrees F (175 degrees C). While it’s warming up, grab that 9×5 inch loaf pan. Don’t try to skip greasing and flouring it—this bread loves to stick, and we want that beautiful loaf intact! I usually grease mine generously, then dust it with flour, tapping out any big excess.
Preparing the Dry and Wet Mixtures for Chocolate Banana Bread
We start by combining the dry stuff: flour, baking soda, and salt go into a medium bowl and get a quick whisk together. Don’t skip that whisking; it helps distribute the soda evenly so your bread rises right.
Now for the big bowl! Cream that softened butter with the sugar until it gets fluffy—it should look noticeably lighter in color. Then, beat in those eggs one by one, making sure each one is fully incorporated before adding the next. Vanilla comes next, followed by your mashed bananas, which you stir in *until just combined*. Remember, don’t overmix anything yet!
This next part is crucial for great Chocolate Banana Bread: gradually add the flour mixture into the wet stuff. Mix on low speed, or fold gently by hand, until you see almost no white streaks of flour remaining. Stop stirring immediately after that, then fold in your chocolate chips quickly. Seriously, stop stirring!
Baking and Cooling Your Chocolate Banana Bread
Pour that beautiful batter right into your prepared pan. It should bake for right around 50 to 60 minutes at 350 degrees. We are looking for that wooden skewer inserted near the center to come out clean, maybe with just a few moist crumbs clinging to it—no wet batter allowed!
Be patient once it’s done! Let it cool in the pan for a good solid ten minutes. This lets the structure set up properly. Then, gently turn it out onto a wire rack to cool completely. Cutting into hot banana bread is only going to lead to squished edges, and we can’t have that!
For more easy baking tips, especially for quick-bake items, you might enjoy my guide on how to make classic homemade doughnuts!
Tips for Success When Making Chocolate Banana Bread
Even with a simple recipe like this, a couple of extra tricks can take your bake from “good” to “I can’t believe I made this!” I learned these the hard way, so you don’t have to!
My biggest game-changer moment came one afternoon when my bread was browning way too fast on top, but the middle was still jiggly. I almost panicked and pulled it early! Instead, I quickly fashioned a little shield. Take a piece of aluminum foil—just a square big enough to cover the top of your loaf pan—and lightly tent it over the top halfway through the baking time. This locks in the moisture underneath while preventing the sugars on top from burning to a crisp. It’s the best way to ensure the whole loaf bakes evenly.
Another key tip is the chocolate chip distribution. If you just dump them all in at the end, they sink to the bottom, which is super disappointing. I avoid this by taking about a quarter of my chocolate chips and tossing them lightly with a teaspoon of flour before folding them into the batter. That little coating of flour helps keep them suspended as the bread bakes. It’s a small silly step, but it guarantees chocolate in every single bite of your Chocolate Banana Bread.
If you are interested in tweaking some of the base flavors, my friend who contributed some ideas for this recipe has another amazing banana bread recipe guide you might want to look at for comparison on spice levels!
Storage and Reheating Instructions
This quick bread is actually fantastic because it holds its moisture so nicely, even without any fancy glaze on top. Don’t even think about slicing it all at once! This loaf tastes even better the next day once all those chocolate chips and banana flavors have had time to really meld together.
You’ll want to keep it wrapped up tight. Once the bread is totally cooled—and I mean completely cool, or it will sweat and get soggy—wrap the whole loaf securely in plastic wrap. If I know we won’t finish it in two days, I go straight for aluminum foil around the plastic wrap. This keeps the air out effectively.
At room temperature, wrapped well, you can count on it being perfect for about three to four days. If your kitchen is super hot, I might risk two days at room temp and then move it to the fridge, but honestly, cold banana bread is sad banana bread if you ask me!
Waking Up Leftover Slices
If you do refrigerate it, or if it’s a day old and just isn’t quite as tender as you remember, reheating is your best friend. You just need about ten to fifteen seconds in the microwave. I usually slice off just what I’m going to eat and zap that piece for long enough to warm the butter content back up.
The microwave works fast, but it can sometimes turn things tough quickly after that first warm-up. For a truly luxurious experience, try wrapping your slice in a tiny bit of foil and letting it heat gently in a 300-degree oven for ten minutes. That gently warms the chocolate without drying out the inside. It’s worth the extra fuss, I promise you!
Variations on Classic Chocolate Banana Bread
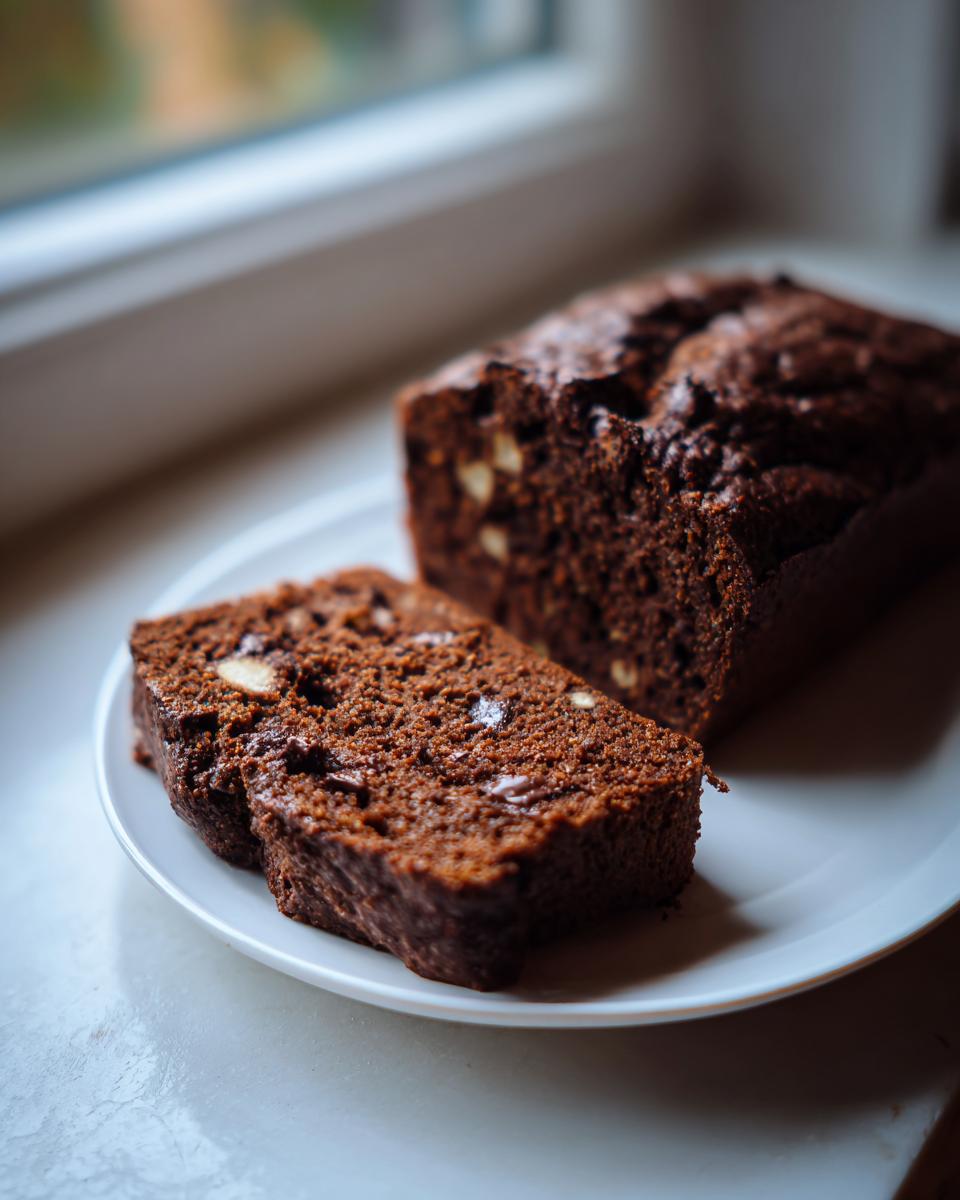
While this recipe is perfect exactly as it is, sometimes you just need to jazz things up a little, right? Maybe you have some toasted walnuts lurking in the pantry, or maybe you just feel like adding a little extra warmth to the spice profile. Good news: this recipe is super adaptable! Because the base structure is so solid, it handles mix-ins like a champ.
The most common swap I make is for texture. My family loves nuts, so I often fold in about half a cup of chopped pecans or walnuts with the chocolate chips. If you toast them lightly first—just a few minutes in a dry skillet over medium heat—it really brings out that earthy, nutty flavor that pairs amazingly well with the rich chocolate.
Adding Warm Spices
If you’re looking for a flavor kick that goes beyond just chocolate, spices are the way to go! Our starting recipe has none, but you can easily introduce them. I find that adding just a teaspoon of ground cinnamon into the dry flour mixture works wonders. Cinnamon and banana are old friends, and they really bring a comforting depth to the loaf.
For a bolder, warmer version—especially if you are baking this around the holidays—try adding a quarter teaspoon of ground nutmeg along with the cinnamon. It won’t taste like pumpkin bread, don’t worry! It just complements the vanilla and sugar beautifully. If you’re feeling ambitious and want to get really fancy with spices, I saw a great idea in my friend’s cinnamon swirl recipe that you could adapt for this loaf, maybe by mixing cinnamon into a portion of the batter before swirling it in!
Swapping Out the Chocolate Type
We already talked about going dark or sticking to semi-sweet chips, but there’s another fun way to change up the chocolate element. What if you don’t want chips suspended throughout, but a gooey center? Try using chocolate chunks instead of chips. The chunks melt slower and create those wonderful pools of melted chocolate in random spots.
Another idea is to stop using solid chips altogether and use a packet of instant chocolate pudding mix instead. Just toss one dry packet right into your flour mix! It doesn’t change the look much, but that pudding powder has stabilizers that make the final crumb incredibly soft and almost velvety. It’s a truly fun texture experiment!
Frequently Asked Questions About Chocolate Banana Bread
It’s always the last few questions that trip people up, isn’t it? Baking, especially quick bread baking, has a few little quirks regarding texture and timing. I’ve compiled the questions I get asked the most about this recipe, so hopefully, we can clear up any last-minute doubts!
Can I use green bananas instead of ripe ones for this recipe?
Oh, please don’t try this! If your bananas are still firm and yellow, they are high in starch and very low in natural sugar. They won’t mash properly, and they certainly won’t give you that deep, sweet banana flavor our bread relies on. Starch doesn’t break down into moisture while baking; it just stays starchy and a bit chalky. You need those bananas to be spotty, soft, and easy to mash into a liquidy consistency. That’s where the moisture and the foundational sweetness come from in this easy baking recipe.
How do I prevent my banana bread from becoming gummy?
Gummy almost always means one of two things, and we talked about both! First, you absolutely must resist the urge to overmix once the flour hits the wet ingredients. Mixing too much develops gluten strands, which creates a dense, gummy texture we are trying to avoid. Stop mixing the second the flour disappears!
The second reason is almost always cooling time. If you are too excited, like I sometimes am, and try to slice into a loaf that’s still piping hot, the steam gets trapped and condenses inside the bread, making that soft center turn gummy. You have to give it that mandated ten minutes in the pan to firm up, then get it out onto the rack to let that steam fully escape before slicing.
Why did my quick bread sink in the middle?
Ugh, the sinking center is the saddest thing! Usually, this happens because the oven temperature wasn’t quite high enough to set the outside structure before the center—which is heavy with bananas and chips—collapsed. Make sure your oven is fully preheated before it goes in. Another big reason is opening the oven door too early! If you check before the 50-minute mark, the sudden rush of cool air can cause that tender middle to fall right down. Give it a full 50 minutes minimum before even glancing at the window!
Estimated Nutritional Breakdown for Chocolate Banana Bread
I always think it’s important to have a general idea of what’s in the goodies we bake, even if we try not to worry about it while we’re eating them! This bread is a wonderful treat, but it does come with a bit of sweetness and fat from the butter and chips, so you know what you’re getting into.
Please keep in mind that these numbers are just estimates, folks. My recipe conversion software calculated these based on standard pantry measurements, so if you used extra-large bananas or a different kind of chocolate chip brand, the final numbers might shift slightly. But these should give you a really good ballpark idea for about one slice!
Here’s the quick rundown:
- Calories: Around 250 per slice. Not bad for something this delicious!
- Sugar Content: About 18 grams. That’s the natural goodness from the bananas mixed with the added granulated sugar.
- Total Fat: Right around 12 grams for that slice.
- Carbohydrates: About 35 grams total.
- Protein: A modest 4 grams, mostly from the eggs and flour.
Honestly, the best part is that this is a homemade quick bread, so we know exactly what went into it—no weird preservatives or hidden ingredients here. If you wanted to lower the sugar a bit, you could always try substituting some of the granulated sugar with a zero-calorie sweetener, but remember that sugar does help keep the bread tender, so don’t cut it too far back!
Print
Simple Chocolate Banana Bread
- Total Time: 75 min
- Yield: 1 loaf 1x
- Diet: Vegetarian
Description
A straightforward recipe for moist chocolate banana bread.
Ingredients
- 2 cups all-purpose flour
- 1 teaspoon baking soda
- 1/2 teaspoon salt
- 1/2 cup unsalted butter, softened
- 3/4 cup granulated sugar
- 2 large eggs
- 1 teaspoon vanilla extract
- 1 cup mashed ripe bananas (about 3 medium)
- 1/2 cup chocolate chips
Instructions
- Preheat your oven to 350 degrees F (175 degrees C). Grease and flour a 9×5 inch loaf pan.
- In a medium bowl, whisk together the flour, baking soda, and salt. Set aside.
- In a large bowl, cream together the softened butter and sugar until light and fluffy.
- Beat in the eggs one at a time, mixing well after each addition. Stir in the vanilla extract.
- Mix in the mashed bananas until just combined.
- Gradually add the dry ingredients to the wet ingredients, mixing until just combined. Do not overmix.
- Fold in the chocolate chips.
- Pour the batter into the prepared loaf pan.
- Bake for 50 to 60 minutes, or until a wooden skewer inserted into the center comes out clean.
- Let the bread cool in the pan for 10 minutes before turning it out onto a wire rack to cool completely.
Notes
- Use very ripe, spotty bananas for the best flavor.
- You can substitute semi-sweet chocolate chips with milk chocolate or dark chocolate.
- Prep Time: 15 min
- Cook Time: 60 min
- Category: Dessert
- Method: Baking
- Cuisine: American
Nutrition
- Serving Size: 1 slice
- Calories: 250
- Sugar: 18
- Sodium: 150
- Fat: 12
- Saturated Fat: 7
- Unsaturated Fat: 5
- Trans Fat: 0
- Carbohydrates: 35
- Fiber: 2
- Protein: 4
- Cholesterol: 50
Keywords: chocolate banana bread, banana bread recipe, quick bread, chocolate chips, easy baking