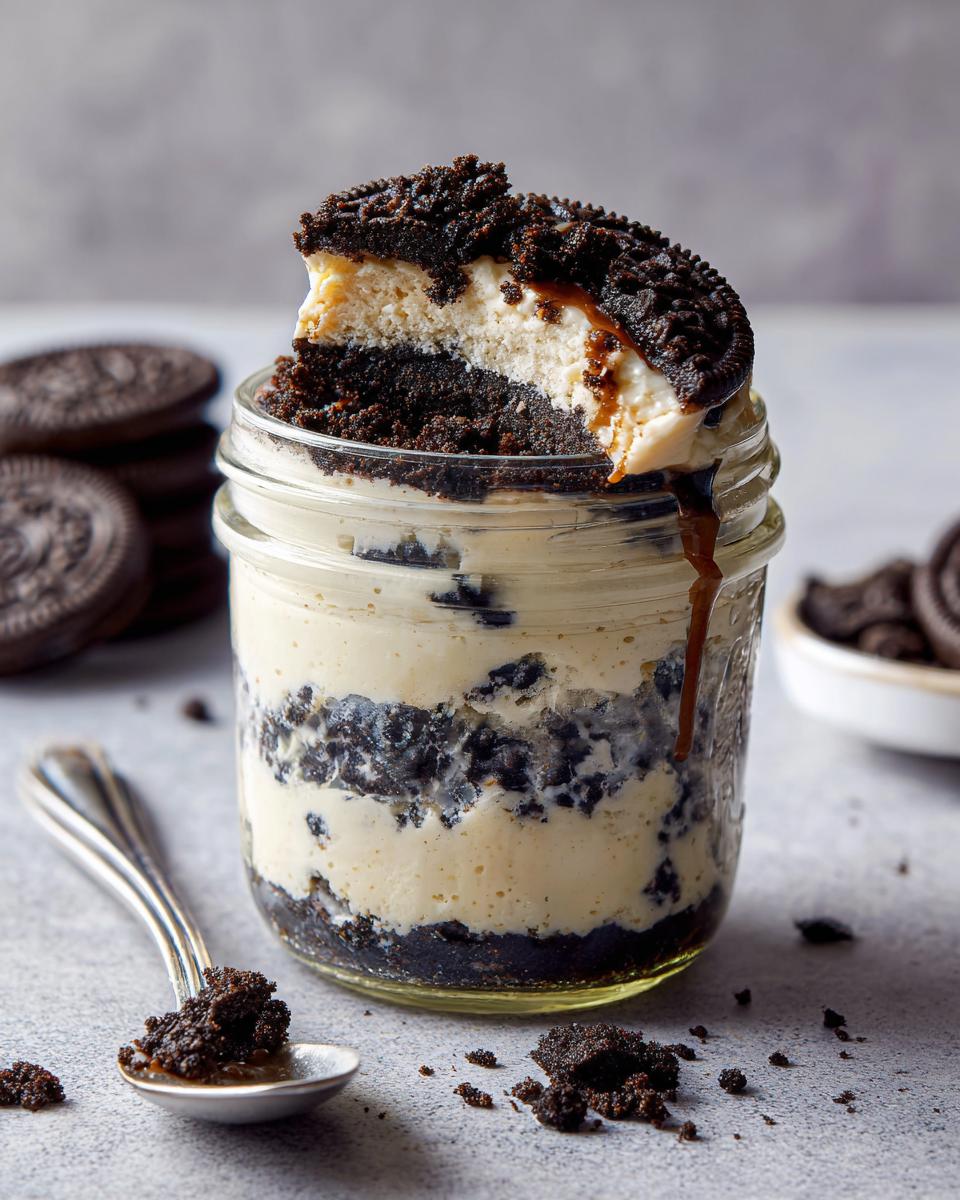
Oh, you HAVE to try making these Chilled Oreo Cheesecake in a Jar! Seriously, they’re my go-to for pretty much any occasion, or, let’s be honest, just because I’m craving something sweet. The best part? No oven required! It’s a total lifesaver when you want a seriously decadent dessert but don’t want the fuss. Plus, serving them in little jars just makes them feel extra special, doesn’t it?
Discover the Deliciousness of Chilled Oreo Cheesecake in a Jar
Honestly, these Chilled Oreo Cheesecake in a Jar recipes are just pure magic. You get that classic, creamy cheesecake vibe with all the crunchy, chocolatey goodness of Oreos, all without even turning on the oven! It’s a game-changer, trust me. The flavor is just spot-on – rich, sweet, and that little bit of tang from the cream cheese is so good. And the presentation? Serving them up in individual jars is just adorable and makes portion control (or lack thereof!) super easy. It’s the perfect no-bake dessert for when you want something impressive but also super simple to whip up. Plus, everyone gets their own little personal treat, which is always a win!

Gather Your Ingredients for Chilled Oreo Cheesecake in a Jar
Alright, let’s get down to business! To make these dreamy little jars of happiness, you’ll need just a few things. Don’t worry, they’re all super easy to find.
Essential Ingredients for Your Chilled Oreo Cheesecake in a Jar
- 1 (8-ounce) package cream cheese, fully softened: This is key for a smooth, lump-free filling. Make sure it’s really at room temperature, not just a little soft.
- 1/2 cup powdered sugar, sifted: Sifting it helps avoid any little grainy bits, giving you that super silky texture we’re going for.
- 1 teaspoon pure vanilla extract: A little splash of vanilla really wakes up all the flavors.
- 1 cup heavy whipping cream, cold: Make sure this is nice and cold before you whip it. It makes all the difference for getting those lovely stiff peaks.
- 18 Oreo cookies, finely crushed, divided: You’ll need most of them for the layers, but save about a quarter cup for sprinkling on top. I like to crush them in a food processor, but a Ziploc bag and a rolling pin works too!
- Optional: 1/2 cup whipped cream for topping: If you’re feeling fancy, a dollop of whipped cream on top is just divine!
That’s it! See? Super simple. Having everything prepped makes the whole process a breeze.
Step-by-Step Guide to Making Chilled Oreo Cheesecake in a Jar
Okay, so putting these Chilled Oreo Cheesecake in a Jar together is honestly the fun part, and it’s so easy you’ll be hooked. Since it’s no-bake, we’re basically just mixing and layering. Let’s get started!
Preparing the Creamy Cheesecake Filling
First things first, grab your bowl and that softened cream cheese. You really want it super soft, like butter, so it beats up nice and smooth. I usually just give it a good whip with my electric mixer until it’s totally lump-free. Then, in goes the sifted powdered sugar and that splash of vanilla. Beat it all together until everything is just perfectly combined and looks like creamy, dreamy goodness. No grainy bits allowed!
Incorporating the Oreos and Whipped Cream
Now for the magic! In a separate bowl, whip up that cold heavy cream until it holds stiff peaks. You know, when you lift the whisk, the cream stays up in pointy little mountains? That’s what you’re looking for. Then, gently, and I mean *gently*, fold that fluffy whipped cream into your cream cheese mixture. You don’t want to deflate all that lovely air, so just a few careful folds will do. Once that’s looking lovely and combined, stir in most of your crushed Oreos. Save a little bit for the top, though!
Assembling Your Chilled Oreo Cheesecake in a Jar
This is where it starts looking like a real dessert! Grab your cute little jars – mason jars, small glasses, whatever you have. Spoon or pipe that glorious cheesecake mixture into them. Fill them up about two-thirds of the way. Then, sprinkle the remaining crushed Oreos right on top. It gives it that gorgeous contrast and extra crunch. Honestly, they look so pretty right from the start!
Chilling for Perfect Texture
This is the hardest part – waiting! You’ve got to pop these beauties into the fridge for at least 2 hours. This is super important because it lets the cheesecake filling firm up and get that lovely, creamy texture. Don’t skip this step, or you’ll end up with a runny mess instead of a proper cheesecake. Trust me, the wait is totally worth it!
Tips for the Perfect Chilled Oreo Cheesecake in a Jar
Okay, so you’ve got the basic steps down for your Chilled Oreo Cheesecake in a Jar, but let’s talk about making them absolutely *perfect*. A few little tricks can really elevate these from good to totally amazing!
Ensuring a Smooth Cheesecake Filling
Seriously, the *most* important thing for a silky smooth filling is making sure your cream cheese is truly, fully softened. I usually take mine out of the fridge a good hour or two before I plan to start. If you’re in a rush, you can cut it into little cubes and microwave it *very* gently for just a few seconds at a time, but be careful not to melt it! You just want it pliable. When you beat it with the powdered sugar, give it a good minute or two to really get all those lumps out. It makes a world of difference!
Customizing Your Chilled Oreo Cheesecake in a Jar
While the classic Oreo version is divine, don’t be afraid to play around! Feeling adventurous? Try crushing up some chocolate chip cookies or even some graham crackers for the crust layer instead of Oreos. You could also fold in a handful of mini chocolate chips or even some caramel swirls into the cheesecake filling itself. And for the topping? A little sprinkle of chocolate shavings or even some chopped nuts would be delicious. The base recipe for this Chilled Oreo Cheesecake in a Jar is so forgiving, so have fun with it!
Frequently Asked Questions About Chilled Oreo Cheesecake in a Jar
Got questions about these yummy Chilled Oreo Cheesecake in a Jar? I’ve got answers! People always ask me about making them ahead of time, or if they can switch up the cookies. Let’s dive in!
Can I Make Chilled Oreo Cheesecake in a Jar Ahead of Time?
Oh, absolutely! This is one of my favorite things about this recipe. You can totally make these a day in advance. In fact, I think they’re even better when they’ve had a full night in the fridge to really chill out and let all those flavors meld together. Just pop them in the fridge once you’ve assembled them, and they’re ready to go whenever you need a sweet treat!
What Jars Are Best for Chilled Oreo Cheesecake in a Jar?
Honestly, almost any small jar works perfectly! I usually reach for those cute little 4-ounce or 8-ounce mason jars. They’re just the right size for a single serving and look so charming. You could also use small jelly jars, baby food jars if you have them lying around, or even little glass ramekins. Just make sure they have lids so you can cover them up tight in the fridge!
Understanding the Nutrition for Chilled Oreo Cheesecake in a Jar
Now, I know we’re not making these Chilled Oreo Cheesecake in a Jar for their health benefits, right? But it’s good to have a general idea of what you’re diving into! So, roughly speaking, a single serving of these creamy delights usually comes in around 350-400 calories. You’re looking at about 25-30 grams of fat, with around 15 grams of that being saturated fat – that’s from the cream cheese and heavy cream, which give it that amazing richness. You’ll get about 30-35 grams of carbohydrates, mostly from the sugar and the cookie crust. Protein-wise, you’re looking at about 5 grams per jar. But remember, this is just an estimate! Depending on the exact brands you use and how generous you are with the Oreo crumbles on top, the numbers can shift a little. Enjoy them guilt-free (or with just a little guilt – that’s okay too!).
Print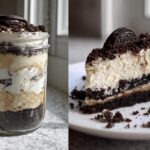
Chilled Oreo Cheesecake in a Jar: 3 Easy Steps
- Total Time: 2 hours 20 minutes
- Yield: 4-6 servings 1x
- Diet: Vegetarian
Description
A no-bake cheesecake featuring a crushed Oreo crust layered with a creamy cheesecake filling and topped with more crushed Oreos, all served in convenient jars.
Ingredients
- 1 (8 ounce) package cream cheese, softened
- 1/2 cup powdered sugar
- 1 teaspoon vanilla extract
- 1 cup heavy whipping cream
- 18 Oreo cookies, crushed, divided
- Optional: Whipped cream for topping
Instructions
- In a medium bowl, beat the softened cream cheese until smooth.
- Add the powdered sugar and vanilla extract. Beat until well combined.
- In a separate bowl, whip the heavy cream until stiff peaks form.
- Gently fold the whipped cream into the cream cheese mixture until just combined.
- Stir in 3/4 cup of the crushed Oreos.
- Spoon the cheesecake mixture into individual jars.
- Top with the remaining crushed Oreos.
- Chill in the refrigerator for at least 2 hours before serving.
- Garnish with whipped cream if desired.
Notes
- For a smoother filling, ensure your cream cheese is fully softened.
- You can adjust the amount of Oreos to your preference.
- These can be made a day in advance.
- Prep Time: 20 minutes
- Cook Time: 0 minutes
- Category: Dessert
- Method: No-Bake
- Cuisine: American
Nutrition
- Serving Size: 1 jar
- Calories: 350
- Sugar: 25g
- Sodium: 200mg
- Fat: 25g
- Saturated Fat: 15g
- Unsaturated Fat: 10g
- Trans Fat: 0g
- Carbohydrates: 30g
- Fiber: 1g
- Protein: 5g
- Cholesterol: 75mg
Keywords: Oreo cheesecake, no-bake cheesecake, cheesecake in a jar, dessert recipe, easy dessert, chocolate cookie dessert