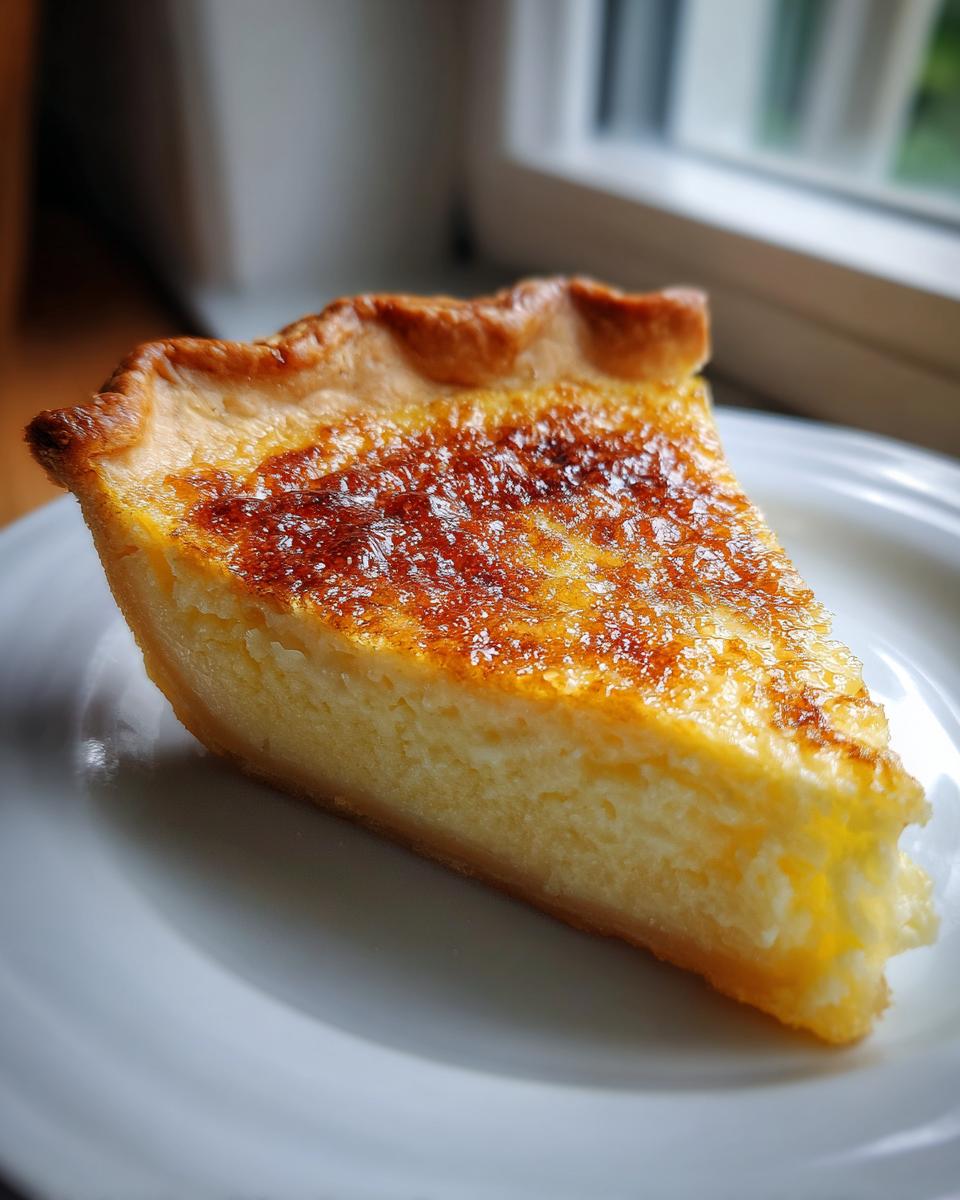
Oh, honey, if you want that true-blue Southern comfort food hug on a plate, forget fussy layered cakes. We are diving headfirst into the world of Buttermilk Pie. This isn’t one of those recipes that tries to reinvent the wheel; it’s the classic custard pie you remember from church potlucks and family reunions, folks. And trust me when I say this is the easiest, most satisfying pie you’ll ever make. I’ve been turning out perfect, shiny tops on this pie since I was tall enough to stir the bowl for my Aunt Clara. It just sings with that perfect balance of sweet and tangy, and you can whip up the filling in about fifteen minutes flat. It’s just pure, beautiful dairy magic.
Why This Buttermilk Pie Recipe Stands Out
If you’ve been intimidated by pastry cream or complicated fillings, stop right there! This Buttermilk Pie is your new best friend. Honestly, it’s the recipe I turn to when I need something show-stopping but only have a few minutes to spare before company arrives. It’s just good, honest Southern baking.
- It requires almost no special equipment—just a bowl and a whisk!
- The final texture is silky smooth custard nestled in a flaky crust.
- It uses pantry staples, meaning you probably have everything you need right now. Seriously, you can have this done baking before you finish your coffee.
Quick Prep Time for Your Buttermilk Pie
You read that right—fifteen minutes of hands-on time! That’s it. We aren’t waiting for yeast to bloom or chilling dough for hours. You whisk the sugar, flour, and salt, dump in the wet stuff, and pour it into your pie shell. It’s ridiculously fast. If you want to see something else that’s speedy but amazing, check out my recipe for easy cheesecake; it’s another quick winner.
Authentic Southern Buttermilk Pie Flavor
The star, of course, is the buttermilk. That slight tang cuts right through the richness of the butter and eggs. It stops the pie from tasting like plain sweet custard—it gives it that signature zing that makes you go back for a second slice every single time. That’s what makes it truly Southern!

Essential Ingredients for the Perfect Buttermilk Pie
When you keep a recipe this simple, the quality of what goes in really matters, you know? We aren’t hiding flavors behind seven different spices here; it’s just pure, sweet custard goodness. I keep all the ingredients listed below tucked away because I can whip this pie up anytime, but I have a couple of must-dos when shopping for them.
First off: Buttermilk! If you’re grabbing something for this pie, make sure it’s full-fat. Low-fat buttermilk just doesn’t lend the same richness or body to the final custard. Also, it’s important that your eggs are nice and relaxed—I mean, room temperature! Cold eggs can shock the melted butter when you mix everything, and that’s how you get tiny little cooked streaks in your otherwise smooth filling. It’s a small thing that makes a huge difference in texture, trust me.
Here’s what you need lurking in your pantry for an 8-serving masterpiece:
- 1 (9 inch) unbaked pie crust (I use my favorite store-bought one when I’m running short on time!)
- 1 1/2 cups granulated sugar
- 3 tablespoons all-purpose flour
- 1/4 teaspoon salt
- 1/2 cup (1 stick) unsalted butter, melted and slightly cooled
- 3 large eggs, lightly beaten
- 1 cup buttermilk (Full-fat, remember!)
- 1 teaspoon vanilla extract
Ingredient Notes and Substitutions for Buttermilk Pie
Okay, let’s talk substitutions, because sometimes life happens and you run out of that tangy buttermilk. Don’t panic! You can make a perfectly acceptable substitute in a pinch. Just measure out 1 cup of regular milk—whole milk is best—and stir in one tablespoon of white vinegar or fresh lemon juice. Let that sit on the counter for about five minutes until it curdles slightly. That’s your quick fix buttermilk! It works every time.
Also, remember those room temperature eggs? If you forgot to pull them out, you can place the whole eggs (in their shells!) into a bowl of warm tap water for about five minutes. That gentle heat brings them right up to serving temperature so they blend beautifully without curdling the butter. If you ever need a substitute for heavy whipping cream in another recipe, I’ve got a little trick for that too, which you can check out here!
Step-by-Step Instructions for Making Buttermilk Pie
Now that we’ve got our ingredients all happy and ready to go, the actual mixing is a breeze—seriously, it’s like three easy steps! Don’t worry about being a pastry expert here; this pie is designed to be foolproof. Just follow the order, and you’ll be golden. First things first, get that oven roaring; we need a nice, even heat source, so preheat it to 350 degrees F (175 degrees C) right away. Take your unbaked pie crust and nestle it lovingly into your 9-inch pie plate so it’s ready for its filling.
Preparing the Dry Mix for Your Buttermilk Pie Filling
This is where we stop lumps before they start! In a medium bowl, grab your sugar, flour, and salt. You want to whisk these three together like your life depends on it for about 30 seconds. You’re not just stirring; you’re aerating and incorporating. If those dry ingredients aren’t fully mixed now, you risk getting little pockets of dry flour taste in your finished custard. We want smooth sailing ahead, so give that dry mix a good beat down!
Combining Wet Ingredients for the Buttermilk Pie
Okay, here comes the magic! Pour in your slightly cooled melted butter, your room-temperature eggs, the buttermilk, and that teaspoon of vanilla. Now, use your whisk again, but listen closely: whisk only until everything is just combined and looks smooth. I mean it—*just* combined! Custards hate being overworked; overmixing incorporates too much air, which can lead to cracking later on. We want silky, not foamy.
Baking and Setting the Buttermilk Pie
Gently pour that beautiful filling right into your prepared crust. Pop it into that 350-degree oven and let it bake for about 45 to 55 minutes. How do you know it’s done? The edges should look set, but the very center needs to have a slight jiggle—kind of like really firm Jell-O when you nudge the pan. This tiny bit of movement means it won’t be runny when cool. If you want to see some ideas for quick snacks while you wait for this masterpiece to set up, take a peek at my easy roll-up recipes!
The hardest part? You must let that pie cool completely on a wire rack before you even think about slicing it. Patience wins this pie, dear friend!
Tips for a Truly Excellent Buttermilk Pie
You’ve mixed it right, you’ve poured it carefully, but I want to give you a few extra tricks I learned over the years that promise to elevate this simple Buttermilk Pie from great to absolutely unforgettable. These aren’t fancy steps, just little things that make sure your custard sets up beautifully shiny and crack-free.
My first big tip concerns the preheating. Don’t rush it! Custards are sensitive to temperature changes. Make absolutely sure your oven is fully, completely up to 350 degrees before that pie goes in. An oven that’s still climbing temperature risks cooking the edges too fast while the center stays loose, which can lead to that dreaded cracking.
Second, about that center jiggle: it’s crucial. If you bake it until the middle is totally solid, it often comes out a little dull and sometimes too firm once it cools down. You want that slight wiggle—it means you’ve got that creamy, melt-in-your-mouth texture waiting for you. Think about it like baking a really firm flan. It should look just shy of being done.
Third piece of advice involves slowing down the cooling process. After those 45-55 minutes, don’t just pull it straight onto a cool countertop. That sudden cool often shocks the skin of the custard, causing it to contract too fast and crackle. Instead, turn your oven off, crack the door open an inch, and let the pie sit inside for 15 to 20 minutes. This gradual cooling is a game-changer. If I can master the timing on this pie, you absolutely can too. It’s almost as important as how I learned to properly sear a steak—a little patience goes a long way in the kitchen! You can see my tips on that topic here.
Finally, if you really want that gorgeous, smooth top layer, try putting a shallow pan of water on the rack below your Buttermilk Pie. This creates a slight steam bath, which keeps the top surface moist while the interior cooks. No dry skin, no cracks, just pure silk!
Serving Suggestions for Classic Buttermilk Pie
I think the best thing about this Buttermilk Pie is how versatile it is! It’s incredible all on its own, especially when it’s just cooled enough that it’s still slightly warm, but honestly, most of my family prefers it chilled. Once it’s fully set, pop it in the fridge for a few hours. That nice, cool temperature makes the custard base really firm up and emphasizes that gorgeous tangy finish. It’s just totally different experiences, and neither one is wrong!
If you’re serving it slightly warm, I like to dust the top very lightly with powdered sugar—just a whisper! But if you’re serving it cold, or if you just want to dress it up for company, it practically screams for a topping. My absolute favorite pairing is a dollop of truly fresh, homemade whipped cream. Don’t even get me started on buying the canned stuff; it just doesn’t compare to the real thing!
If you want to make that topping extra special, try folding in a little bit of fresh strawberry puree or some lemon zest into your whipped cream. Speaking of amazing fruit toppings, you have to check out the recipe I use for strawberry whipped cream—it takes about five minutes and turns this simple pie into a showstopper dessert. You could also go the route of fresh berries piled high—maybe some blueberries or raspberries. The bright acidity of the fruit is just perfect against that mellow, sweet custard. However you decide to serve it, just make sure you have a fork ready because you won’t be able to wait!
Storage and Reheating Instructions for Buttermilk Pie
Alright, so if you manage to have leftovers—which, let’s be real, is rare in my house—you need to know how to treat this beautiful custard properly. Because it’s loaded with dairy and eggs, this Buttermilk Pie is not a dessert that likes to sit out on the counter all day. Once you’ve admired it and served a few slices, the rest needs to go straight into the fridge. Covered is best, though. You don’t want any stray fridge smells messing with that delicate vanilla flavor!
Generally, this pie lasts beautifully for about four to five days tucked away in the refrigerator. It keeps its texture really well, and honestly, some folks (myself included) love it even more the next day because that tang seems to deepen overnight. Just wrap the plate loosely with plastic wrap or transfer any cut slices into an airtight container. That locks in the moisture and keeps that delicate top looking gorgeous.

Now, here’s the part where I have to be stern: Please, please, please, do not try to reheat custard pie! It’s just not going to work out for you. When you heat up a buttermilk or chess pie, the proteins in the custard seize up and scramble things. You’ll end up with a texture that’s grainy, possibly weepy, and definitely not the smooth, silky experience we worked so hard to achieve. Just enjoy it cold or let it sit on the counter for about 20 minutes to take the intense chill off if that’s your preference. Room temperature or chilled—that’s the Buttermilk Pie rule! Skip the microwave entirely; this pie shines best when served cool.
Frequently Asked Questions About Buttermilk Pie
I know when you’re baking a classic recipe like this, you sometimes end up with questions that pop up halfway through the process. That’s totally normal! Don’t fret if things look a little different than you expected. I’ve gathered up the absolute most common worries I hear about getting that perfect custard texture and appearance right here.
Why is my Buttermilk Pie cracking on top?
Oh, the dreaded crack! It breaks my heart every time it happens to you guys. Nine times out of ten, cracking comes down to two things: overbaking or temperature shock. If you bake the pie until the center has zero jiggle, you run the risk of the top skin tightening and ripping as it cools. Also, remember what I said about the cooling process? Pulling a blazing hot pie straight onto a cool granite countertop can shock that custard skin. Try my tip about turning the oven off and letting it sit inside with the door cracked—that gradual descent usually fixes the issue completely!
Can I make this Buttermilk Pie without a pre-made crust?
Absolutely you can! A homemade crust is always going to taste better, right? This recipe works beautifully with your favorite flaky all-butter pie crust. The key here is that the recipe calls for an *unbaked* crust. That means you just roll out your dough, gently place it in the plate, and pour the filling right in uncooked. You don’t need to blind-bake it first because the custard filling cooks the bottom shell perfectly as it bakes. If you’re looking for a different kind of easy, non-pie dessert, maybe check out my vanilla cool whip pie for something super fast and no-bake!
Now, if you *did* happen to use a crust that tends to brown too quickly, you can always pre-bake the edges for about 15 minutes before adding the filling, just to give them a head start on color. But for standard pastry, unbaked is the way to go for that perfect Buttermilk Pie experience.
Estimated Nutritional Data for Your Buttermilk Pie
Now, I always tell people these numbers are just guidelines, you know? Because once you start working with real butter and full-fat buttermilk, things can vary just a little bit! But for the sake of planning ahead (or tracking macros, if that’s your thing), here is the breakdown for one generous slice of this gorgeous Buttermilk Pie based on our ingredients list. It’s accurate to the recipe as written, but remember this is an estimate—your oven temperatures and crust brand might shift things!
This recipe yields 8 servings, so keep that in mind when you look at the totals. It’s a rich dessert, so even one slice is pretty satisfying!
- Calories: Approximately 350 per slice
- Total Fat: Roughly 16 grams (And yes, most of that is good flavor-carrying fat from the butter!)
- Carbohydrates: Around 48 grams (That’s where that lovely sugar content lives!)
- Protein: About 6 grams (Thanks, eggs and buttermilk!)
- Saturated Fat: About 9 grams
- Cholesterol: Around 90mg
This pie isn’t exactly light fare, but honestly, when you’re eating something this comforting and traditional, who’s counting too closely, right? It’s a perfect little slice of Americana served after a big Sunday meal. Enjoy every single creamy bite!
Share Your Classic Buttermilk Pie Experience
Well, that’s it, my sweet friends! You’ve got the foolproof blueprint for the best, most comforting Classic Buttermilk Pie that’ll ever grace your table. This recipe is steeped in tradition, but it’s so simple you’ll probably find yourself making it on a random Tuesday night just because the craving hits!
I’ve poured all my best advice and little Aunt Clara’s secrets into these steps, but the best part of sharing a recipe like this is hearing back from you! Did you try the water bath trick? Did you serve it chilled or at room temperature? Don’t keep all that buttery, tangy goodness to yourself!
I truly want to hear how your Buttermilk Pie turned out. Please, please hop down to the comments section below and leave me a rating—five stars if it stole your heart! Tell me your favorite topping suggestion, or if you had any little tweaks that worked perfectly in your kitchen. If you’re whipping up a batch, take a gorgeous photo, and tag me on social media so I can see that perfect, creamy custard shine!
If you ever have questions about the ingredients, the baking time, or just need to get in touch because you’re so excited about how good your pie smells, you can always send me a note through my contact page. Happy baking, and enjoy that slice of Southern sunshine!
Print
Classic Buttermilk Pie
- Total Time: 65 min
- Yield: 8 servings 1x
- Diet: Vegetarian
Description
A simple, sweet custard pie with a tangy buttermilk base baked in a flaky crust.
Ingredients
- 1 (9 inch) unbaked pie crust
- 1 1/2 cups granulated sugar
- 3 tablespoons all-purpose flour
- 1/4 teaspoon salt
- 1/2 cup (1 stick) unsalted butter, melted
- 3 large eggs, lightly beaten
- 1 cup buttermilk
- 1 teaspoon vanilla extract
Instructions
- Preheat your oven to 350 degrees F (175 degrees C). Place the pie crust in a 9-inch pie plate.
- In a medium bowl, whisk together the sugar, flour, and salt.
- Add the melted butter, beaten eggs, buttermilk, and vanilla extract to the sugar mixture. Whisk until just combined and smooth. Do not overmix.
- Pour the filling into the unbaked pie crust.
- Bake for 45 to 55 minutes, or until the center is mostly set but still has a slight jiggle.
- Cool the pie completely on a wire rack before slicing.
Notes
- For a slightly firmer texture, you can add a small amount of nutmeg to the filling mixture.
- Serve chilled or at room temperature.
- Prep Time: 15 min
- Cook Time: 50 min
- Category: Dessert
- Method: Baking
- Cuisine: American
Nutrition
- Serving Size: 1 slice
- Calories: 350
- Sugar: 45g
- Sodium: 250mg
- Fat: 16g
- Saturated Fat: 9g
- Unsaturated Fat: 7g
- Trans Fat: 0.5g
- Carbohydrates: 48g
- Fiber: 1g
- Protein: 6g
- Cholesterol: 90mg
Keywords: buttermilk pie, custard pie, sweet pie, southern dessert, easy pie