Okay, confession time: sometimes I just want dessert, and I want it NOW. And that’s where this absolute gem of a Blender Orange Pudding comes in. Seriously, have you ever thought about making pudding in a blender? It sounds a little wild, I know, but trust me, it’s a total game-changer. My kitchen adventures often lead me down these “what if” paths, and this one? It’s a keeper. It’s so ridiculously simple, and the results are just… wow. Smooth, creamy, bursting with bright orange flavor – it’s like sunshine in a bowl, and the blender does all the hard work!

Why You’ll Love This Blender Orange Pudding
Honestly, what’s not to love about this pudding? It’s ridiculously easy, which is always a win in my book:
- Super Speedy: We’re talking minutes to get it ready for the stove. The blender does most of the heavy lifting!
- Seriously Simple: Just toss everything in and blend. No fussy techniques or complicated steps here.
- Incredible Flavor: That bright, zesty orange taste is just divine. It’s refreshing and not too sweet.
- Blender Magic: It’s just so convenient! No lumps, no fuss, just perfectly smooth pudding goodness every single time.
Gather Your Ingredients for Blender Orange Pudding
Okay, let’s get our ingredients together for this amazing Blender Orange Pudding. It’s really straightforward, and having everything ready makes it even quicker. You’ll need:
1 can (14 oz) sweetened condensed milk, undiluted: Make sure it’s the regular sweetened kind, not the ‘fat-free’ or ‘eagle brand’ stuff if you can help it. This is what gives us that lovely sweetness and creamy base.
1 can (12 oz) evaporated milk: This is different from condensed milk. It’s just milk that’s had about 60% of the water removed, which makes our pudding nice and rich.
1 cup orange juice: Freshly squeezed is always best for that vibrant, natural orange flavor! If you absolutely have to use bottled, just make sure it’s 100% juice with no added sugar or pulp. Trust me, fresh makes a difference here.
1/4 cup cornstarch: This is our thickening agent. Make sure it’s cornstarch, not cornmeal or anything else!
1 teaspoon vanilla extract: A little vanilla always rounds out the flavors so nicely.
Pinch of salt: Just a tiny bit to balance out the sweetness and really make the orange flavor pop.
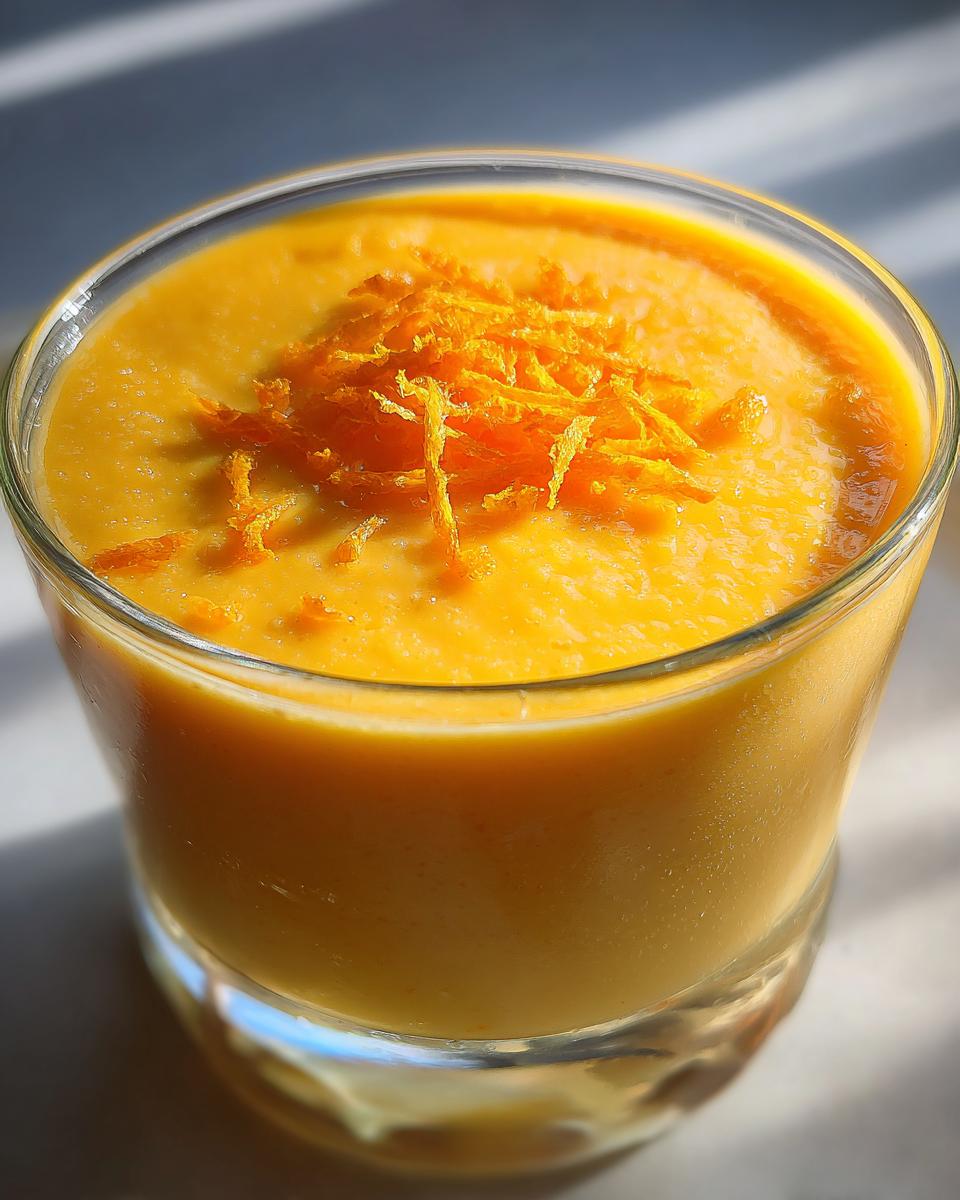
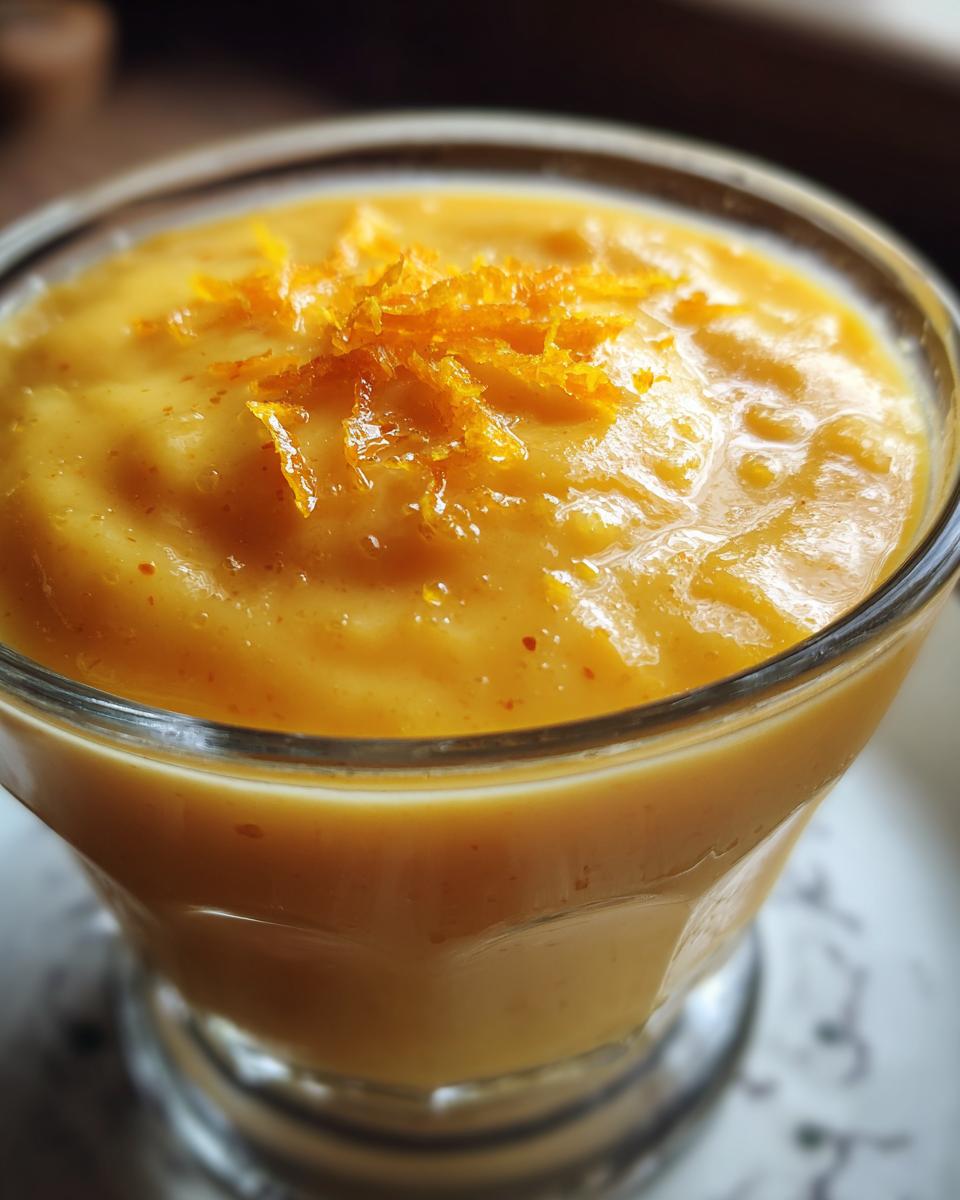
Orange zest for garnish (optional): If you have an extra orange lying around, a little bit of the zest grated on top at the end adds a lovely fresh aroma and extra orange punch.
Ingredient Notes and Simple Substitutions for Blender Orange Pudding
Most of these ingredients are pretty standard, but let’s chat about a couple of things. The orange juice is really key, and while fresh is king, if you’re in a pinch, a good quality 100% orange juice from the carton will work fine. Just avoid the super sugary, ‘orange drink’ kind. If you can’t find evaporated milk, you could technically use whole milk, but it won’t be quite as rich or thick, so you might need a tiny bit more cornstarch. And for the sweetened condensed milk, there really isn’t a great substitute that will give you the same texture and sweetness, so try to stick with that one!
How to Prepare Your Blender Orange Pudding
Alright, let’s get this magical Blender Orange Pudding made! It’s truly as simple as it sounds. First things first, grab your blender. Make sure it’s clean and ready to go. You’re going to add all of your ingredients right into the blender jar: the sweetened condensed milk, the evaporated milk, that lovely orange juice, the cornstarch, the vanilla extract, and that tiny pinch of salt. Don’t forget the orange zest if you’re using it for extra flavor right from the start!
Now, pop the lid on nice and secure. You’re going to blend this on high speed for about 30 seconds to a minute. You want everything to be super smooth and totally combined – no lumps of cornstarch hiding in there! It should look like a beautiful, creamy orange liquid.
Once it’s blended, carefully pour this mixture into a medium-sized saucepan. I like to use a non-stick one if I have it. Place the saucepan over medium heat. This is where the magic really happens, but you need to be patient and stir, stir, stir! Use a whisk or a good silicone spatula and keep it moving constantly. You don’t want it to stick to the bottom or scorch. You’ll see it start to thicken up gradually.
Keep stirring and cooking until the pudding is nice and thick. This usually takes about 10-15 minutes. You’ll know it’s ready when it coats the back of a spoon nicely and maybe even starts to bubble a little more deliberately. Be careful, as hot pudding can splatter!
Once it’s thickened to your liking, take it off the heat. Now, you can either pour it into individual serving dishes, like little ramekins or pretty glasses, or just put it all into one larger serving bowl. Let it cool down a bit on the counter for about 15-20 minutes.
Then comes the hardest part: the waiting! Cover the pudding with plastic wrap, making sure the wrap touches the surface of the pudding to prevent a skin from forming. Pop it into the refrigerator for at least 2 hours, or until it’s completely chilled and set firm. The longer it chills, the better it tastes, in my opinion!
Tips for Achieving the Perfect Blender Orange Pudding
Want your pudding to be absolutely perfect? I’ve got a few little tricks up my sleeve! For an unbelievably smooth texture, especially if you’re worried about any cornstarch lumps, give the blended mixture a quick strain through a fine-mesh sieve before you pour it into the saucepan. You can also totally adjust the sweetness; if you prefer it less sweet, just use a little less condensed milk. And if you want that super vibrant, almost neon orange color, a few drops of orange food coloring stirred in at the end of blending makes it look extra special!
Serving and Storing Your Delicious Blender Orange Pudding
This Blender Orange Pudding is just divine served chilled! I love topping it with a little bit of fresh orange zest for that extra pop of citrusy aroma and a touch of color. Sometimes, if I’m feeling fancy, a small dollop of whipped cream or even a candied orange peel makes it feel extra special. It’s really a simple dessert, so letting its bright orange flavor shine is usually the best approach.
Got leftovers? Lucky you! Just cover the pudding tightly with plastic wrap, making sure the wrap actually touches the surface of the pudding itself. This stops that not-so-lovely skin from forming. Pop it in the fridge, and it should stay wonderfully fresh for about 3-4 days. Since it’s a pudding, reheating isn’t really a thing; it’s meant to be enjoyed cold, straight from the fridge. Just grab a spoon and dig in!
Frequently Asked Questions About Blender Orange Pudding
Got questions about this super easy Blender Orange Pudding? I’ve got answers!
Can I make this Blender Orange Pudding ahead of time?
Absolutely! This pudding is actually *better* made ahead of time. It needs at least 2 hours to chill and set properly. You can easily make it the day before you plan to serve it, which is fantastic for parties or when you just want dessert ready to go. Just make sure to cover it tightly with plastic wrap, pressing it right onto the surface to prevent a skin from forming, and keep it in the fridge.
What is the best way to thicken this Blender Orange Pudding if it’s too thin?
If your pudding seems a little thinner than you’d like after cooking, don’t panic! The easiest fix is to whisk together a tablespoon or two of cornstarch with a tiny bit of cold water or orange juice to make a smooth slurry. Then, slowly whisk this slurry into the pudding while it’s still warm on the stove. Keep stirring over medium-low heat for another minute or two until it thickens up to your desired consistency. Just be careful not to add too much at once!
Are there any ingredient variations for this Blender Orange Pudding?
You can definitely play around with this recipe! For a different citrus twist, try using a mix of orange and lemon juice. If you want a richer flavor, you could add a splash of Grand Marnier or another orange liqueur after cooking (for the grown-ups, of course!). Some folks also like to add a bit of orange zest directly into the blender mixture for an even stronger orange flavor, which is totally delicious.
Estimated Nutritional Information for Blender Orange Pudding
Please keep in mind that these numbers are estimates and can vary based on the specific brands of ingredients you use and the exact serving size. This delicious Blender Orange Pudding typically offers:
- Calories: Around 350 per serving
- Fat: About 10g
- Protein: Approximately 8g
- Carbohydrates: Roughly 60g
- Sugar: Around 50g

Blender Orange Pudding: 1-Minute Magic
- Total Time: 2 hours 25 minutes
- Yield: 6 servings 1x
- Diet: Vegetarian
Description
A simple and delicious orange pudding made in a blender.
Ingredients
- 1 can (14 oz) sweetened condensed milk
- 1 can (12 oz) evaporated milk
- 1 cup orange juice
- 1/4 cup cornstarch
- 1 teaspoon vanilla extract
- Pinch of salt
- Orange zest for garnish (optional)
Instructions
- Combine all ingredients in a blender.
- Blend until smooth and well combined.
- Pour the mixture into a saucepan.
- Cook over medium heat, stirring constantly, until thickened.
- Pour into individual serving dishes or a single bowl.
- Chill in the refrigerator for at least 2 hours before serving.
- Garnish with orange zest if desired.
Notes
- For a smoother pudding, strain the mixture before cooking.
- Adjust sweetness by adding more or less condensed milk.
- Add a few drops of orange food coloring for a more vibrant color.
- Prep Time: 10 minutes
- Cook Time: 15 minutes
- Category: Dessert
- Method: Blender
- Cuisine: American
Nutrition
- Serving Size: 1 serving
- Calories: 350
- Sugar: 50g
- Sodium: 100mg
- Fat: 10g
- Saturated Fat: 6g
- Unsaturated Fat: 4g
- Trans Fat: 0g
- Carbohydrates: 60g
- Fiber: 1g
- Protein: 8g
- Cholesterol: 25mg
Keywords: blender orange pudding, easy orange dessert, no bake pudding, quick dessert, simple pudding