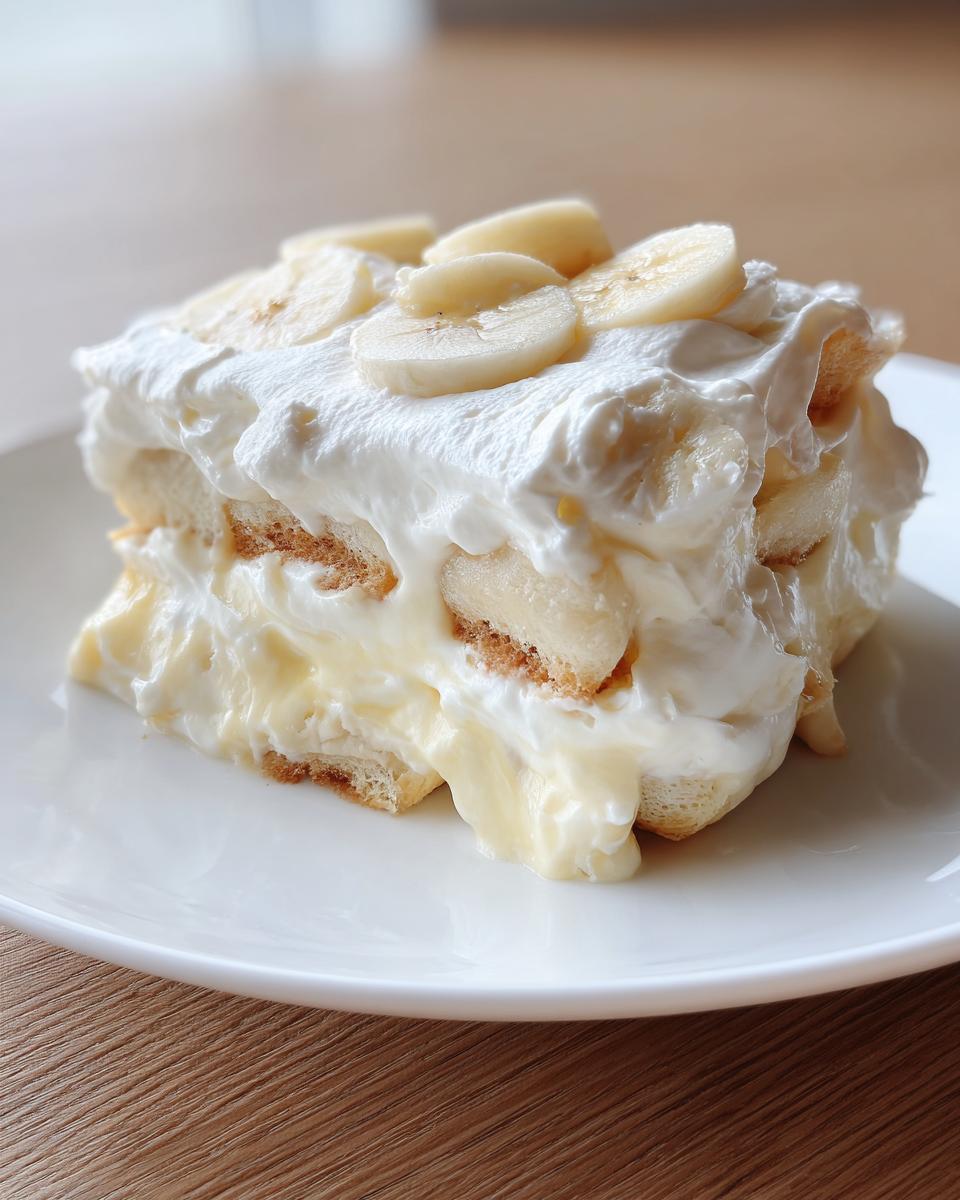
Oh my goodness, if you’re looking for that soul-soothing, perfect scoop of dessert that tastes just like childhood, you’ve absolutely hit the jackpot. Forget complicated custards and long hours waiting for things to bake! We are diving headfirst into the easiest, creamiest recipe for the **Best Banana Pudding** you will ever need. This isn’t one of those fussy, stiff puddings; this is the one that wobbles just right.
I remember when my Aunt Carol would bring this to every summer picnic. It was always the first dessert to disappear! She never wrote it down, it was all muscle memory, but I finally nailed the measurements years ago. It’s the ultimate no-bake hero dessert. This recipe relies on the classic trio: sweet bananas, salty vanilla wafers, and rich, creamy pudding goodness. Trust me, once you try my method, you’ll never go back to the boxed stuff that tastes flat. This is pure, unadulterated comfort in a dish, and I’m so excited to share every secret step with you!
Before we get into the mixing, if you’re looking for another simple crowd-pleaser, you absolutely have to check out my thoughts on classic homemade doughnuts. They’re baked, not fried, which is a completely different kind of magic!
Why This is the Best Banana Pudding Recipe
Honestly, what could be better than a dessert that requires zero oven time? That’s the beauty of this traditional recipe for the **Best Banana Pudding**. It uses simple ingredients you probably already have hanging around, and the assembly is so fast you’ll be shocked you’re done in under 20 minutes. It’s my go-to when company drops by unexpectedly!
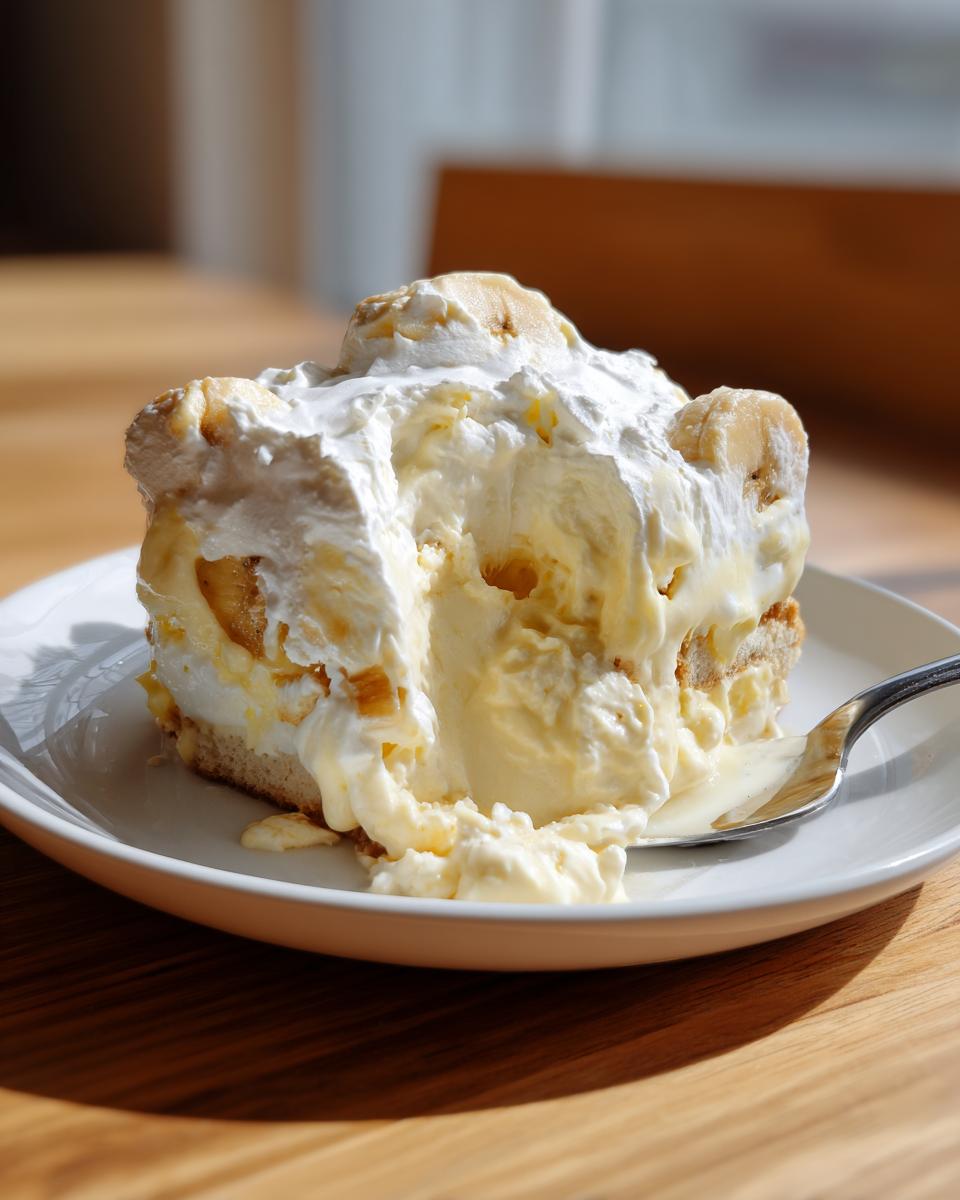
When you chill it, the wafers soften up just enough. They stop being crispy and turn into a beautiful, cake-like layer that soaks up all that sweet pudding. That texture combination—soft wafers meeting creamy pudding and silky bananas—is what makes this classic dessert iconic.
- It’s completely no-bake, which saves you oven space when you need it most.
- The flavor actually improves overnight, which means you can easily make it the day before a party!
- It uses basic instant pudding, making it ridiculously reliable every single time.
If you need another easy, no-bake fix, you should peek at my thoughts on the no-bake Oreo dessert—it’s dangerously good, too. And if you’re feeling ambitious after this, maybe try those homemade doughnuts I mentioned!
Key Details for Your Best Banana Pudding
Setting expectations up front is key when you’re relying on chill time. You’ll be thrilled at how quickly the prep flies by!
- Prep Time: Seriously only 20 minutes!
- Total Time: About 4 hours and 20 minutes—but most of that is just waiting for it to chill properly.
- Yields: This recipe makes enough for 8 very happy people.
Make sure you give it that full chilling time; that’s how you get the full experience of the **Best Banana Pudding** texture. Don’t skimp on the chill!

Gathering Ingredients for the Best Banana Pudding
Alright, let’s get our ingredients lined up! When you’re making something this simple, the quality (and correct measurement!) of what you put in really matters for achieving the **Best Banana Pudding** flavor profile. There’s truly no shortcut when it comes to measuring the pudding mix, so grab your actual box!
Here is what you need ready to go. Make sure your bananas are ripe—they should have some speckles on the peel, but definitely not be brown and mushy yet. We want them sweet, but still firm enough to hold their shape when sliced!
- Instant vanilla pudding mix: You need exactly one (5.1 ounce) package. This is so important because cooking the custard takes way too long, and the texture just isn’t the same.
- Cold milk: Measure out exactly 2 cups of very cold milk to whisk up that instant pudding.
- Frozen whipped topping: Get one (8 ounce) container, and make sure it is fully thawed on the counter before you even start mixing.
- Sweetened condensed milk: Grab one (14 ounce) can of this—it provides all the sweetness and richness we need.
- Vanilla extract: Just one teaspoon of the real stuff, if you have it!
- Ripe bananas: You’ll need 4 large, beautiful, ripe bananas. Slice them up right before you start assembling the layers!
- Vanilla wafers: One standard package is all you need for the wafers that turn into that amazing cake-like layer.
Look, if you made too much pudding mix and want to use the rest up, you could always whip up some no-bake Oreo dessert next week—that recipe is fantastic, too!
Step-by-Step Instructions for Perfect Best Banana Pudding
Okay, now for the fun part—making this beautiful, creamy concoction! While the process is simple, the technique is everything when you want that truly glorious texture in your **Best Banana Pudding**. We need to treat that whipped topping gently, or we’ll accidentally make banana soup instead of pudding!
Preparing the Creamy Pudding Base
First things first, we have to set that instant pudding. Follow the box directions exactly: whisk the pudding mix into the full 2 cups of cold milk. You’ll notice it starts getting thick right away, but the box always says to let it set for five minutes—don’t skip that! Once it seems firm, now comes the critical part. You need to gently fold in your thawed whipped topping. I mean *gently*. Use a wide spatula and cut down the middle, then sweep up the side of the bowl. We are trying to incorporate air, not beat the air out!
After the topping is mixed in, stir in the sweetened condensed milk and your vanilla extract. Don’t overmix here either! We just want everything combined into one heavenly, light, fluffy base ready for layering.
Assembling Layers for the Best Banana Pudding
Now it’s time to build this masterpiece! Grab your biggest clear glass dish—it’s so much more satisfying when you can see the layers. Start by completely covering the bottom with a layer of vanilla wafers. Don’t be shy! Then, take your sliced bananas and arrange them right over those wafers. You want a solid, even coating of banana slices.
Spoon about one-third of your glorious pudding mixture on top of that banana layer. Make sure you spread it all the way to the edges! Then, you just repeat that whole sequence: wafers, bananas, pudding. Keep going until everything in your bowls is used up, and you must finish with a final layer of pudding on top. This is how you make the **Best Banana Pudding**—every spoonful needs all three components!
Chilling and Serving Your Best Banana Pudding
This is the hardest part: waiting. You must cover your dish tightly—I usually use plastic wrap pressed gently onto the surface of the pudding—and get it into the fridge. It needs a minimum of 4 hours, but seriously, overnight is ideal! That chilling time is what allows the wafers to soften up perfectly into that cake-like texture.
If you want just a slight textural element on the top, you can crush up a few extra vanilla wafers and sprinkle them over the top right before you serve it. Honestly, that simple crunch contrast makes the **Best Banana Pudding** even more fun to eat!
If you need more inspiration for quick, impressive desserts, check out my thoughts on how to make no-bake Oreo dessert!
Tips for Making the Best Banana Pudding Even Better
This recipe is already amazing, I’m not going to lie, but sometimes you just want to take something already perfect and give it that little extra something special, right? When I’m making this **Best Banana Pudding** for a birthday or a celebration, I always try one of these little upgrades. They don’t change the core recipe, but they certainly make people ask for the recipe!
My biggest tip involves the star of the show: the banana itself. You want bananas that are delightfully ripe—speckled yellow is perfect—but avoid any that are completely brown and mushy. If they are too soft, they break apart instantly when you’re layering, and you end up with banana puree instead of lovely, distinct slices blending into the pudding.
Another thing that makes a huge difference is the quality of your vanilla wafers. Don’t skimp here! Get the good, buttery ones if you can find them. Since the wafers are the only source of crunch initially, if you use a wafer that tastes a bit stale or cheap, you’ll definitely notice it.
Considering a Meringue Topping (If You’re Feeling Fancy)
While the traditional way I shared above involves just topping it with pudding or crushed wafers, my uncle swore by a toasted meringue topping instead of reaching for the whipped topping to fold in. It gives you a beautiful, cloud-like, caramelized top.
To do this, you’d typically prepare your pudding base (just pudding, condensed milk, and vanilla—no whipped topping), layer it up, and then, instead of folding in the topping, you whip up some egg whites with sugar until they form stiff peaks. You spread that meringue over the top layer of pudding and either stick it under the broiler for just a minute or use a good kitchen torch until it’s beautifully golden brown. Be careful, those broilers are hotter than a summer day! It gives you a warm-cool contrast that makes this **Best Banana Pudding** feel incredibly elegant.
If you’re needing more inspiration for classic American sweets that feel easy but look impressive, you should definitely check out my notes on classic homemade doughnuts. They are another favorite in my kitchen!
Ingredient Notes and Substitutions for Banana Pudding
Sometimes life throws you a curveball, right? You’re ready to whip up the **Best Banana Pudding**, and you realize you used the last of the sweetened condensed milk, or maybe you forgot to grab the instant pudding mix. Don’t panic! We can usually make smart substitutions here without ruining the whole dessert. This recipe relies on the simplicity of instant mix, though, so changes require a little care.
Let’s talk about the whipped topping first, because that’s often what people run out of. If you don’t have that stabilized whipped topping thawed, you can absolutely make your own whipped cream right before you mix it in! You’ll need heavy whipping cream—cold, cold cream—and beat it until it forms medium peaks. You’ll likely need about 1 ½ cups of heavy cream to replace that one 8-ounce container. Make sure you whip it up separately before gently folding it into the pudding mixture, just like the recipe says!
Using Cooked Pudding vs. Instant Pudding
Can you use cooked vanilla custard instead of the instant mix? Technically, yes, you can, but in my opinion, it changes the whole vibe of this particular **Best Banana Pudding**. Instant pudding is designed to set up quickly and be lightened by the whipped topping. If you use a homemade cooked pudding, it’s going to be much heavier and denser, and you’ll have to let it cool down completely before mixing anything else in, which adds serious time.
If you go the homemade route, make sure you cook it until it’s very thick, and perhaps use slightly less milk than the recipe calls for. But honestly, for this no-bake recipe, the instant mix is truly the secret weapon for that light, airy texture we’re aiming for.
Choosing the Right Milk and Wafers
What kind of milk should you use? I almost always use 2% milk because it’s what I keep on hand, and it works perfectly. Whole milk will give you a slightly richer result, but skim milk is usually too thin and might not let the instant pudding set up quite as firmly. Stick to 2% or whole milk for the best results!
And for the vanilla wafers—the recipe calls for one package, but if you’re making a huge dish, just make sure you have plenty enough to create thick, solid layers. If you’re short, you can always crush some up to fill in the bottom layer a little better, though you risk losing that cake-like texture. If you happen to have extra whipped cream made from heavy cream, you could even check out my thoughts on how to make heavy cream at home if you need a backup supply!
Storage and Make-Ahead Options for Banana Pudding
One of the best things about this **Best Banana Pudding** is that it just gets better with time, making it fantastic for planning ahead! You absolutely must store it covered tightly in the refrigerator. If you wrap it well, it lasts beautifully for about 3 to 4 days. That’s if you can manage to keep your hands off it that long, which I rarely do!
For parties, I try to assemble it the night before serving. Chilling it overnight is the sweet spot because the wafers have enough time to absorb moisture without turning to complete mush. If you assemble it the morning of, make sure it chills for at least 4 crucial hours before anyone even looks at it! It’s a lifesaver when you want a fantastic dessert ready without stressing on the day of the event. If you’re looking for another make-ahead wonder, you need to try my no-bake Oreo dessert recipe next!
Frequently Asked Questions About This Classic Dessert
I get so many questions when people first try this recipe because it’s just so easy, and folks wonder where the catch is! Rest assured, there isn’t one, but there are smart ways to handle the ingredients to make sure you get the absolute best texture every single time.
How do I keep the bananas from turning brown in banana pudding?
This is the #1 question I always get about any banana dessert! Bananas brown because of oxidation, so we need to block the air. My favorite trick that works wonders is slicing your bananas right before you start assembling the layers. Have your wafers and pudding ready literally waiting for the bananas to hit the dish. If you’re making it ahead of time—say, you’re assembling it the night before—toss your slices lightly in a tiny bit of fresh lemon juice. You don’t need much, just enough to coat them before they go under that delicious pudding layer. The acid slows down the browning dramatically!
Can I use homemade custard instead of instant pudding mix?
You totally can, but you need to know it changes the final texture of this particular **no bake pudding**. The instant mix has stabilizers that work perfectly with the whipped topping to keep the whole thing light and lofty. If you use a homemade cooked custard, it’s going to be much denser, almost like a classic pastry cream. If you do go that route, you have to let that custard cool completely—and I mean completely—before you even think about folding in the whipped topping, or you’ll deflate it instantly. For this specific recipe, I really stick to the instant mix for speed and fluffiness.
What is the best way to serve this no bake pudding?
For a family gathering where everyone digs in, a large, clear 9×13 inch dish or a big trifle bowl is spectacular because you truly get to show off those perfect layers. However, I’m obsessed lately with serving this in individual small Mason jars or clear plastic cups!
Serving it in individual portions is fantastic because it keeps the layers super neat, and chilling time seems to work faster when the portions are smaller. Plus, you don’t have to worry about cutting neat squares later! If you’re prepping for a picnic or a party, individual servings are just way easier to manage and hand out.
If you liked how easy this was, you might want to look into my recipe for classic homemade doughnuts, because they really surprised me with how simple they turned out!
Nutritional Estimates for Your Classic Banana Pudding
Because this particular dessert is all about indulgence, I don’t always look at the nutritional label, but I know some of you are curious about what you’re digging into! Since we aren’t baking anything—no flour, no eggs in the main body of the pudding—the macros are mostly sugar and fat, which is exactly what makes it taste so good, right?
Remember, these numbers are just estimates based on the amounts listed in the recipe ingredients. If you use lighter whipped topping or substitute the sweetened condensed milk, your final tally might change slightly. But for a standard serving of this delicious **classic dessert**, here is what you can generally expect, per serving:
- Calories: Around 350
- Sugar: About 45g (Sweetness overload alert—but worth it!)
- Fat: Approximately 15g
- Carbohydrates: Roughly 55g
- Protein: About 4g (Thanks, milk!)
It’s definitely a treat, not an everyday snack, but perfect for those special family gatherings where you need a guaranteed crowd-pleaser. Dig into that sweet vanilla goodness!
Share Your Experience Making the Best Banana Pudding
Well, that’s it! You’ve got all the insider knowledge now to make what I truly believe is the **Best Banana Pudding** recipe out there. It’s simple, it’s creamy, and it always tastes like a Sunday afternoon celebration at my house.
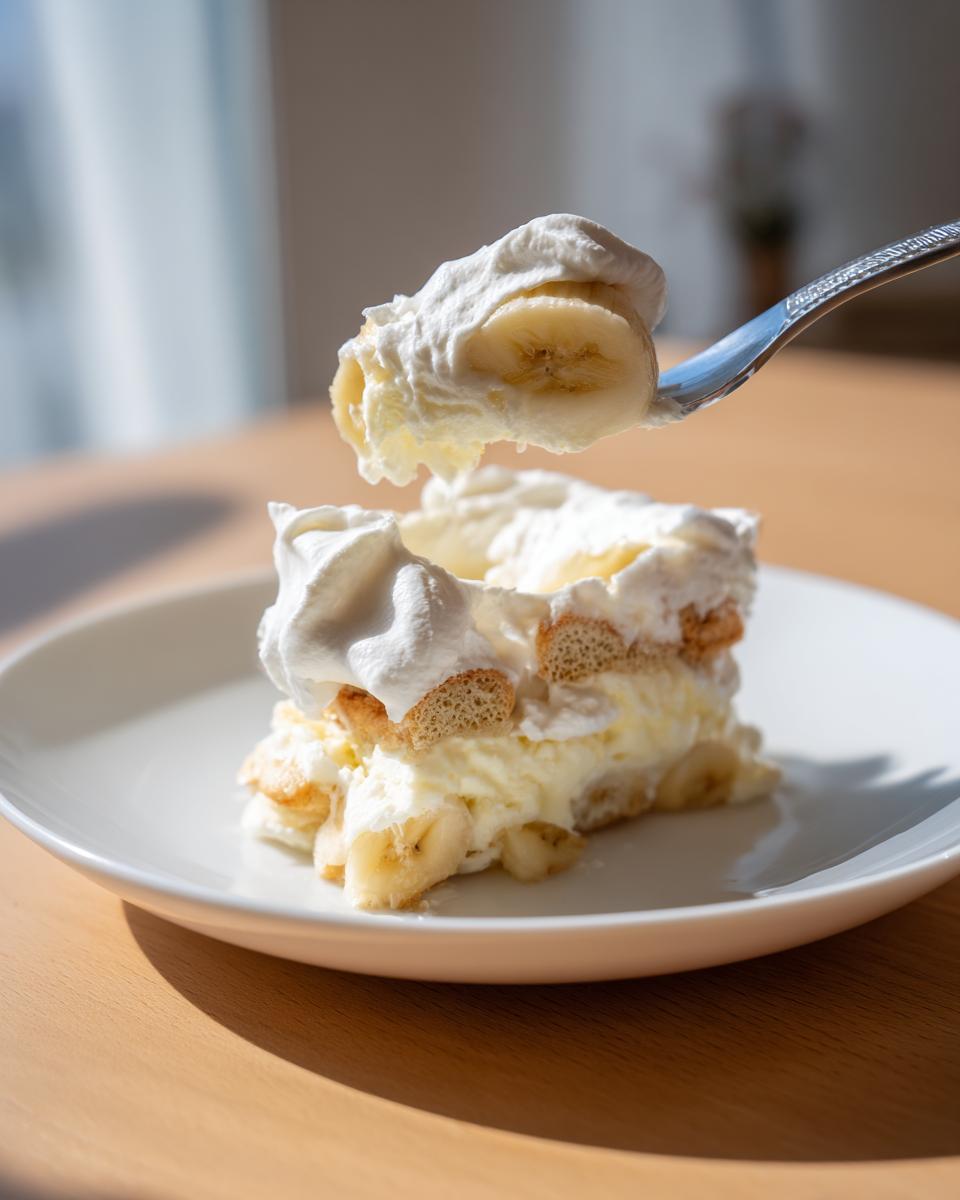
I truly, truly hope you love making this as much as my family loves eating it! Once you try it, I need to know what you thought. Did you manage to keep your hands off it long enough for that 4-hour chill time? Be sure to leave a comment below and let me know—specifically, tell me: what was your favorite layer? Was it the soft, cakey wafers, the sweet bananas, or that impossibly light, fluffy pudding? I always aim for maximum wafer soakage!
And if you snap a picture of your beautiful, wobbly creation, tag me on social media! Seeing my readers enjoy these classic, comforting recipes brings me so much joy. It proves that the **Best Banana Pudding** doesn’t need a fancy oven or complicated steps.
If you found this recipe satisfyingly easy, I have another winner you might want to add to your rotation for next time—my no-bake Oreo dessert is just as dangerously quick to assemble. Happy mixing, and thank you for letting me share this sweet piece of my family history with you!
Print
Classic Banana Pudding
- Total Time: 4 hr 20 min
- Yield: 8 servings 1x
- Diet: Vegetarian
Description
A simple recipe for traditional layered banana pudding.
Ingredients
- 1 (5.1 ounce) package instant vanilla pudding mix
- 2 cups cold milk
- 1 (8 ounce) container frozen whipped topping, thawed
- 1 (14 ounce) can sweetened condensed milk
- 1 teaspoon vanilla extract
- 4 large ripe bananas, sliced
- 1 package vanilla wafers
Instructions
- Prepare the instant vanilla pudding according to package directions, using 2 cups of cold milk. Let it set for 5 minutes.
- Gently fold the thawed whipped topping into the set pudding.
- Stir in the sweetened condensed milk and vanilla extract until combined.
- In a large bowl, layer the bottom with vanilla wafers.
- Arrange a layer of sliced bananas over the wafers.
- Spoon one-third of the pudding mixture over the bananas.
- Repeat the layers: wafers, bananas, pudding, until all ingredients are used, ending with pudding on top.
- Cover the dish and refrigerate for at least 4 hours before serving.
Notes
- For a firmer pudding, chill for 6 hours or overnight.
- You can garnish the top layer with crushed vanilla wafers if desired.
- Prep Time: 20 min
- Cook Time: 0 min
- Category: Dessert
- Method: No Bake
- Cuisine: American
Nutrition
- Serving Size: 1 serving
- Calories: 350
- Sugar: 45g
- Sodium: 250mg
- Fat: 15g
- Saturated Fat: 8g
- Unsaturated Fat: 7g
- Trans Fat: 0g
- Carbohydrates: 55g
- Fiber: 1g
- Protein: 4g
- Cholesterol: 25mg
Keywords: banana pudding, vanilla wafers, classic dessert, no bake pudding, sweet dessert