Okay, so picture this: crisp autumn air, leaves crunching underfoot, and that undeniable urge for something sweet, chewy, and utterly delightful. That’s where my absolute favorite Apple Cider Caramels come in! Seriously, these aren’t just any caramels. They’re little bites of pure, concentrated fall happiness. The flavor of the apple cider is just *intense* in the best way possible, and the texture? Oh, the texture is spot on – perfectly chewy without sticking to your teeth forever.
I’ve been messing around with candy making for years now, and let me tell you, it can be a bit finicky! Lots of trial and error, maybe a few burnt batches (don’t tell anyone!), but these Apple Cider Caramels? They were a game-changer for me. I first whipped up a batch for a fall bake sale, and they were gone in minutes. People were asking for the recipe before I even had a chance to put the lid on the container! They’ve become my go-to homemade gift during the autumn months, and honestly, I always make an extra batch just for myself. There’s something so rewarding about turning simple ingredients into these little golden jewels. Trust me, you can totally do this!
Why Make These Apple Cider Caramels?
Honestly? Because they are *so* much better than anything you can buy at the store! These aren’t your average, bland caramels. Here’s why you should absolutely give these a try:
- Intense Apple Cider Flavor: We really concentrate that apple goodness, so you get a true taste of fall in every bite.
- Perfectly Chewy: Not too hard, not too soft. Just that ideal, satisfying chewiness that makes a great caramel.
- Seriously Impressive (but easy!): Making candy at home feels fancy, but this recipe is totally doable, even if you’re new to it.
- Homemade Love: There’s just something special about making and sharing homemade treats, right?
Ingredients for Your Apple Cider Caramels
Alright, let’s talk ingredients! You don’t need anything too crazy for these, which is great. Just good, standard stuff you probably have or can easily grab. Getting the right amounts is key here, so measure carefully!
- 2 cups apple cider (Any kind you like, just not sparkling!)
- 1 cup heavy cream
- 1 cup granulated sugar
- 1/2 cup light corn syrup (This helps prevent crystallization and gives that chewy texture!)
- 1/4 cup unsalted butter, cut into pieces (Make sure it’s unsalted so you control the saltiness!)
- 1 teaspoon vanilla extract
- 1/2 teaspoon flaky sea salt (Optional, but a little sprinkle on top is *chef’s kiss*!)
Equipment Needed for Apple Cider Caramels
You don’t need a ton of fancy gadgets for these, which is nice! But there are a couple of things that are seriously non-negotiable if you want these Apple Cider Caramels to turn out just right. Trust me on these!
- A good, medium saucepan: Make sure it’s got a heavy bottom. This helps distribute the heat evenly and prevents that dreaded scorching!
- A candy thermometer: This is your absolute best friend when making candy. Getting the temperature just right is crucial for that perfect chewy texture, and guessing just won’t cut it here.
- An 8×8 inch baking pan: This is the perfect size for setting your caramels. Lining it with parchment paper is a must for easy removal later!
Preparing Your Apple Cider Caramels: Step-by-Step
Okay, this is where the magic really happens! Making candy can seem intimidating, but if you follow these steps carefully, you’ll be a caramel pro in no time. Just take your time and pay attention to the temperatures – that’s the biggest secret!
- Reduce that cider! Get your 2 cups of apple cider into that medium saucepan. Turn the heat up to medium-high and let it boil away. You’re basically concentrating all that lovely apple flavor. Keep an eye on it, stirring occasionally, until it’s reduced down to just a quarter cup. This usually takes about 20-30 minutes, and your kitchen is going to start smelling amazing!
- Add the good stuff. Once the cider is reduced and smelling potent, add in your heavy cream, granulated sugar, corn syrup, and those pieces of unsalted butter. Turn the heat down to medium. Now, this is important: stir constantly! You want to make sure that sugar dissolves completely and nothing sticks to the bottom. Keep stirring until you don’t feel any grittiness on the bottom of the pan.
- Time for the thermometer! Pop your candy thermometer into the mixture, making sure the tip isn’t touching the bottom of the pan. Now, just let it cook, stirring occasionally (you don’t need to stir constantly anymore, phew!), until the thermometer hits 245°F (118°C). This is called the “firm-ball stage,” and it’s key to getting that perfect chewy texture. Don’t rush this part!
- Off the heat and flavor time. As soon as it hits 245°F, take the pan off the heat immediately. Seriously, every degree matters here! Stir in your vanilla extract and that flaky sea salt now, if you’re using it. Be careful – it’s super hot!
- Pour and cool. Carefully pour the hot caramel into your prepared 8×8 inch pan that’s lined with parchment paper. Don’t scrape the pan – sometimes bits on the bottom can be slightly overcooked. Just pour what flows easily.
- Patience is a virtue! Now, let it cool completely at room temperature. This takes several hours, maybe even overnight. Resist the urge to stick it in the fridge – slow cooling helps the texture. You’ll know it’s ready when it’s firm to the touch.
- Cut ’em up! Once it’s totally cool and firm, lift the whole sheet of caramel out of the pan using the parchment paper. Place it on a cutting board and use a sharp knife or a pizza cutter (my favorite for straight lines!) to cut it into squares.
- Wrap ’em individually. This is the final step before enjoying! Wrap each little caramel in wax paper or cellophane to keep them from sticking together. They look so cute all wrapped up!
Tips for Perfect Apple Cider Caramels
Making candy is all about a little bit of science and a whole lot of care! Here are a few extra tips I’ve picked up that make a huge difference in getting these Apple Cider Caramels just right:
- Heavy-bottomed pan is a must! Seriously, don’t skip this. A thin pan heats unevenly and you’re way more likely to scorch your beautiful caramel.
- Stirring matters, but know when to stop. You need to stir constantly at the beginning to dissolve the sugar, but once the thermometer is in and it’s bubbling away, just occasional stirring is fine. Too much stirring at high temps can actually encourage sugar crystals to form – and nobody wants grainy caramel!
- Be super careful with hot sugar! This stuff is molten lava. Have everything ready before you start, and if you have little ones or pets around, keep them out of the kitchen while you’re cooking the caramel. Safety first!
Storing and Enjoying Your Apple Cider Caramels
So you’ve made these gorgeous Apple Cider Caramels, congratulations! Now you want to make sure they stay perfect so you can enjoy them bit by bit (or all at once, no judgment here!). The best way to keep them fresh and chewy is to wrap each caramel individually. Little squares of wax paper or those cute cellophane wrappers work great! Once they’re all wrapped up, just pop them in an airtight container and keep them at room temperature. They’ll stay lovely and chewy for a couple of weeks… if they last that long!
Frequently Asked Questions About Apple Cider Caramels
Making candy can sometimes bring up a few questions, especially if it’s your first time! Here are some common things people ask about these Apple Cider Caramels:
Q1. Why do I need to reduce the apple cider so much?
Reducing the apple cider is absolutely key! You’re boiling away the water and concentrating all that lovely apple flavor. If you didn’t reduce it, you’d have a much weaker apple taste, and the extra liquid would mess with the caramel’s texture.
Q2. What if my caramel doesn’t set up properly?
Oh no! This usually means it didn’t reach the correct temperature (245°F/118°C). The temperature is crucial for getting to the firm-ball stage. If it’s too soft, you can *carefully* put it back in the saucepan, bring it back up to temperature, and try pouring it again. Just be super cautious with hot sugar!
Q3. Can I use a different type of sugar or syrup?
I really recommend sticking to the granulated sugar and light corn syrup specified in the recipe. Granulated sugar provides the structure, and corn syrup helps prevent crystallization, which keeps your caramels smooth and chewy. Substituting other sugars or syrups can change the final texture and how the caramel sets.
Q4. My caramel looks grainy! What happened?
Graininess often happens if sugar crystals form in the caramel. This can be caused by stirring too much while it’s boiling at high heat, or if bits of sugar are stuck to the sides of the pan. Making sure the sugar is fully dissolved at the beginning and avoiding scraping the sides when pouring can help!
Estimated Nutritional Information
Okay, so while we’re definitely making these Apple Cider Caramels for the pure joy of it, some folks like to have an idea of what’s in each little bite. Keep in mind, these numbers are just estimates! Depending on the specific brands of ingredients you use (like butter or cream) and how big you cut your caramels, the actual values can vary a bit. Think of this as a helpful guide, not a hard and fast rule!
- Serving Size: 1 caramel
- Calories: Around 100
- Sugar: About 15g
- Fat: Approximately 4g
- Saturated Fat: Roughly 2g
- Unsaturated Fat: Around 1g
- Trans Fat: 0g (Yay!)
- Carbohydrates: About 18g
- Fiber: 0g
- Protein: 0g
- Cholesterol: Roughly 10mg
- Sodium: About 10mg (if you don’t add extra salt)
Share Your Experience
So, did you make these Apple Cider Caramels? I’d absolutely LOVE to hear how they turned out! Leave a comment below and let me know, or even better, snap a pic and share it on social media! Don’t forget to tag me so I can see your gorgeous creations!
Print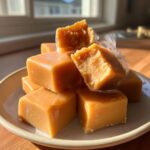
Apple Cider Caramels: 245°F of Pure Delight
- Total Time: 40 minutes
- Yield: About 40 caramels 1x
Description
Chewy caramels with a delightful apple cider flavor.
Ingredients
- 2 cups apple cider
- 1 cup heavy cream
- 1 cup granulated sugar
- 1/2 cup light corn syrup
- 1/4 cup unsalted butter, cut into pieces
- 1 teaspoon vanilla extract
- 1/2 teaspoon flaky sea salt (optional)
Instructions
- Boil apple cider in a medium saucepan over medium-high heat until reduced to 1/4 cup. This takes about 20-30 minutes.
- Add heavy cream, sugar, corn syrup, and butter to the saucepan with the reduced apple cider. Stir constantly over medium heat until the sugar dissolves.
- Insert a candy thermometer. Continue to cook, stirring occasionally, until the mixture reaches 245°F (118°C). This is the firm-ball stage.
- Remove from heat. Stir in vanilla extract and sea salt, if using.
- Pour caramel into an 8×8 inch baking pan lined with parchment paper.
- Let cool completely at room temperature for several hours or until firm.
- Cut into squares using a sharp knife or pizza cutter.
- Wrap individual caramels in wax paper or cellophane.
Notes
- Reducing the apple cider intensifies the flavor.
- Use a heavy-bottomed saucepan to prevent scorching.
- Stirring constantly helps prevent sugar crystallization.
- Be careful when working with hot sugar.
- Prep Time: 10 minutes
- Cook Time: 30 minutes
- Category: Dessert
- Method: Boiling
- Cuisine: American
Nutrition
- Serving Size: 1 caramel
- Calories: 100
- Sugar: 15g
- Sodium: 10mg
- Fat: 4g
- Saturated Fat: 2g
- Unsaturated Fat: 1g
- Trans Fat: 0g
- Carbohydrates: 18g
- Fiber: 0g
- Protein: 0g
- Cholesterol: 10mg
Keywords: caramel, apple cider, candy, chewy, sweet