Oh, who doesn’t love a little bit of sweet, pillowy goodness? Honestly, there’s something magical about a perfectly fluffy marshmallow, especially when it’s made right in your own kitchen! I remember the first time I dared to try making these Homemade Marshmallows myself. I was a little nervous, thinking it would be super complicated, but wow, was I wrong! They turned out so incredibly soft and airy, way better than anything from the store. Plus, you get to customize them exactly how you like. Trust me, once you’ve tried these, you’ll never go back to the bagged stuff!
Why You’ll Love These Homemade Marshmallows
Honestly, these Homemade Marshmallows are just pure joy in dessert form! Here’s why you’re going to be obsessed:
- They’re SO easy! Seriously, don’t let the candy thermometer scare you. Once you get the hang of it, it’s practically foolproof.
- Texture dreams! Forget that slightly rubbery store-bought stuff. These are melt-in-your-mouth fluffy and incredibly light. They’re just heavenly.
- Flavor town, population: YOU! You can add whatever extracts you like – peppermint for the holidays, maybe some raspberry for a fruity twist. The possibilities are endless!
- Super satisfying. There’s a special kind of pride that comes from making these magical little puffs from scratch. Plus, they make amazing gifts!
Gather Your Ingredients for Homemade Marshmallows
Alright, time for the fun part – gathering your supplies! Making these Homemade Marshmallows is super straightforward. You probably have most of this stuff in your pantry already, but a quick check is always a good idea. Make sure you’ve got a good quality unflavored gelatin; it’s truly the backbone of these fluffy clouds! I always go for plain stuff because we’re adding our own amazing flavors later. And for the sugar, stick to granulated white sugar; it’s what gives us that clean, sweet base. The corn syrup is key here – it stops the sugar from crystallizing and keeps our marshmallows super smooth and chewy. Oh, and don’t forget that pinch of salt and a good splash of vanilla extract; they really make all the difference!
So, here’s what you’ll want to have handy:
- 1 cup granulated sugar
- 1/2 cup good quality light corn syrup
- 1/4 cup water, plus a little extra cold water for the gelatin
- 2 1/2 teaspoons unflavored gelatin (this is important – make sure it’s unflavored!)
- 1/4 teaspoon salt
- 1 teaspoon pure vanilla extract (or whatever flavor you’re dreaming up!)
- For dusting: 1 tablespoon cornstarch and 1 tablespoon powdered sugar
Step-by-Step Guide to Making Homemade Marshmallows
Okay, it’s time to dive into the actual making of these incredible Homemade Marshmallows! Don’t be intimidated by the steps – I’ll walk you through it, and trust me, it’s way easier than you think. It’s all about a little patience and following these steps. You’ll feel like a total baking wizard! You can even whip up some homemade heavy cream to go with them if you get inspired.
Preparing Your Pan for Homemade Marshmallows
First things first, let’s get our pan ready. You’ll need a 9×13 inch baking pan. Grease it up really well, no one likes sticky marshmallows glued to the bottom! Then, line it with parchment paper so there’s a bit hanging over the sides – this makes lifting the whole slab out so much easier later. Finally, give that parchment a good dusting with your cornstarch and powdered sugar mix. This is super important to stop them from sticking all over the place!
Blooming the Gelatin
Now for the magic ingredient: gelatin! In a small bowl, sprinkle your unflavored gelatin over 1/4 cup of cold water. Give it a little stir and just let it sit there for about 5 to 10 minutes. You’ll see it puff up and get all jiggly. This “blooming” step is crucial because it helps the gelatin dissolve smoothly later on, giving us those perfect, fluffy marshmallow clouds.
Cooking the Sugar Syrup
Grab a medium saucepan and combine your granulated sugar, corn syrup, and another 1/4 cup of water. Pop it on medium heat and stir it around just until the sugar completely dissolves. Once it’s all dissolved and looking smooth, stop stirring! Bring this mixture to a rolling bubble and let it cook until your candy thermometer reads exactly 240°F (115°C). This stage is super important for the marshmallow’s texture, so keep an eye on that thermometer!
Combining and Whipping the Marshmallow Mixture
Alright, this is where things get exciting! Take your saucepan off the heat. Now, very carefully, with your electric mixer running on low speed, slowly start pouring that hot sugar syrup in a steady stream into the bloomed gelatin. Let it incorporate for a moment, then crank that mixer speed up to high! You’re going to beat this for a good 10 to 15 minutes. I know it sounds like a long time, but you want it to get super thick, glossy, and basically triple in volume. It should look like a cloud!
Adding Flavor and Pouring
Just before you finish whipping, toss in your salt and that delicious vanilla extract (or whatever flavor you’ve chosen!). Give it one last quick mix to combine. Now, carefully pour this glorious, fluffy mixture into your prepared pan. It’ll be thick, so you might need a spatula to help spread it out evenly to the edges. Try to get it as smooth as you can; it makes for prettier marshmallows!
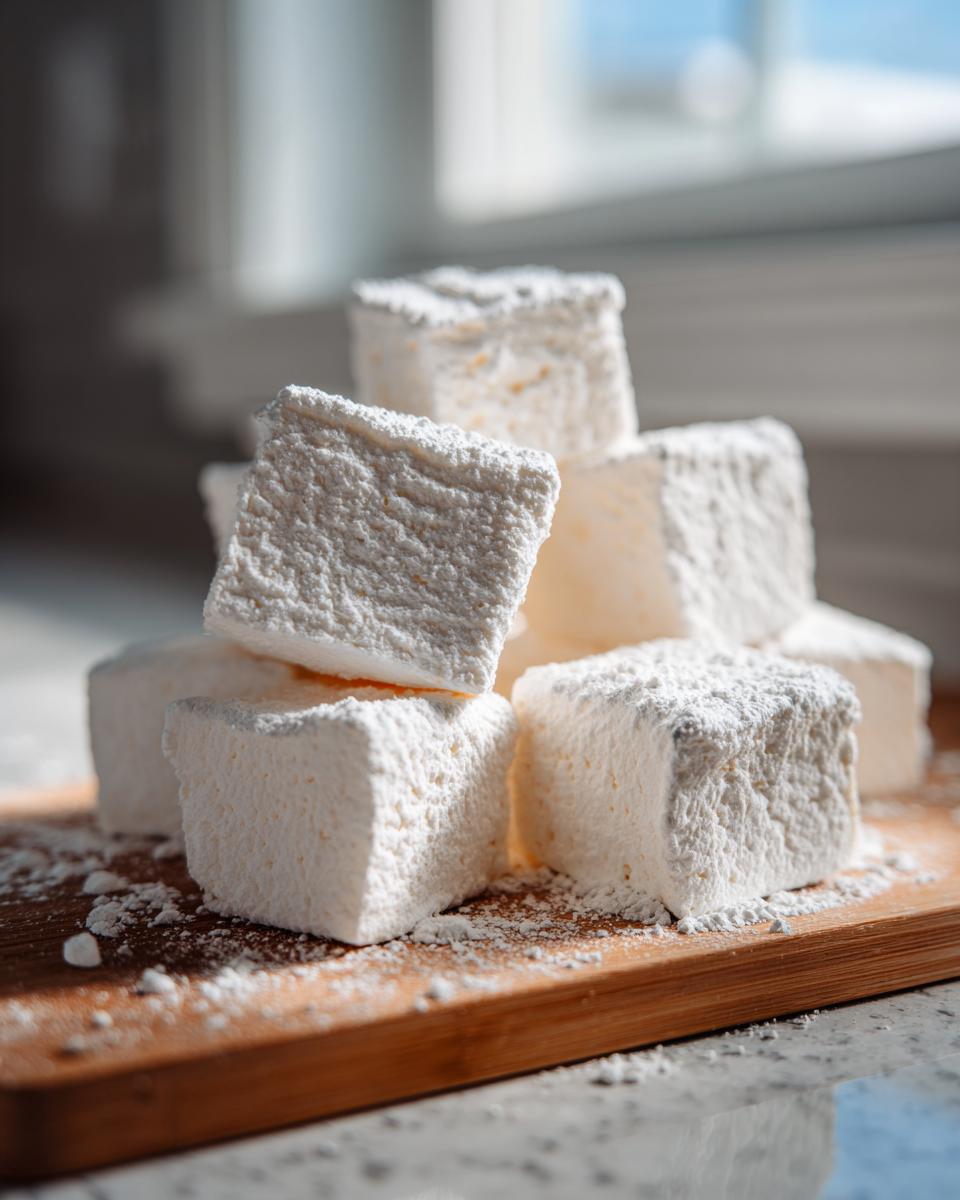
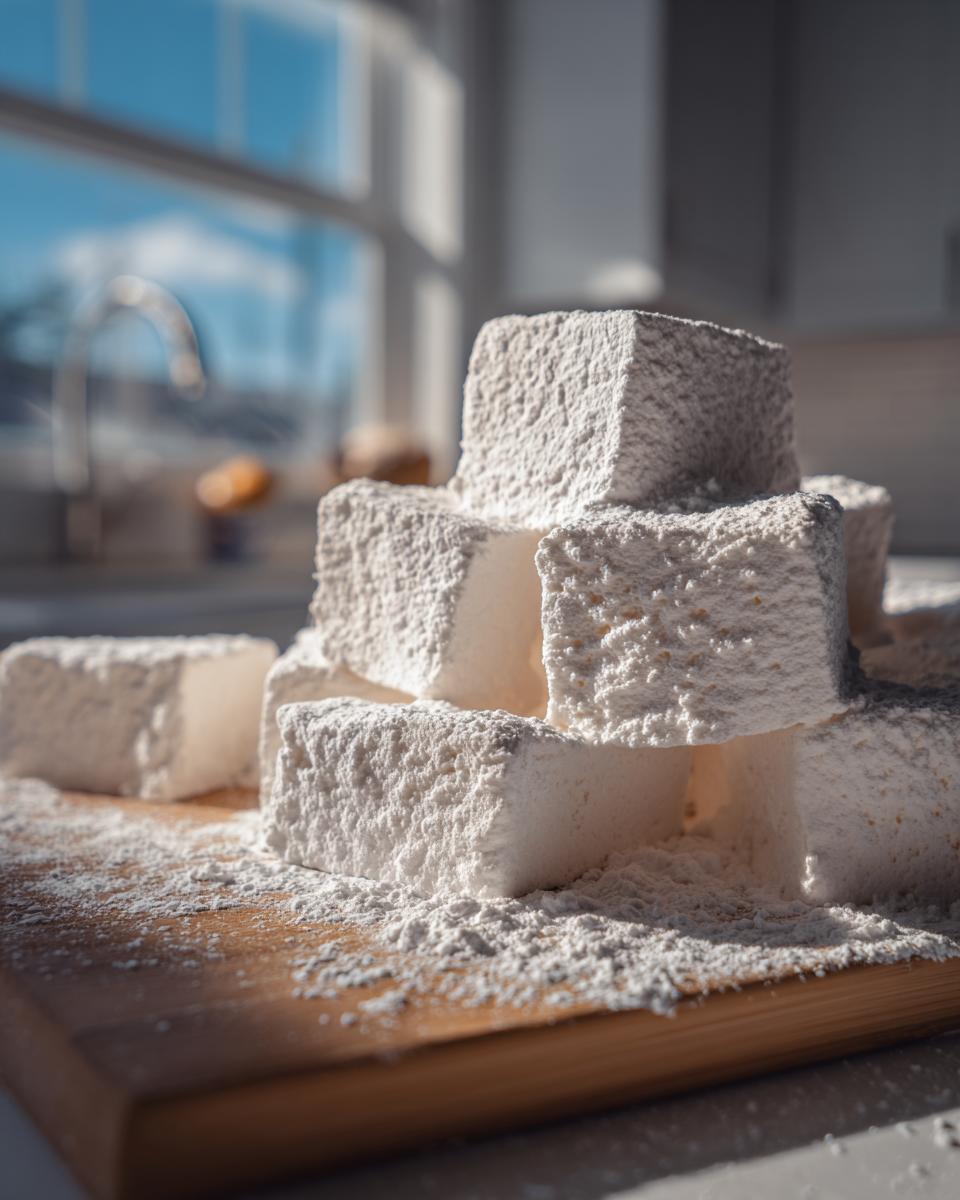
Setting and Cutting Your Homemade Marshmallows
Now comes the hardest part: waiting! Let those beautiful marshmallows sit out on the counter, uncovered, for at least 4 hours, but honestly, overnight is best. They need time to set up properly. Once they’re firm, dust the top with a little more of that cornstarch and powdered sugar mix. Use those parchment paper overhangs to lift the whole slab right out of the pan onto a cutting board. Dust your knife or a pizza cutter with a bit more of the dusting mixture (or lightly oil it!) before you start cutting. This prevents sticking like crazy! Cut them into whatever size squares you fancy, then dust all the cut sides so they don’t clump together.

Tips for Perfect Homemade Marshmallows
Making these Homemade Marshmallows is a blast, but a few little tricks can make them absolutely divine. My biggest advice? Use a reliable candy thermometer! Seriously, it’s a game-changer. Don’t eyeball the temperature; trust the thermometer for that perfect fluffy texture. Also, using good quality gelatin really makes a difference – sometimes the cheaper stuff just doesn’t bloom right. And beat that mixture for the full time! I know it feels like ages, but that’s what gives them that incredible volume. If you mess up the temperature, don’t toss them! You can often re-melt them carefully and try again, or just stir them into something like hot chocolate. You could even try whipping up some homemade coffee creamer to serve alongside your fresh marshmallows for an extra treat!

Variations and Flavor Ideas for Homemade Marshmallows
Once you’ve mastered the basic Homemade Marshmallows, get ready to go wild! This recipe is such a fun canvas to play with. Want a pop of color? Just add a tiny bit of gel food coloring during the whipping stage – think pastel pinks or blues! And the flavors? Oh my goodness. Swap out that vanilla for a teaspoon of peppermint extract for a festive treat, or try almond or even a bit of coffee or maple extract. Imagine those in your cozy fall drinks! You can even mix in mini chocolate chips or colorful sprinkles at the very end of the whipping process. They might sink a little, but they add such a fun surprise. It’s like edible confetti! Or perhaps you’re feeling a bit more tropical, like with these coconut lemon curd thumbprint cookies – you can totally adapt flavors!
Storing and Serving Your Homemade Marshmallows
Once you’ve cut up your beautiful Homemade Marshmallows, the big question is how to keep them perfect. Honestly, the best way is to store them in an airtight container at room temperature. Don’t even think about the fridge – that makes them all hard and sad! In a good container, they’ll stay delightfully soft and fluffy for about two weeks, though I doubt they’ll last that long because they’re just too delicious! They’re amazing on their own, of course, but imagine them melting into a mug of rich hot chocolate, or even better, piled high in some gooey homemade s’mores! If you’re feeling super extra, check out this recipe for stretchy pants s’mores dip – these would be perfect for that!
Frequently Asked Questions About Homemade Marshmallows
Alright, let’s dive into some questions that pop up when you’re making these delightful Homemade Marshmallows. It’s totally normal to have a few! Here are some common ones I get:
Why are my homemade marshmallows sticky?
If your marshmallows are super sticky, it usually means they didn’t quite set up fully. This can happen if the sugar syrup wasn’t cooked to the right temperature (240°F/115°C) or if they just need a bit more time to dry out at room temperature. Make sure you’re letting them sit uncovered for at least 4 hours, or even better, overnight!
Can I make vegan homemade marshmallows?
You sure can! Instead of gelatin, you’ll want to use a vegan substitute like agar-agar. The process is a little different, and you might need to adjust the liquid amounts, so look for a specific vegan marshmallow recipe. But yeah, totally doable if you’re plant-based!
How long do homemade marshmallows last?
Stored properly in an airtight container at room temperature, they’re usually good for about 2 weeks. Just keep them away from humidity and don’t put them in the fridge, or they get weirdly tough.
What can I do with failed homemade marshmallows?
Don’t you worry if they don’t turn out perfectly! Even slightly wonky marshmallows are still delicious. They’re fantastic stirred into hot chocolate, used in s’mores (who cares if they aren’t perfect squares then?), or even chopped up and folded into cookie dough. They’re still a sweet treat!
Nutritional Information for Homemade Marshmallows
Just a quick note on nutrition: these numbers are estimates, okay? They can totally change depending on the exact brands of ingredients you use and how big you cut your yummy Homemade Marshmallows! You’re looking at about 70 calories per marshmallow, with around 17g of sugar and 18g of carbs. Good news is, they’re pretty much fat-free!
Print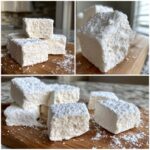
Homemade Marshmallows
- Total Time: 4 hr 35 min
- Yield: 36 servings 1x
- Diet: Vegetarian
Description
A simple recipe for making soft and fluffy marshmallows at home.
Ingredients
- 1 cup granulated sugar
- 1/2 cup light corn syrup
- 1/4 cup water, plus more for gelatin
- 2 1/2 teaspoons unflavored gelatin
- 1/4 teaspoon salt
- 1 teaspoon vanilla extract
- 1 tablespoon cornstarch
- 1 tablespoon powdered sugar
Instructions
- Lightly grease a 9×13 inch baking pan and line it with parchment paper, leaving an overhang on the sides. Dust the parchment paper with a mixture of cornstarch and powdered sugar.
- In a small bowl, sprinkle the gelatin over 1/4 cup of cold water and let it bloom for 5-10 minutes.
- In a medium saucepan, combine the granulated sugar, corn syrup, and 1/4 cup of water. Cook over medium heat, stirring until the sugar dissolves.
- Bring the mixture to a boil and cook, without stirring, until it reaches 240°F (115°C) on a candy thermometer.
- Remove the saucepan from the heat.
- Pour the hot sugar syrup in a slow, steady stream into the bloomed gelatin mixture, while beating on low speed with an electric mixer.
- Increase the mixer speed to high and beat for 10-15 minutes, until the mixture is thick, glossy, and has tripled in volume.
- Beat in the salt and vanilla extract.
- Pour the marshmallow mixture into the prepared pan. Smooth the top with a spatula.
- Let the marshmallows sit at room temperature, uncovered, for at least 4 hours, or preferably overnight.
- Once set, dust the top with more cornstarch and powdered sugar.
- Use the parchment paper overhang to lift the marshmallow slab out of the pan.
- Cut the marshmallows into desired shapes using a lightly oiled knife or pizza cutter.
- Dust the cut sides with more cornstarch and powdered sugar to prevent sticking.
Notes
- You can use different extracts like peppermint or almond for flavored marshmallows.
- Store marshmallows in an airtight container at room temperature for up to 2 weeks.
- Prep Time: 20 min
- Cook Time: 15 min
- Category: Dessert
- Method: No-Bake
- Cuisine: American
Nutrition
- Serving Size: 1 marshmallow
- Calories: 70
- Sugar: 17g
- Sodium: 5mg
- Fat: 0g
- Saturated Fat: 0g
- Unsaturated Fat: 0g
- Trans Fat: 0g
- Carbohydrates: 18g
- Fiber: 0g
- Protein: 1g
- Cholesterol: 0mg
Keywords: marshmallows, homemade, dessert, sweet, easy, no-bake, vanilla