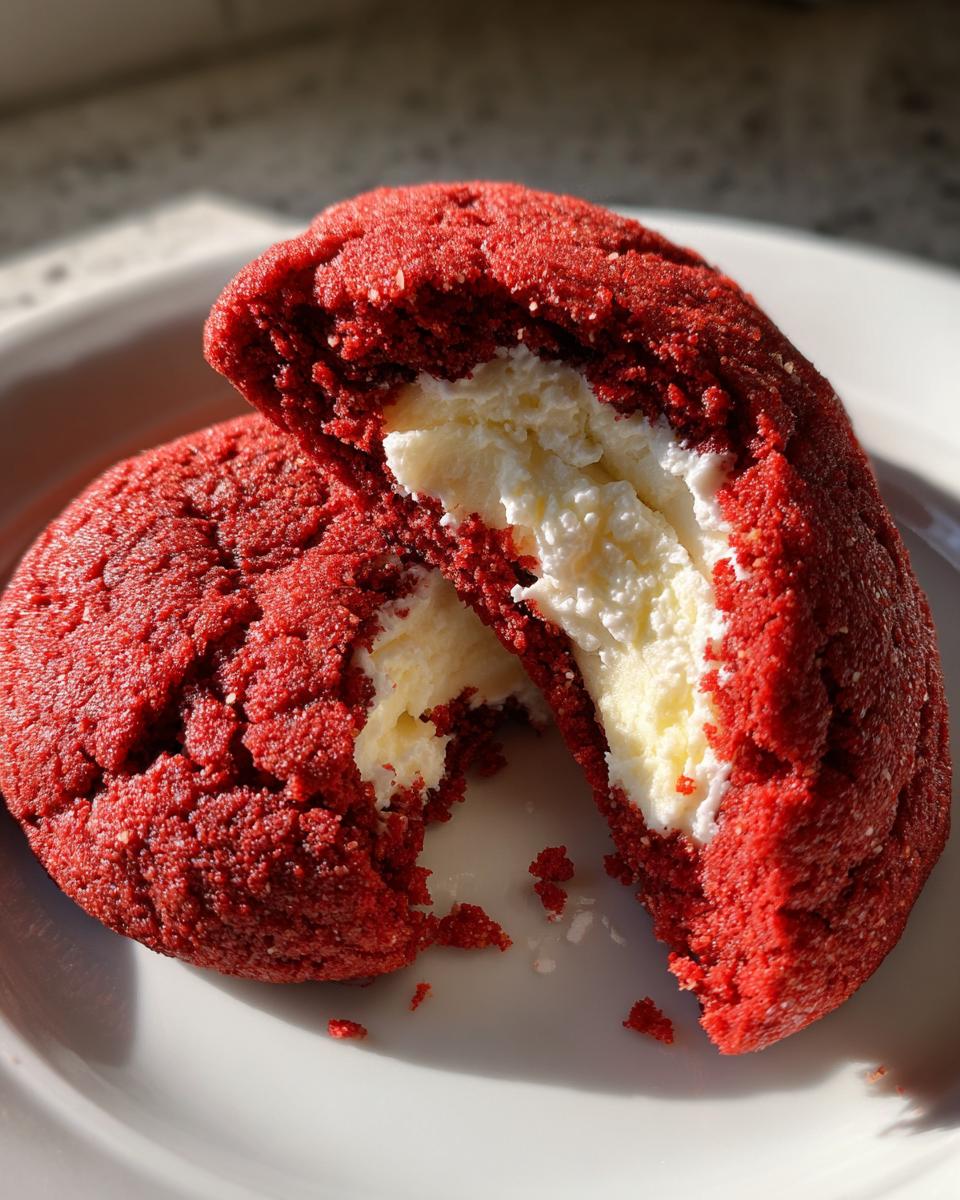
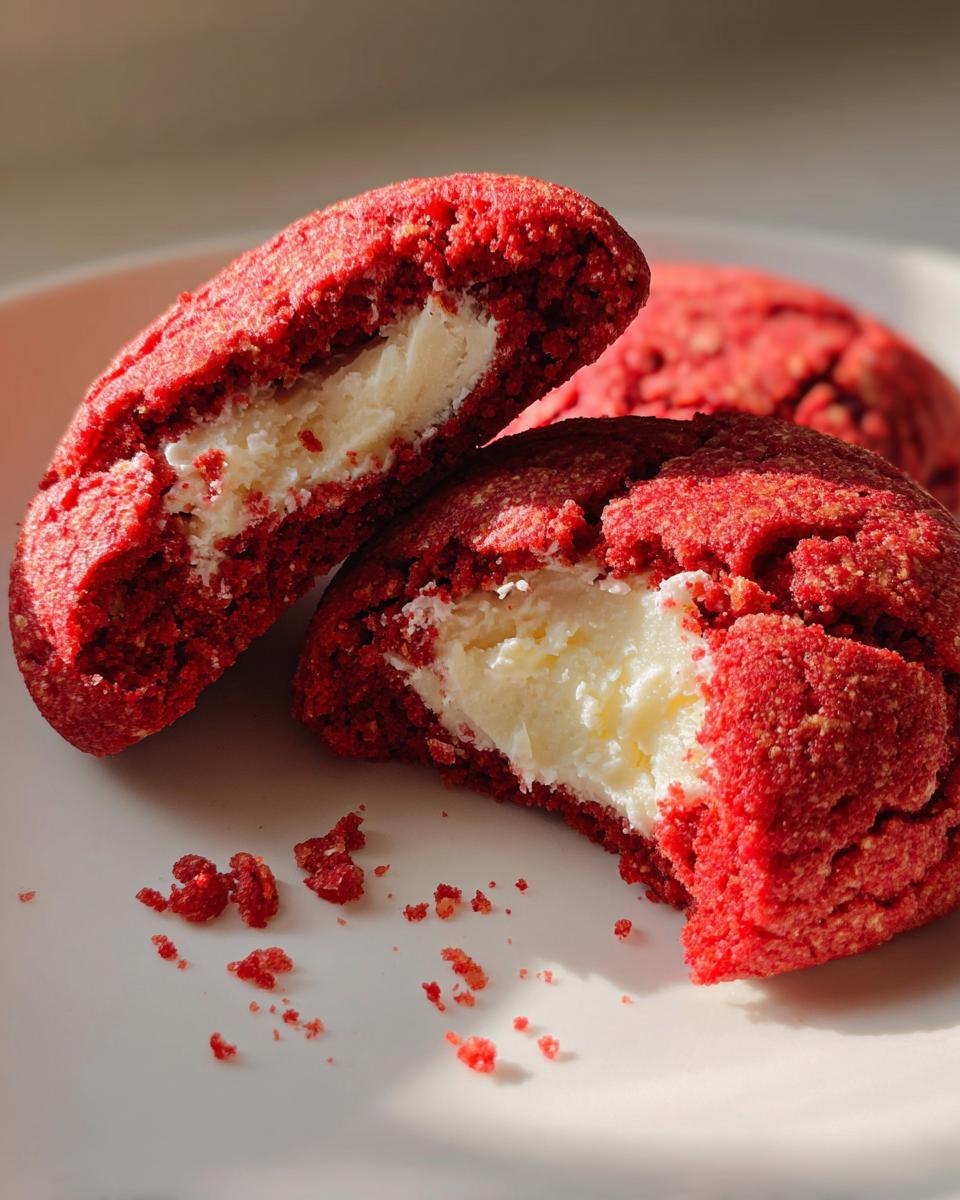
Oh, you are going to ADORE these! If there’s one thing I love more than baking, it’s a classic flavor combo done *just* right. And red velvet? It’s always felt so special, you know? That gorgeous color, that hint of cocoa… it just screams celebration. That’s why I’ve spent ages perfecting these Red Velvet Cookies with Cream Cheese Filling. They’re like little bites of pure joy, with that perfectly balanced sweet and tangy cream cheese center that just melts in your mouth. Trust me, these are going to be your new go-to!
Why You’ll Love These Red Velvet Cookies with Cream Cheese Filling
Seriously, what’s not to love here? These cookies are a total showstopper, and they’re surprisingly easy to whip up, which is always a win in my book!
- That Gorgeous Red Hue: They’ve got that signature vibrant red color that just pops. It makes them feel extra festive, no matter what you’re celebrating.
- Rich, Velvety Flavor: You get that subtle cocoa taste mixed with the sweetness of the cookie, and it’s just perfection. It’s not too much of anything, just perfectly balanced.
- The Dreamy Cream Cheese Center: Oh, this is the best part! That surprise pocket of creamy, tangy cream cheese filling inside each cookie is just divine. It adds this amazing moistness and a little zing.
- So Easy to Make: Even if you’re not a seasoned baker, you can totally nail these. The steps are straightforward, and the results are so impressive.
- Perfect for Any Occasion: Whether it’s a holiday party, a birthday, or just a Tuesday that needs cheering up, these cookies fit right in. They feel special without being fussy.
- Great for Gifting: Package these up in a cute tin or box, and you’ve got an instant, heartfelt gift that anyone would be thrilled to receive. Who wouldn’t want a homemade red velvet cookie?
Gather Your Ingredients for Red Velvet Cookies with Cream Cheese Filling
Alright, time to get our hands on some goodies! Having the right ingredients is seriously half the battle, and it makes all the difference in getting that perfect red velvet flavor and that luscious cream cheese filling. For these cookies, we want things fresh and good quality, trust me!

Essential Dry Ingredients for Red Velvet Cookies
First up, our dry stuff for the cookies themselves. You’ll need:
- 2 1/4 cups all-purpose flour (make sure to spoon it into your measuring cup and level it off, don’t just scoop!)
- 1 teaspoon baking soda
- 1/2 teaspoon salt
- 1 tablespoon unsweetened cocoa powder (this gives it that subtle chocolate hint!)
Key Wet Ingredients for Red Velvet Dough
Now for the wet ingredients that bring our red velvet dough to life:
- 1/2 cup unsalted butter, softened (super important that it’s soft, not melted!)
- 1 1/2 cups granulated sugar
- 2 large eggs
- 1 teaspoon vanilla extract
- 1-2 ounces red food coloring (this is where you can play around to get your perfect shade of red!)
The Irresistible Cream Cheese Filling Components
And for that dreamy center, we just need two simple things:
- 8 ounces cream cheese, softened (again, make sure it’s soft so it mixes up nicely!)
- 1/4 cup powdered sugar
Crafting Your Red Velvet Cookies with Cream Cheese Filling: Step-by-Step
Alright, let’s get baking! This is where the magic really happens. Don’t worry, it’s pretty straightforward, and seeing that red dough come together is just so satisfying. Just follow along, and you’ll have amazing cookies in no time!
Preparing the Red Velvet Cookie Dough Base
First things first, let’s get our dry ingredients mixed. In a medium bowl, just whisk together that flour, baking soda, salt, and the cocoa powder. Give it a good stir so everything is nicely combined. Now, in a bigger bowl – this is where the main action happens – cream together your softened butter and sugar. You want it to be nice and fluffy, like pale yellow clouds. Then, beat in your eggs one at a time, making sure each one is mixed in before you add the next, and stir in that vanilla extract. For the color, mix your cocoa powder and red food coloring in a tiny bowl to make a paste. This helps distribute the color really evenly. Add that paste to your butter mixture and beat it all together until it’s a gorgeous, uniform red. Now, slowly add your dry ingredients to the wet ingredients, just mixing until it’s *barely* combined. Seriously, don’t overmix it! A few streaks of flour are totally fine.
Chilling and Shaping the Red Velvet Cookie Dough
This next step is super important for getting that perfect cookie shape and stopping them from spreading too much: chilling the dough! Cover that beautiful red dough and pop it in the fridge for at least 30 minutes. While it’s chilling, let’s make the filling. Just beat your softened cream cheese and powdered sugar together until it’s smooth and creamy. No lumps allowed! Once the dough is chilled, it’s time to shape. Grab about a tablespoon of the dough, flatten it in your palm, and spoon about a teaspoon of that cream cheese filling right in the middle. Then, take another tablespoon of dough, flatten that, and gently place it over the filling, carefully pinching the edges of both dough pieces together to completely seal in that yummy cream cheese. Roll it gently into a ball. Make sure that filling is totally enclosed!
Baking Your Red Velvet Cookies to Perfection
Okay, oven time! Preheat it to 350°F (175°C) and line your baking sheets with parchment paper. Parchment paper is your best friend here – it stops sticking and makes cleanup a breeze. Place your cookie balls onto the prepared sheets, giving them about 2 inches of space between them because they will spread a little. Now, pop them in the oven for about 10 to 12 minutes. You’re looking for the edges to be set. They might look a little soft in the center, but that’s okay – they’ll firm up as they cool.
Cooling and Finishing Your Red Velvet Cookies with Cream Cheese Filling
Once they’re out of the oven, let them hang out on the baking sheets for a few minutes. This is crucial because they’re still pretty delicate right after baking. After they’ve cooled a bit on the sheet, carefully transfer them to a wire rack to cool completely. This lets the air circulate and ensures they don’t get soggy bottoms. And voilà! Your gorgeous Red Velvet Cookies with Cream Cheese Filling are ready to be devoured!
Expert Tips for Perfect Red Velvet Cookies with Cream Cheese Filling
Okay, so you’ve made these cookies, and they’re already pretty darn good, right? But if you want to take them from “good” to “OMG, I need the recipe NOW,” here are a few little secrets I’ve picked up along the way. These are my tried-and-true tips for making sure they turn out absolutely perfect every single time!
- Get That Red Right: Don’t be shy with the food coloring! Start with the lower amount (1 ounce) and see how it looks after you mix it in. If you want a deeper, richer red, add the second ounce. Gel food coloring usually gives you the most vibrant color without making the dough too wet.
- Chill Out! Seriously, don’t skip the chilling step. It’s the secret weapon against cookies spreading too much. Cold dough holds its shape better in the oven, giving you those nice, thick cookies with a surprise center, not flat discs.
- Seal the Deal: When you’re enclosing the cream cheese filling, really pinch those dough edges together securely. You want to make sure that lovely cream cheese stays tucked inside while baking. If it oozes out a bit, don’t stress, but a good seal makes a difference!
- Don’t Overbake: These cookies bake fast! They should look set around the edges but still a little soft in the middle when you take them out. They finish cooking on the hot baking sheet, which keeps them wonderfully moist and chewy.
- Room Temp is Key: Make sure your butter and cream cheese are truly softened, not melted. This makes creaming them together much easier and helps create that light, fluffy texture that’s characteristic of a great cookie, especially with that creamy filling.
Common Questions About Red Velvet Cookies with Cream Cheese Filling
Got questions? I’ve got answers! Baking should be fun, not frustrating, so let’s clear up anything that might be on your mind about these delicious red velvet cookies with cream cheese filling.
Q: Can I make these red velvet cookies without food coloring?
You can! The color will be more of a light brown cookie with a cream cheese center. It’ll still taste great, but you’ll miss out on that signature red velvet look. For a more natural red hue, you could try beet powder, but it might subtly affect the flavor.
Q: How do I stop my cream cheese filling from leaking out?
The biggest trick is to make sure the dough is well-chilled and that you really seal the filling inside the cookie dough. Pinch those edges together firmly! Also, avoid overfilling with the cream cheese; a smaller amount is easier to enclose.
Q: Can I use regular cream cheese instead of softened?
It’s really best to use softened cream cheese. If it’s too cold, it won’t mix smoothly with the powdered sugar, and you might end up with lumpy filling. Let it sit on the counter for about an hour to get nice and soft.
Q: My cookies spread too much. What did I do wrong?
This usually happens if the butter was too soft or melted, or if the dough wasn’t chilled long enough. Make sure your butter is just softened (you can press an indent with your finger) and give that dough at least 30 minutes in the fridge! Chilling is key for thicker cookies.
Ingredient Notes and Substitutions for Red Velvet Cookies
Sometimes you just need to swap things out, right? Don’t worry, these red velvet cookies with cream cheese filling are pretty forgiving. For that gorgeous red color, I really recommend using a gel food coloring. It gives you a super vibrant shade without adding too much liquid to the dough, which can make cookies spread. If you can’t find gel, liquid food coloring works, but you might need a bit more, and be careful not to make the dough too wet. As for the butter, unsalted is best so you can control the salt content, but if you only have salted butter, just cut back the added salt in the recipe a little bit. And for the cream cheese? Full-fat, block-style cream cheese gives the best texture for the filling. Lighter versions can sometimes make the filling a bit too watery.
Serving and Storing Your Red Velvet Cookies with Cream Cheese Filling
These cookies are absolutely divine on their own, but they’re even better with a cold glass of milk or a hot cup of coffee. For a real treat, serve them with a scoop of vanilla ice cream! If you happen to have any leftovers (which is rare in my house!), store them in an airtight container. Because of that yummy cream cheese filling, it’s best to keep them in the refrigerator. They’ll stay fresh and delicious for about 3-4 days. Just let them sit out for a few minutes before enjoying if they’ve been chilled!
Understanding the Nutrition of Red Velvet Cookies with Cream Cheese Filling
Just a little note here: the nutritional information for these red velvet cookies with cream cheese filling is an estimate. It can change depending on the brands of ingredients you use and exactly how big you make your cookies. Think of it as a general guide!

Amazing Red Velvet Cookies with Cream Cheese Filling
- Total Time: 32 minutes
- Yield: 24 cookies 1x
- Diet: Vegetarian
Description
Delicious red velvet cookies with a sweet cream cheese filling. Perfect for any occasion.
Ingredients
- 2 1/4 cups all-purpose flour
- 1 teaspoon baking soda
- 1/2 teaspoon salt
- 1/2 cup unsalted butter, softened
- 1 1/2 cups granulated sugar
- 2 large eggs
- 1 teaspoon vanilla extract
- 1 tablespoon unsweetened cocoa powder
- 1–2 ounces red food coloring
- 8 ounces cream cheese, softened
- 1/4 cup powdered sugar
Instructions
- In a bowl, whisk together flour, baking soda, and salt.
- In another bowl, cream together butter and granulated sugar until light and fluffy.
- Beat in eggs one at a time, then stir in vanilla extract.
- In a small bowl, mix cocoa powder and red food coloring to form a paste. Add to the butter mixture and beat until well combined.
- Gradually add the dry ingredients to the wet ingredients, mixing until just combined.
- Chill the dough for at least 30 minutes.
- Preheat oven to 350°F (175°C). Line baking sheets with parchment paper.
- For the filling, beat together softened cream cheese and powdered sugar until smooth.
- Scoop about 1 tablespoon of cookie dough, flatten it slightly, and place about 1 teaspoon of cream cheese filling in the center.
- Cover the filling with another tablespoon of cookie dough, shaping into a ball.
- Place cookies on the prepared baking sheets, about 2 inches apart.
- Bake for 10-12 minutes, or until edges are set.
- Let cookies cool on the baking sheets for a few minutes before transferring to a wire rack to cool completely.
Notes
- Adjust red food coloring for desired color intensity.
- Do not overmix the cookie dough.
- Ensure cream cheese filling is fully enclosed in the cookie dough.
- Prep Time: 20 minutes
- Cook Time: 12 minutes
- Category: Dessert
- Method: Baking
- Cuisine: American
Nutrition
- Serving Size: 1 cookie
- Calories: 180
- Sugar: 15g
- Sodium: 80mg
- Fat: 9g
- Saturated Fat: 5g
- Unsaturated Fat: 4g
- Trans Fat: 0g
- Carbohydrates: 23g
- Fiber: 1g
- Protein: 2g
- Cholesterol: 30mg
Keywords: red velvet cookies, cream cheese filling, chocolate cookies, holiday cookies, dessert recipe