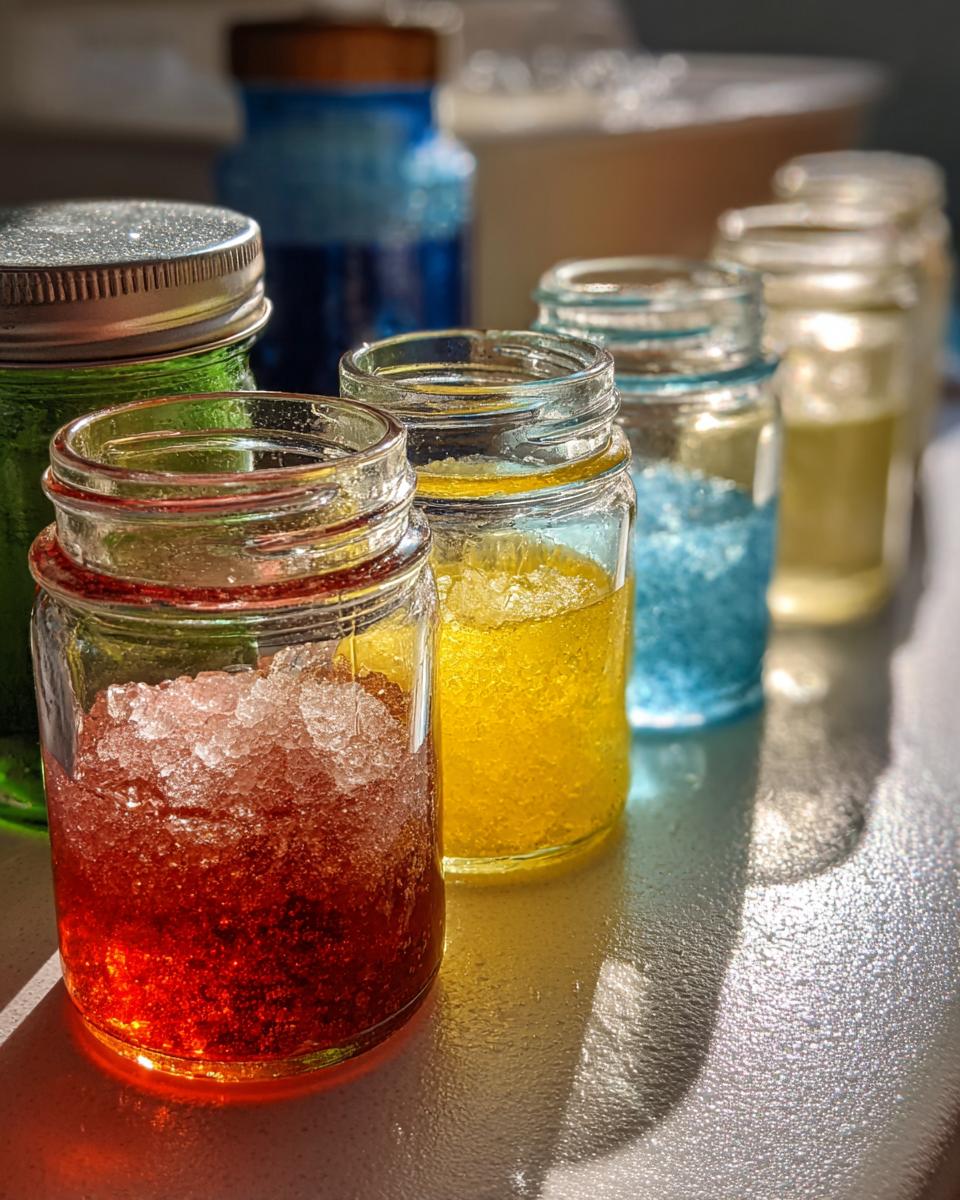
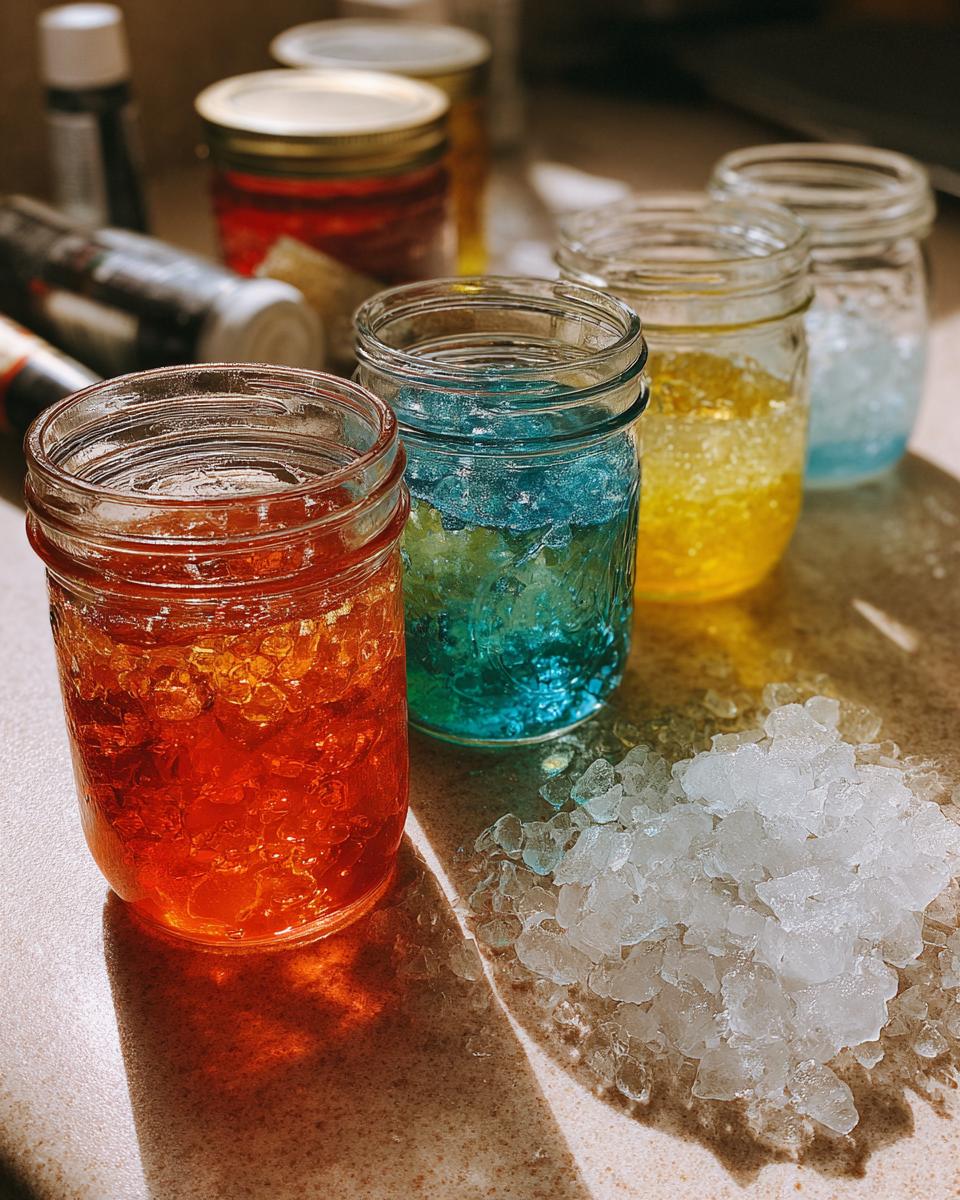
Nothing screams summer like the first bite of a frosty snow cone, am I right? My childhood summers were marked by the sound of the ice shaver and sticky fingers from rainbow-colored syrup. But here’s the thing – you don’t need a fancy machine or expensive syrups to recreate that magic! These basic syrups for snow cones are ridiculously easy to make at home with just three ingredients you probably already have. I’ve spent years perfecting my syrup ratios (with plenty of “Oops!” moments along the way), and trust me, once you taste homemade, you’ll never go back to those artificial bottled versions.
What I love most is how customizable these syrups are. Want neon blue raspberry for the kids? Done. Feeling fancy with lavender-hinted lemonade syrup? Absolutely possible. The best part? You can whip up a batch faster than it takes to wait in line at the carnival stand. Just grab your saucepan and let’s make some sweet summer memories!

Why You’ll Love These Basic Syrups for Snow Cones
Oh honey, let me tell you why this recipe is about to become your summer staple:
- Ready in under 10 minutes – Faster than running to the convenience store when that sugar craving hits!
- Endless flavor possibilities – Mix and match extracts to create your dream combo (my current obsession? Watermelon-lime).
- No weird ingredients – Just simple pantry staples instead of those unpronounceable chemicals in store-bought syrups.
- Kid-approved magic – Watch their eyes light up when you whip out custom-colored syrups (pro tip: let them pick the colors!).
- Cools you to the core – That first icy-crunchy-sweet bite is pure summer happiness in a cup.
Seriously, once you try homemade, you’ll wonder why you ever settled for anything else!
Ingredients for Basic Syrups for Snow Cones
Okay, let’s gather the troops! The beauty of these syrups is how few ingredients you need – I literally keep this stuff stocked all summer long. Here’s what you’ll want to grab:
- 1 cup granulated sugar – Plain white sugar works perfectly, though I sometimes sneak in a tablespoon of brown sugar for caramel notes when making root beer flavor
- 1 cup water – Straight from the tap is fine, but filtered water makes the cleanest-tasting syrup
- 1 teaspoon flavor extract – My pantry’s always stocked with strawberry, cherry, and blue raspberry (the classics!), but don’t be afraid to experiment with coconut or watermelon
- Food coloring (optional) – Gel colors give the brightest hues, but I’ve used everything from beet juice to turmeric for natural alternatives
That’s it! Well, plus a pinch of love – but that ingredient’s always free.
Equipment You’ll Need
You won’t need fancy gadgets for this – just raid your kitchen for these basics:
- Small saucepan – My trusty 1-quart pot gets the job done perfectly
- Wooden spoon – For stirring (watch out for that bubbly sugar – it’s hot!)
- Measuring cups – Precision matters with that sugar ratio
- Glass jars or squeeze bottles (optional) – These make storage and pouring a breeze – I repurpose clean ketchup bottles for perfect drizzles!
How to Make Basic Syrups for Snow Cones
Alright, let’s get syrup-making! This process is so simple you’ll have it memorized after one batch. Just follow these foolproof steps (learned through many sticky trial-and-error moments in my kitchen!).
Step 1: Combine Water and Sugar
Grab your saucepan and dump in that cup each of water and sugar. Medium heat is your friend here – too high and you’ll risk caramelization (unless you want caramel syrup, which is actually delicious!). Stir constantly with your wooden spoon until every single sugar crystal disappears – about 3-5 minutes. The moment it turns clear like liquid glass? That’s your cue!
Step 2: Add Flavor and Color
Remove the pan from heat immediately – high heat destroys delicate extract flavors. Now stir in your chosen extract (start with 1 teaspoon, you can always add more). This is when I add food coloring too – a few drops at a time until I get that perfect carnival hue. Watch how the colors swirl hypnotically!
Step 3: Cool and Store
Patience time! Let the syrup cool completely at room temperature (about 30 minutes) before pouring over ice – hot syrup makes sad, melty snow cones. I transfer mine to clean jars or those handy squeeze bottles once cooled. Store in the fridge where it’ll stay good for up to two weeks… though mine never lasts that long!
Tips for Perfect Basic Syrups for Snow Cones
After making countless batches (and a few colorful kitchen disasters), here are my foolproof tricks for snow cone syrup success:
- Taste as you go – Start with 1 tsp extract, then add more drop by drop until the flavor pops just right
- Quality matters – Splurge on good extracts; that cheap imitation vanilla won’t give you the same magic
- Layer flavors – Try mixing ½ tsp each of raspberry and lemon for a fireworks effect on your tongue
- Mind the heat – Too hot and your extracts will lose their oomph – always take the pan off the burner first!
- Get creative with colors – Mix food coloring drops in a spoon first to create custom shades before adding to syrup
Remember – there are no mistakes here, just happy (and sometimes neon-colored) accidents!
Variations for Basic Syrups for Snow Cones
Now for the fun part – let your imagination run wild with these flavor twists! My kids and I play “mad syrup scientist” every summer, mixing up wild combos. Some of our favorites:
- Tropical dream – Mango extract + splash of coconut milk for creaminess (add turmeric for golden color)
- Berry blast – Mix strawberry and blue raspberry extracts (with a secret pinch of citric acid for tang!)
- Herbal delight – Lavender or mint extract with lemon zest – so refreshing!
For natural colors, try beet juice for pink, matcha for green, or blended blueberries for purple. The possibilities are endless – what will you create?
Serving Suggestions
Oh, the joy of pouring that vibrant syrup over a mountain of finely crushed ice – it’s practically a summer ritual in my house! But why stop there? Sometimes I’ll get fancy with fresh fruit toppings (try tiny diced strawberries or mango bits) or a fluffy dollop of whipped cream for extra indulgence. My neighbor’s kids go wild when I sprinkle mini chocolate chips over coconut syrup – instant tropical party! And for adults? A drizzle of cold brew coffee syrup over ice makes the most refreshing afternoon pick-me-up.
Storage & Reheating
Here’s the beautiful thing about these syrups – they store like a dream! Just pour your cooled syrup into clean jars or squeeze bottles (my Dollar Tree finds work perfectly) and pop them in the fridge. They’ll stay fresh and flavorful for up to two weeks – though in my house, they’re lucky to last two days! No reheating needed, since cold syrup over crunchy ice is pure perfection. Pro tip: Label your bottles unless you want rainbow-colored fridge shelves (speaking from experience here!).
Nutritional Information
Now let’s be real – we’re not eating snow cones for their health benefits! Exact nutrition varies based on your extracts and sugar amounts, but a typical 2-tablespoon serving comes in around 50 calories of pure summer joy.
Frequently Asked Questions
I’ve gotten so many great questions about these syrups over the years – let me share the answers to the ones that pop up most often!
Can I use honey instead of sugar?
You bet! Swap the sugar for equal parts honey, but remember it’ll give a more floral taste. I love this with lemon or lavender extracts. Just know the syrup might be slightly thicker.
How long does homemade syrup last?
In the fridge, your syrups will stay fresh about 2 weeks. I always give mine a sniff test – if it smells off or gets cloudy, time to make a fresh batch!
Why remove from heat before adding extracts?
High heat makes delicate flavors fade fast. Taking it off the burner first preserves that bright, vibrant taste we all love in snow cones.
Can I make sugar-free versions?
Absolutely! Sugar substitutes work, but you’ll need to adjust quantities since they’re often sweeter. Start with half the amount and taste as you go.
What’s the best ice texture?
The fluffier the better! If you don’t have a shaver, pulse ice in a blender briefly – just don’t overdo it or you’ll get slush instead of that perfect crunchy snow.
Share Your Snow Cone Creations
I’d love to see your colorful syrup experiments! Snap a photo of your masterpiece and tag me – I live for those “aha!” moments when someone creates a flavor combo I’ve never tried. Nothing makes me happier than seeing families making sweet memories with this simple recipe, just like I did with my grandma’s old ice shaver. Now go forth and create some syrup magic!
Print
3-Ingredient Basic Syrups for Snow Cones You’ll Crave
- Total Time: 10 minutes
- Yield: 1 cup 1x
- Diet: Vegetarian
Description
Easy-to-make basic syrups for snow cones, perfect for hot summer days. Customize flavors and colors to your liking.
Ingredients
- 1 cup water
- 1 cup granulated sugar
- 1 teaspoon flavor extract (e.g., strawberry, blue raspberry, cherry)
- Food coloring (optional)
Instructions
- Combine water and sugar in a saucepan.
- Heat over medium heat, stirring until sugar dissolves.
- Remove from heat and stir in flavor extract.
- Add food coloring if desired.
- Let cool before pouring over crushed ice.
Notes
- Store leftover syrup in the fridge for up to two weeks.
- Experiment with different extracts for unique flavors.
- Adjust sugar to taste.
- Prep Time: 5 minutes
- Cook Time: 5 minutes
- Category: Dessert
- Method: Stovetop
- Cuisine: American
Nutrition
- Serving Size: 2 tablespoons
- Calories: 50
- Sugar: 13g
- Sodium: 0mg
- Fat: 0g
- Saturated Fat: 0g
- Unsaturated Fat: 0g
- Trans Fat: 0g
- Carbohydrates: 13g
- Fiber: 0g
- Protein: 0g
- Cholesterol: 0mg
Keywords: snow cone syrup, homemade syrup, summer treat