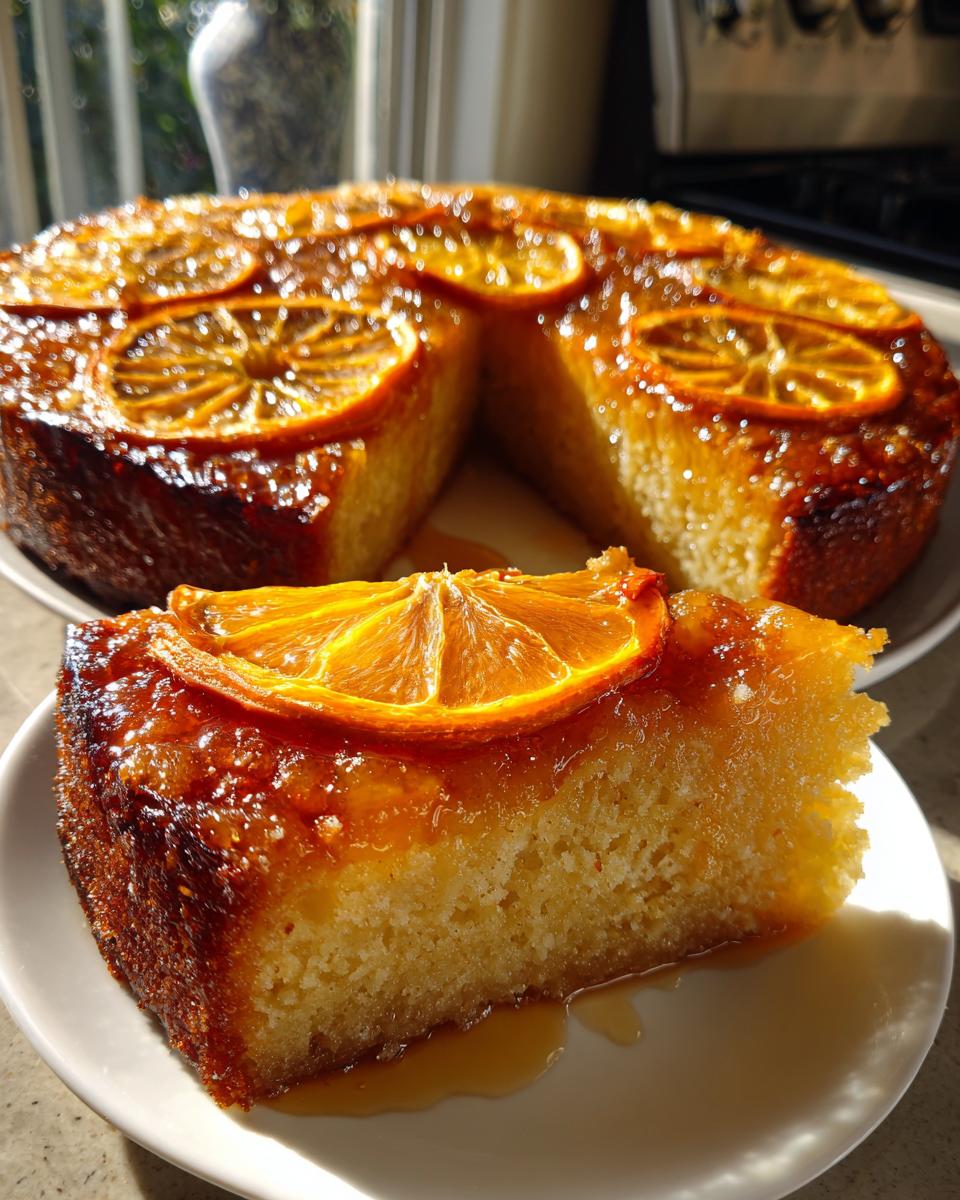
Oh my gosh, you HAVE to try this upside down orange cake! I stumbled upon this recipe during a serious citrus craving last winter, and wow—it was love at first bite. There’s something magical about how those caramelized orange slices glisten on top when you flip the cake. Plus, it’s shockingly easy to make!
I remember my first attempt—I was convinced I’d mess up the flipping part (total kitchen disaster flashbacks from my failed pineapple upside-down cake years ago). But surprise! This version is much more forgiving. The oranges create this gorgeous natural syrup that keeps the cake unbelievably moist while baking.
What I adore most is how simple ingredients transform into something that looks fancy enough for guests but comes together in under an hour. My neighbor actually thought I bought it from a bakery when I brought over a slice! That’s the beauty of upside down cakes—they do all the decorating for you while tasting like sunshine in dessert form.
Why You'll Love This Upside Down Orange Cake
Let me tell you why this cake became my go-to dessert – it's basically happiness in cake form! First off, that caramelized orange topping? Absolute magic. The oranges turn into this sticky, citrusy glaze that makes every bite sing. And don't even get me started on the texture – so unbelievably moist it practically melts in your mouth.
Here's what makes it special:
- Showstopper looks with zero effort – The oranges arrange themselves into a gorgeous pattern while baking. No fancy decorating skills needed!
- Moisture for days – Unlike dry pound cakes that need soaking, this one stays perfectly tender thanks to the orange syrup soaking upward.
- Simple enough for weeknights – You probably have all the ingredients already, and it mixes up faster than running to the bakery.
- Crowd-pleasing versatility – Equally perfect for brunch, afternoon tea, or dressed up with whipped cream for dinner parties.
Seriously, I've made this for book club, potlucks, even my niece's bridal shower – it disappears every time. The best part? Watching people's faces light up when you flip that cake pan to reveal the glistening orange top. Pure kitchen magic!

Ingredients for Upside Down Orange Cake
Here’s the beautiful part – you only need simple pantry staples to make magic happen! But trust me, the quality of these ingredients makes all the difference. I learned this the hard way when I once tried using margarine instead of real butter – let’s just say that cake and I aren’t on speaking terms anymore.
The star players:
- 2 large oranges – Please, please use fresh ones! The thin peel is everything here. Navel oranges work great, but blood oranges make a stunning winter variation.
- 1 cup sugar (divided) – We’ll use half for caramelizing the oranges and half for the batter. Granulated works perfectly – no fancy sugars needed.
- 1/2 cup unsalted butter, softened – Real butter only! Take it out 30 minutes before baking so it creams properly. Cold butter = sad, dense cake.
- 2 eggs at room temperature – This matters more than you think! Cold eggs don’t blend as smoothly. Quick tip: soak them in warm water for 5 minutes if you forgot to take them out.
The supporting cast:
- 1 1/2 cups all-purpose flour – Don’t pack it! Spoon it lightly into measuring cups for the perfect texture.
- 1 tsp baking powder – Our little rising helper. Make sure yours isn’t expired – give the canister a sniff test.
- 1/2 tsp salt – Just enough to balance the sweetness. I prefer fine sea salt for even distribution.
- 1/2 cup milk – Whole milk makes the richest cake, but any percentage works in a pinch.
- 1 tsp vanilla extract – The flavor booster! Pure extract makes a difference over imitation.
See? Nothing weird or hard to find. I bet you’ve got most of this in your kitchen right now. Just grab some fresh oranges, and you’re golden!
How to Make Upside Down Orange Cake
Okay, let’s get baking! I promise this upside down orange cake comes together easier than you think. Just follow these simple steps, and you’ll be flipping out (literally) over how gorgeous it turns out. The key is taking your time with each layer – trust me, the payoff is worth it!
Preparing the Orange Layer
First things first – grab that 9-inch round cake pan (metal works best for even browning). Here’s my little trick: line the bottom with parchment paper cut to fit. It’s like insurance against sticking when you flip the cake later!
Now for the fun part – the oranges! Slice them about 1/4-inch thick – too thin and they’ll disappear, too thick and they won’t caramelize properly. I like to remove any seeds but keep the peels on – they soften beautifully while baking. Arrange them in a single layer, slightly overlapping like flower petals. Don’t stress about perfection here – it’ll look gorgeous no matter what!
Sprinkle that 1/2 cup sugar evenly over the oranges. This is where the magic happens – as it bakes, the sugar will melt into the most amazing citrus caramel. Just wait until you smell it!
Mixing the Cake Batter
Now for the cake part! In a big bowl, cream together the softened butter and remaining 1/2 cup sugar until it’s light and fluffy. This takes about 2 minutes with a hand mixer – you’ll know it’s ready when it looks almost whipped. Add the eggs one at a time, beating well after each. Pro tip: if your mixture looks curdled, just add a tablespoon of flour to bring it back together.
In another bowl, whisk together the flour, baking powder and salt. Now the dance begins – alternate adding the dry ingredients and milk to the butter mixture, starting and ending with the dry. Mix just until combined after each addition – overmixing makes tough cakes! Finally, stir in that vanilla extract. The batter should be thick but pourable – if it seems stiff, add a splash more milk.
Baking and Inverting the Cake
Gently pour the batter over your beautiful orange arrangement, spreading it evenly to the edges. Pop it in your preheated 350°F oven and resist opening the door for at least 30 minutes! You’ll know it’s done when the edges pull away slightly from the pan and a toothpick comes out clean – about 35-40 minutes total.
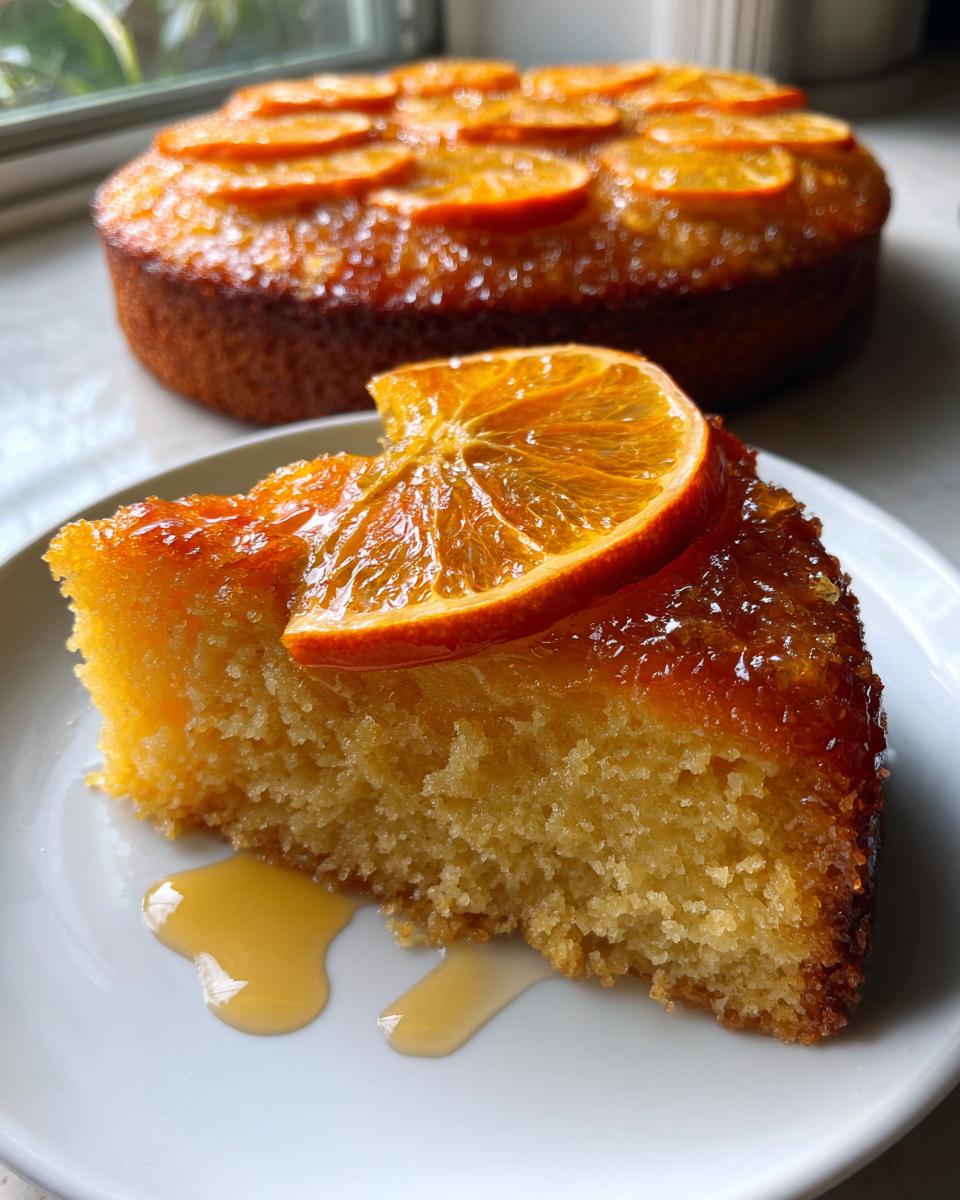
Here’s the critical part: let it cool in the pan for exactly 10 minutes. Any less and the oranges might stick; any more and the caramel hardens too much. Run a knife around the edges, place your serving plate on top, and with oven mitts (that caramel is hot!), confidently flip it over in one smooth motion. Lift the pan slowly – ta-da! That first glimpse of the glistening orange top never gets old.
Let it cool completely before slicing – I know it’s hard to wait, but this gives the syrup time to set. The anticipation makes that first bite even sweeter!
Tips for Perfect Upside Down Orange Cake
After making this cake more times than I can count (okay fine, I may have a slight obsession), I’ve learned all the little tricks that take it from good to “oh-my-gosh-can-I-have-the-recipe” amazing. These are my can’t-live-without tips that’ll guarantee you success every time!
Pat those oranges dry!
Here’s a lesson I learned the soggy way – after slicing your oranges, give them a quick pat with paper towels. Those natural juices are wonderful, but too much moisture can make your caramel layer watery instead of sticky-perfect. A few gentle taps does the trick!
The 10-minute rule is sacred
I know you’ll be tempted to flip that cake the second it comes out of the oven – resist! Wait exactly 10 minutes (set a timer if you’re impatient like me). This gives the caramel just enough time to set without hardening completely. Trust me, I’ve rushed this step before and ended up with half my oranges stuck to the pan. Not cute.
Loosen before you flip
Before the big reveal, take a thin knife and gently run it around the entire edge of the cake. This helps release any spots where the caramel might have stuck. Do it while the cake is still warm – it makes all the difference for that perfect flip!
Slice with a warm knife
Want clean slices without mangling your beautiful orange design? Heat your knife under hot water and dry it quickly before cutting. The warm blade glides right through without tearing. I do this between every slice – it’s my secret weapon for picture-perfect pieces!
One bonus tip? If any oranges do stick to the pan (it happens to the best of us), just scoop them out gently and place them back on the cake. The caramel acts like edible glue – no one will ever know!
Variations for Upside Down Orange Cake
One of the best things about this upside down orange cake is how easily you can play with it! I love experimenting with different twists – sometimes I’ll surprise even myself with how a simple swap can create a whole new dessert experience. Here are my favorite variations that still honor that classic citrus magic:
Citrus swaps that wow:
- Blood oranges – When they’re in season, these make the most stunning ruby-red topping. The flavor’s slightly more complex too – a little berry-like!
- Clementines or tangerines – Perfect for when you want smaller, sweeter citrus slices. Just use more slices to cover the pan.
- Lemon-orange combo – Alternate slices of each for a pretty two-tone effect and extra zing! (Pucker warning though!)
Flavor boosters:
- Cinnamon sugar – Mix a teaspoon of cinnamon into the sugar you sprinkle over the oranges – cozy warmth meets bright citrus.
- Almond extract – Swap the vanilla for almond extract in the batter – it pairs shockingly well with oranges!
- Grand Marnier glaze – Brush the flipped cake with an orange liqueur syrup for an adults-only version.
Texture tweaks:
- Add pecans – Sprinkle chopped pecans over the oranges before adding batter for crunch.
- Coconut twist – Mix shredded coconut into the batter for tropical vibes.
The beauty is you can make this cake a dozen different ways and it’ll always feel special. My rule? Whatever variation you try, keep those fresh oranges front and center – they’re the real stars here!
Serving and Storing Upside Down Orange Cake
Oh, the glorious moment when you get to serve this beauty! Here’s my not-so-secret secret – this upside down orange cake tastes best when it’s still slightly warm. The caramelized orange topping becomes this luscious, spoonable syrup that just begs to be paired with a dollop of freshly whipped cream. I like to add a tiny sprinkle of orange zest on top for extra flair – it makes people feel like they’re getting something fancy!
If you’re serving it for company (prepare for recipe requests!), let the cake cool completely first, then warm individual slices for about 10 seconds in the microwave. The heat brings back that fresh-from-the-oven magic. For an extra special touch, drizzle each plate with a little of the orange syrup that collects at the bottom – pure citrus gold!
Now, about storage – if by some miracle you have leftovers (it happens!), here’s how to keep them happy:
- Room temperature: Cover tightly with plastic wrap or store in an airtight container for up to 2 days. The oranges keep it surprisingly moist!
- Refrigerator: If your kitchen runs warm, pop it in the fridge for up to 4 days. Just let slices come to room temp or warm slightly before serving.
- Freezing: Wrap individual slices tightly in plastic, then foil. Freeze for up to 3 months. Thaw overnight in the fridge, then refresh in a 300°F oven for 5 minutes.
One word of caution – that gorgeous caramelized top can get sticky when stored. Place parchment paper between slices if stacking them. And whatever you do, don’t refrigerate while still warm – you’ll get condensation that makes the topping weep. Learned that one the hard way!
Truth be told, this cake rarely lasts more than a day in my house. My husband has been known to sneak slices for breakfast (not that I blame him – citrus totally counts as fruit, right?). But if you do need to store it, these tricks will keep it tasting just-baked fresh!
Upside Down Orange Cake FAQs
I get so many questions about this cake – which means you’re probably wondering some of these things too! Here are the answers to everything I’ve been asked (sometimes multiple times by the same very enthusiastic friends).
Can I use bottled orange juice instead of fresh oranges?
Oh honey, no! The magic is in those fresh orange slices – their natural oils and texture create that beautiful caramelized topping. Bottled juice would just make a soggy mess. If you’re in a pinch, try canned mandarin oranges (well-drained), but fresh is always best!
How do I prevent the cake from sticking to the pan?
Three words: parchment paper circle! Line the bottom before arranging your oranges – it’s my foolproof trick. Also, that 10-minute cooling window is crucial. Too soon and it falls apart; too late and the caramel glues itself to the pan. And always run a knife around the edges before flipping!
Can I make this upside down orange cake ahead of time?
Absolutely! Bake it the day before and store at room temperature (tightly wrapped). The flavors actually deepen overnight! Just warm slices slightly before serving to bring back that fresh-baked feel. The oranges might darken a bit, but they’ll still taste amazing.
Why did my orange topping turn out bitter?
Ah, probably the pith (that white part under the peel)! When slicing oranges, try to get just a thin layer of peel with minimal pith. Some bitterness is normal with citrus, but too much pith can overpower the sweetness. Navel oranges tend to have thicker pith – try Valencia or Cara Cara oranges instead!
Can I use a different pan size?
You can, but adjust baking times! A 9-inch square pan works similarly to round. For a 9×13 pan, increase the recipe by half and watch the baking time – it’ll likely need 45-50 minutes. Mini loaf pans are adorable for individual servings (bake 25-30 mins). Just keep an eye on that toothpick test!
Still have questions? Drop them in the comments – I love helping troubleshoot baking adventures! After all, my first attempt wasn’t perfect either (let’s just say I learned the hard way about proper orange slicing). But that’s the joy of baking – every “oops” teaches you something new!
Nutritional Information
Okay, let’s talk numbers – but don’t let them scare you away from enjoying a slice (or two) of this heavenly upside down orange cake! These estimates are based on standard ingredients, but your exact numbers might vary depending on your specific oranges, butter, or flour brand. That’s the beauty (and sometimes frustration) of homemade baking!
Per serving (1/8 of cake):
- Calories: 280
- Fat: 12g (7g saturated)
- Carbohydrates: 40g
- Fiber: 2g
- Sugar: 25g
- Protein: 4g
- Sodium: 180mg
Now, before anyone panics about the sugar content – remember, a good chunk comes from those beautiful natural oranges! And honestly, life’s too short not to enjoy a proper slice of cake now and then. My philosophy? Savor each bite slowly, share it with people you love, and balance it out with some extra veggies at dinner. No food guilt allowed in this kitchen!
Alright, my fellow orange cake enthusiasts – I need to hear from you! Did this upside down orange cake bring as much joy to your kitchen as it does to mine? Drop a comment below and let me know how it turned out – I read every single one (yes, even the “my cat knocked it off the counter” stories…been there!).
If you loved it as much as I do, would you do me a huge favor? Give it a star rating so other bakers know it’s worth trying! And if you snapped a photo of your beautiful creation (I know you did – that caramelized top is too pretty not to photograph), tag me on Instagram – I love seeing your kitchen triumphs!
Most importantly – keep baking with love and don’t stress the small stuff. Even if your first flip isn’t perfect (mine certainly wasn’t!), the taste will still be magical. Now go forth and spread some citrusy happiness!
Print
33 Best Upside Down Orange Cake Recipe for Flawless Flips
- Total Time: 55 mins
- Yield: 8 servings 1x
- Diet: Vegetarian
Description
A moist and citrusy cake with caramelized orange slices on top. Simple to make and perfect for any occasion.
Ingredients
- 2 large oranges
- 1 cup sugar
- 1/2 cup unsalted butter, softened
- 2 eggs
- 1 1/2 cups all-purpose flour
- 1 tsp baking powder
- 1/2 tsp salt
- 1/2 cup milk
- 1 tsp vanilla extract
Instructions
- Preheat oven to 350°F (175°C). Grease a 9-inch round cake pan.
- Slice oranges thinly and arrange them in a single layer at the bottom of the pan.
- Sprinkle 1/2 cup sugar evenly over the oranges.
- In a bowl, cream butter and remaining 1/2 cup sugar. Add eggs one at a time, mixing well.
- Whisk flour, baking powder, and salt in a separate bowl. Add to butter mixture alternately with milk.
- Stir in vanilla. Pour batter over oranges in the pan.
- Bake for 35-40 minutes or until a toothpick comes out clean.
- Cool for 10 minutes, then invert onto a plate.
Notes
- Use fresh oranges for best flavor.
- Let cake cool slightly before inverting to prevent crumbling.
- Store leftovers in an airtight container for up to 3 days.
- Prep Time: 15 mins
- Cook Time: 40 mins
- Category: Dessert
- Method: Baking
- Cuisine: American
Nutrition
- Serving Size: 1 slice
- Calories: 280
- Sugar: 25g
- Sodium: 180mg
- Fat: 12g
- Saturated Fat: 7g
- Unsaturated Fat: 4g
- Trans Fat: 0g
- Carbohydrates: 40g
- Fiber: 2g
- Protein: 4g
- Cholesterol: 70mg
Keywords: orange cake, upside down cake, citrus dessert