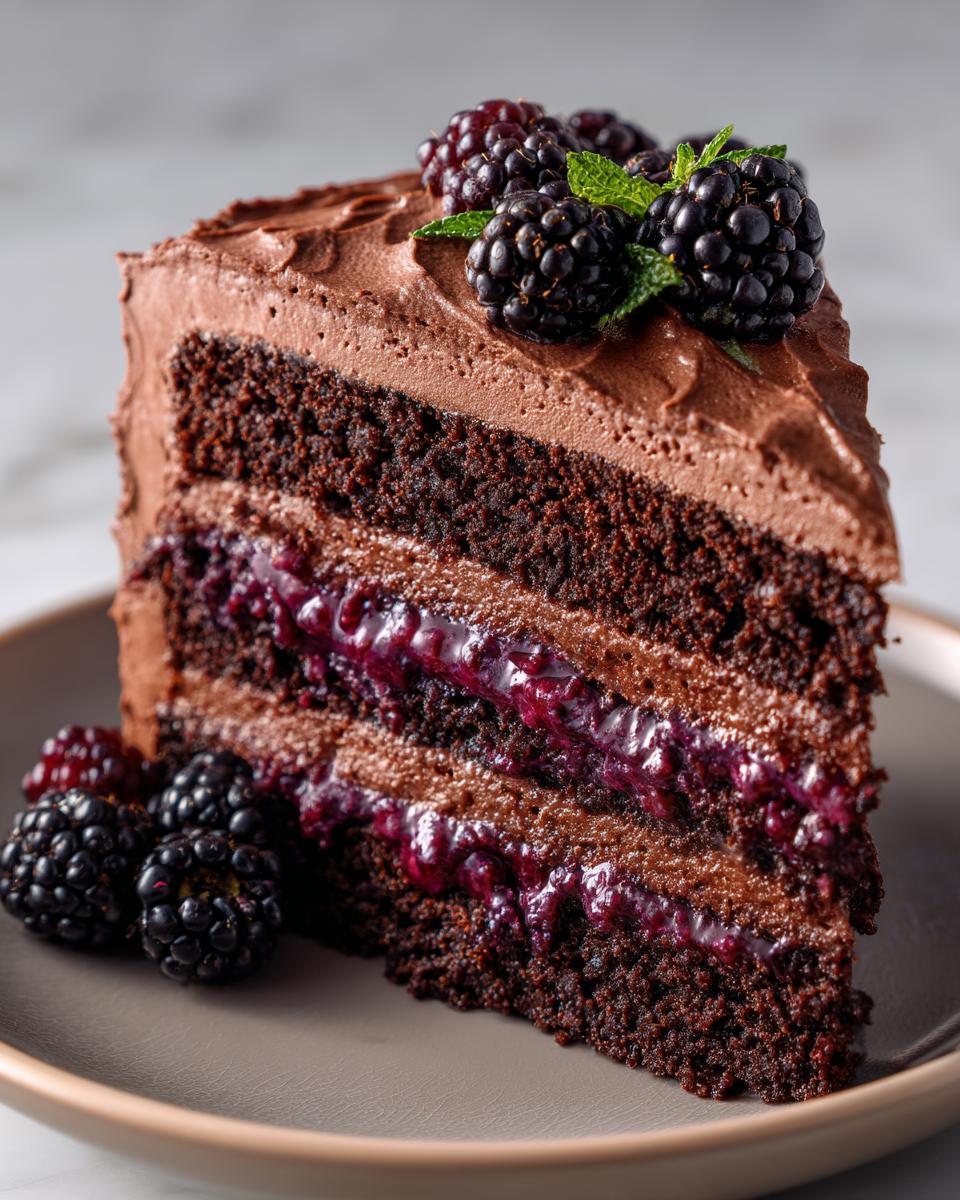
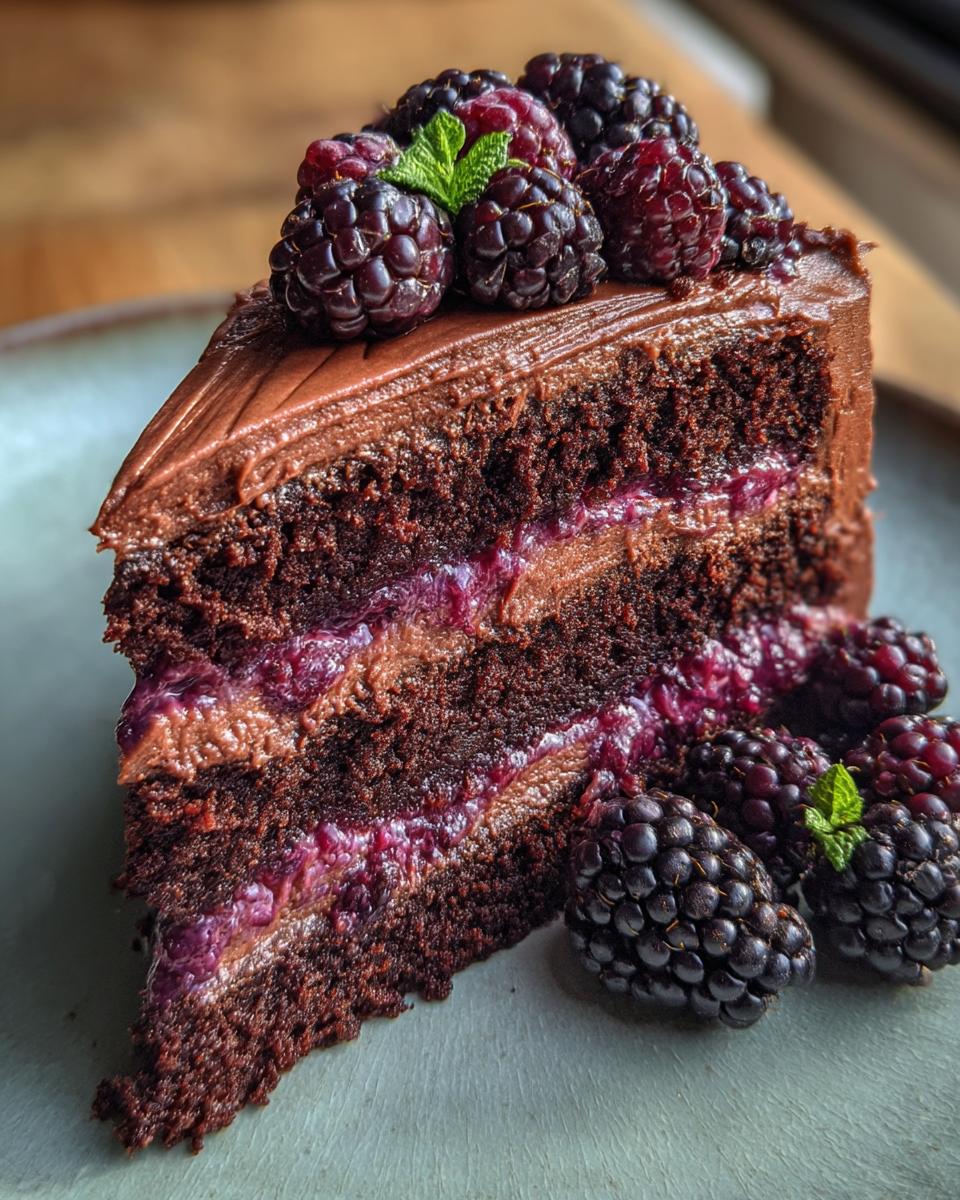
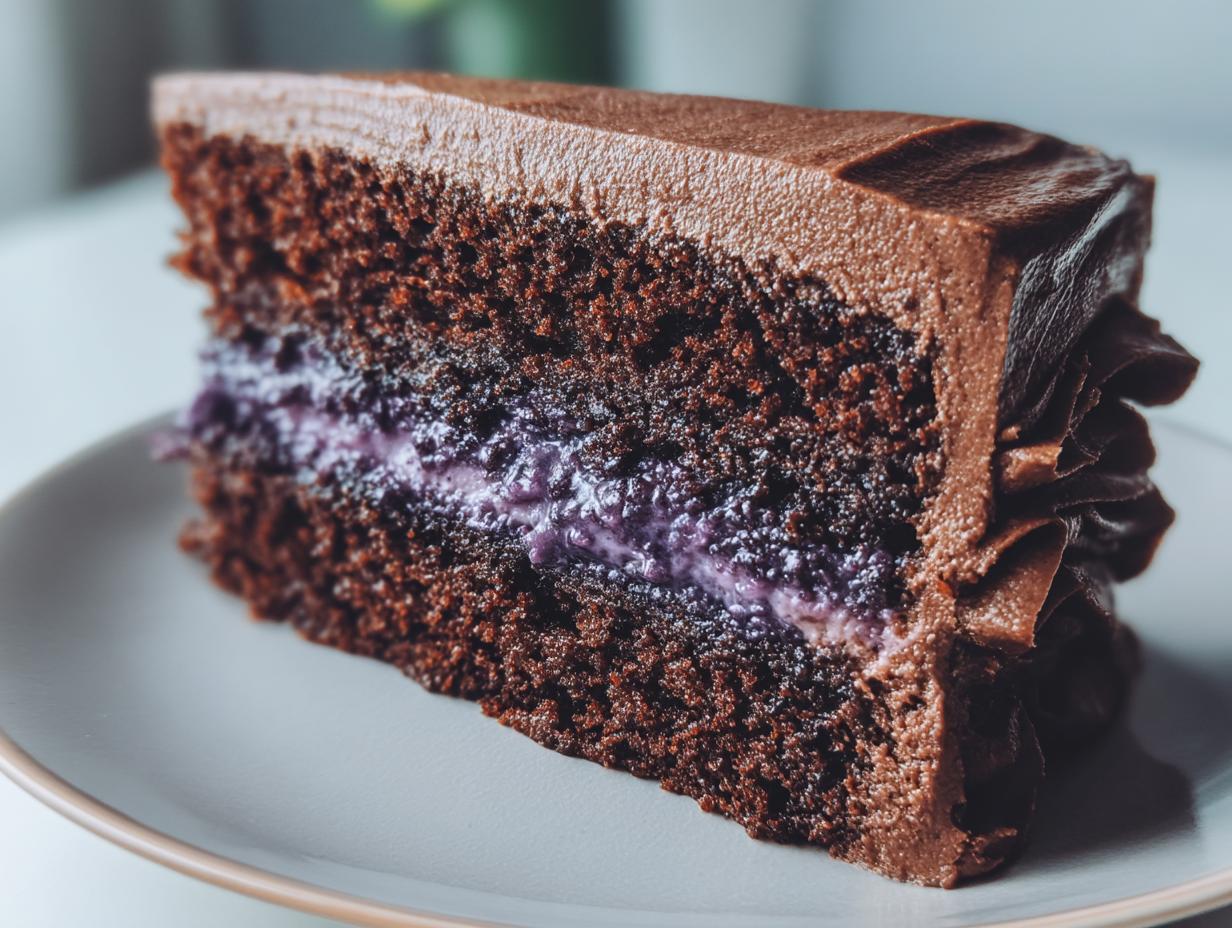
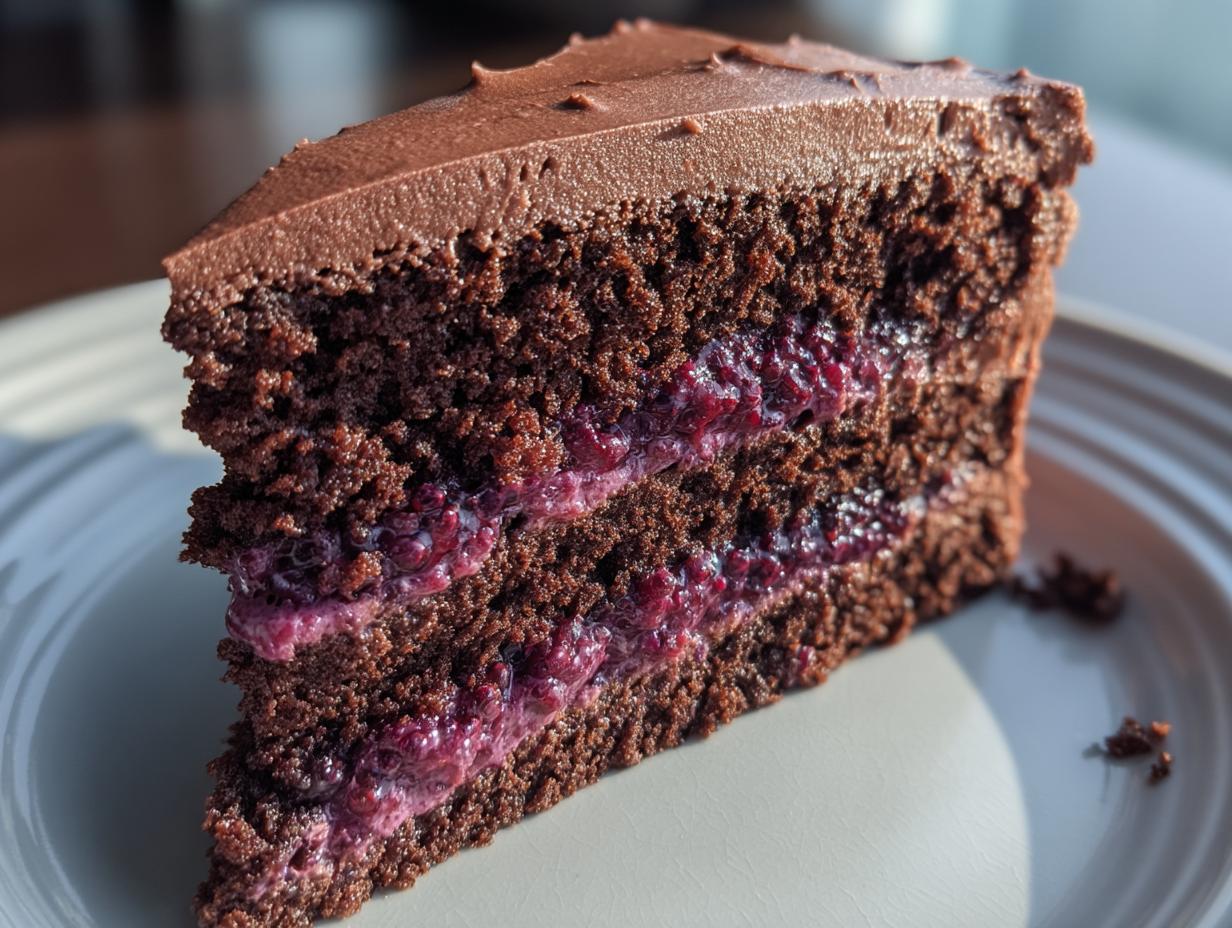
Okay, stop what you’re doing. Seriously. Because I need to tell you about *this* cake. It’s not just any cake; it’s THE cake. We’re talking about my absolute favorite, a total showstopper: the Chocolate Blackberry Layer Cake. Imagine this: deep, dark, moist chocolate cake layers, sandwiched with a ridiculously vibrant, slightly tangy blackberry filling, all wrapped up in the smoothest, richest chocolate frosting you can dream of. It sounds fancy, right? But trust me, it’s completely doable, and the payoff is just… wow.
I first whipped this up for a friend’s birthday, and let me tell you, it disappeared faster than I could blink! Everyone was asking for the recipe. There’s just something magical about how the intense chocolate pairs with the bright, juicy burst of blackberries. It’s not too sweet, not too heavy, just perfect. It feels special, celebratory, but also comforting. Since then, it’s become my go-to for any occasion that calls for something truly spectacular. If you want to make someone feel loved, bake them this Chocolate Blackberry Layer Cake. It’s pure edible joy.

Why You’ll Love This Chocolate Blackberry Layer Cake
Okay, so why should THIS Chocolate Blackberry Layer Cake be the next thing you bake? Let me break it down for you, because there are *so* many reasons:
- That Flavor Combo is Everything: Seriously, the way the deep, slightly bitter chocolate hugs the bright, juicy tang of the blackberries? It’s a match made in dessert heaven. It’s sophisticated but still feels like a warm hug.
- Perfect for *Any* Celebration: Birthdays, holidays, Tuesdays that feel like Fridays… this cake elevates any occasion. It looks stunning, and people will think you spent hours slaving away (your secret is safe with me!).
- It’s More Doable Than You Think: Don’t be intimidated by the layers! While it takes a little time, the steps are straightforward, and I’ll walk you through everything. You’ve totally got this.
Trust me, one bite of this Chocolate Blackberry Layer Cake and you’ll understand why it’s my absolute favorite.
Essential Ingredients for Your Chocolate Blackberry Layer Cake
Alright, let’s talk ingredients! You don’t need anything super fancy for this Chocolate Blackberry Layer Cake, but using good quality stuff really does make a difference. Think of it like building a house – you need solid materials! Here’s what you’ll need to gather:
- For the Cake: 2 cups all-purpose flour, 1 3/4 cups granulated sugar, 3/4 cup unsweetened cocoa powder (use a good quality one!), 1 1/2 teaspoons baking soda, 1 teaspoon baking powder, 1 teaspoon salt, 2 large eggs, 1 cup buttermilk, 1 cup strong black coffee (and it needs to be hot!), 1/2 cup vegetable oil, and 1 teaspoon vanilla extract. That hot coffee might sound weird, but it seriously enhances the chocolate flavor and makes the cake super moist.
- For the Blackberry Filling: 2 cups glorious fresh blackberries (though frozen works in a pinch, more on that later!), 1/2 cup granulated sugar, and 2 tablespoons lemon juice. Simple, right?
- For the Chocolate Frosting: 1 cup unsalted butter, softened (like, *really* soft), 4 cups powdered sugar, 3/4 cup unsweetened cocoa powder (again, quality here matters!), 1/2 cup milk, and 1 teaspoon vanilla extract.
See? Nothing too crazy! Just make sure your butter is properly softened for that frosting – it makes all the difference in getting that smooth, dreamy texture.
Equipment Needed for Making Chocolate Blackberry Layer Cake
You don’t need a professional kitchen to make this Chocolate Blackberry Layer Cake, just a few basic tools you probably already have! Here’s what you’ll want to have ready:
- A couple of good-sized mixing bowls (one for dry, one for wet).
- A whisk for getting those dry ingredients all happy together.
- Two 9-inch round cake pans – make sure they’re ready to go!
- A wire rack for cooling those beautiful cake layers.
- A saucepan for bubbling up that lovely blackberry filling.
- And honestly, a rubber spatula is always a lifesaver for getting every last bit of batter out!
That’s pretty much it! Simple and effective for creating something truly delicious.
Step-by-Step Guide to Crafting Chocolate Blackberry Layer Cake
Okay, deep breaths! Making this Chocolate Blackberry Layer Cake is a process, but each step is totally manageable and gets you closer to that amazing first bite. We’re going to break it down, piece by piece, so you feel confident every step of the way. Follow along, and you’ll have a stunning cake in no time!
Preparing the Cake Layers for Your Chocolate Blackberry Layer Cake
First things first, let’s get those beautiful chocolate layers ready. This is the foundation of our Chocolate Blackberry Layer Cake, so we want to get it right!
- Get your oven heated up to 350°F (175°C). While it’s warming, take your two 9-inch round cake pans and give them a good grease and flouring. This is key to making sure your cakes pop right out later without sticking!
- Grab that big bowl and whisk together your dry cake ingredients: flour, sugar, cocoa powder, baking soda, baking powder, and salt. Just a quick whisk to combine everything nicely.
- In another bowl, whisk together your wet ingredients: eggs, buttermilk, the hot coffee (yep, hot!), vegetable oil, and vanilla extract. The hot coffee really helps bloom the cocoa powder and boost that chocolate flavor.
- Now, pour the wet mixture into the dry ingredients. Mix until everything is just combined and smooth. Don’t go crazy mixing here; overmixing can make the cake tough. A few small lumps are totally fine!
- Divide the batter evenly between your two prepared pans. You can eyeball it or use a cup measure if you want to be super precise.
- Pop them in the preheated oven and bake for about 30-35 minutes. You’ll know they’re done when a wooden skewer inserted into the center comes out clean.
- Let the cakes cool in their pans for about 10 minutes. This is important! Then, carefully invert them onto a wire rack to cool completely. Patience is a virtue here – make sure they are *totally* cool before you even think about the filling or frosting.
Creating the Luscious Blackberry Filling
While your cake layers are cooling, let’s get busy with that vibrant blackberry filling! This stuff is pure gold and really makes the Chocolate Blackberry Layer Cake sing.
- In a saucepan, combine your fresh blackberries, the 1/2 cup of sugar for the filling, and the lemon juice. Cook this over medium heat, stirring occasionally. You’ll see the berries start to break down and the mixture will thicken up nicely, usually after about 15-20 minutes. Once it looks like a lovely, thick jam, take it off the heat. Let it cool completely. Seriously, completely cool. Warm filling will melt your frosting!
Whipping Up the Decadent Chocolate Frosting
Now for the best part (in my opinion!) – the frosting! This chocolate frosting is rich, smooth, and the perfect partner for the cake and filling.
- Get your softened butter into a large bowl and beat it until it’s nice and creamy. This is where a stand mixer or hand mixer is your best friend! Gradually add your powdered sugar and cocoa powder, alternating with the milk. Beat until it’s smooth and looks perfectly spreadable. Stir in that vanilla extract for extra flavor. If it seems too stiff, add a tiny bit more milk; if it’s too thin, add a little more powdered sugar. You want it just right for frosting your beautiful Chocolate Blackberry Layer Cake.
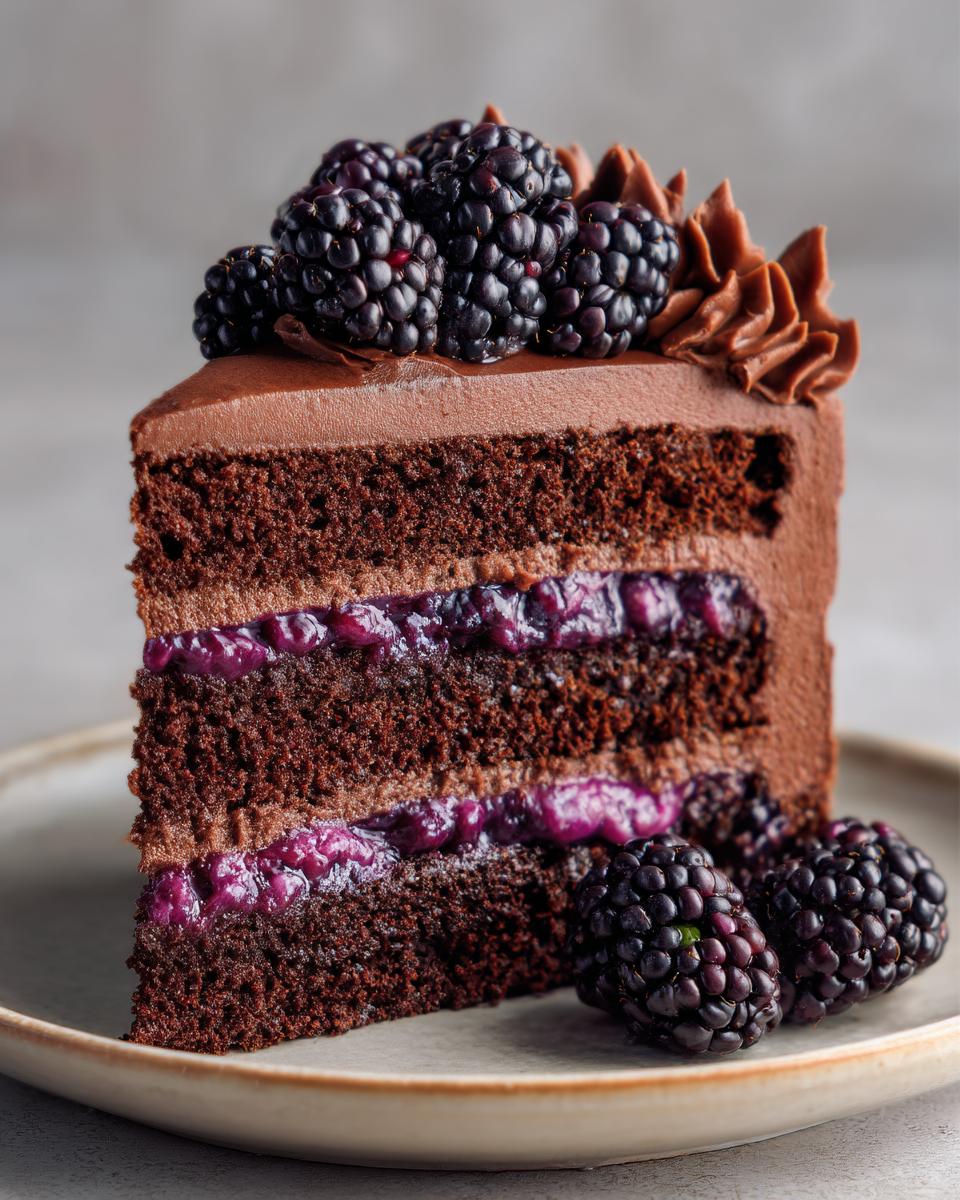
Assembling Your Beautiful Chocolate Blackberry Layer Cake
The moment of truth! Putting it all together to create your masterpiece.
- Place one cooled cake layer onto your serving plate or cake stand. Spread that lovely, cooled blackberry filling evenly over the top of the first layer. Don’t be shy!
- Carefully place the second cake layer on top of the filling. Now, grab your chocolate frosting and frost the top and sides of the entire cake. Make it as smooth or as rustic as you like – it’s your creation! Step back and admire your stunning Chocolate Blackberry Layer Cake.
Tips for Success with Your Chocolate Blackberry Layer Cake
Okay, you’ve made it through the steps! To make sure your Chocolate Blackberry Layer Cake turns out absolutely perfect every single time, here are a few little things I’ve learned along the way. They seem small, but they make a big difference!
- Room Temp is Your Friend: Seriously, make sure your eggs, buttermilk, and especially your butter are at room temperature. It helps everything combine smoothly and gives you a better cake texture and frosting consistency.
- Don’t Overmix: Once you add the wet to the dry ingredients for the cake, mix *just* until everything is combined. Overmixing develops gluten and can make your cake tough. We want tender and moist!
- Cooling is Crucial: I know it’s tempting, but let those cake layers and the blackberry filling cool completely before you assemble! Warm components will melt your frosting and make a mess. Patience pays off for a beautiful Chocolate Blackberry Layer Cake.
Follow these simple tips, and you’re practically guaranteed a winner with your Chocolate Blackberry Layer Cake!
Frequently Asked Questions About Chocolate Blackberry Layer Cake
Got questions about making this amazing Chocolate Blackberry Layer Cake? Don’t worry, I’ve probably asked them myself at some point! Here are a few common ones that pop up:
Can I Use Frozen Blackberries for the Chocolate Blackberry Layer Cake?
Yes, absolutely! Frozen blackberries work perfectly for the filling. Just measure them out frozen and proceed with the recipe as written. They’ll break down just fine as they cook, and you’ll still get that delicious, slightly tangy blackberry filling that makes this cake so special.
How Long Does Chocolate Blackberry Layer Cake Last?
If you can resist eating it all in one go (good luck!), this Chocolate Blackberry Layer Cake will keep well for about 3-4 days at room temperature, covered tightly. If you pop it in the fridge, it can last a couple of days longer. The flavors actually deepen overnight, which is pretty great!
Can I Make the Cake Layers Ahead of Time for This Chocolate Blackberry Layer Cake?
Definitely! This is a great time-saver. You can bake the cake layers a day or two in advance. Just make sure they are completely cooled, then wrap them tightly in plastic wrap and store at room temperature. You can even freeze the cooled layers for up to a month – just wrap them well and thaw overnight in the fridge before assembling your Chocolate Blackberry Layer Cake.
Storing and Reheating Chocolate Blackberry Layer Cake
Okay, if you magically have any leftovers of this Chocolate Blackberry Layer Cake (seriously, how?), storing it is easy. Just cover the cut side of the cake tightly with plastic wrap or pop slices into an airtight container. It’s totally fine to keep it at room temperature for 3-4 days. If you want it to last a bit longer, the fridge is your friend! As for reheating? Honestly, this cake is best enjoyed at room temperature, so I usually just let a slice sit out for 15-20 minutes before diving in. No need for the microwave!
Estimated Nutritional Information
Now, while I’m all about the joy of baking and eating delicious things, I know some of you like to keep an eye on the nutritional side of things. Please note that the nutritional information for this Chocolate Blackberry Layer Cake is just an estimate. It can vary a good bit depending on the specific brands of ingredients you use (like the type of cocoa powder or butter) and how precisely you measure everything. I’m not a registered dietitian, so please take this as a general idea rather than a strict calculation! The most important thing is to enjoy your baking and treating yourself!
Share Your Chocolate Blackberry Layer Cake Creations
I absolutely LOVE seeing what you bake! If you make this Chocolate Blackberry Layer Cake, please come back and leave a comment and a rating. It makes my day! Even better, snap a pic and share it on social media – tag me so I can see your beautiful cake! Happy baking!
Print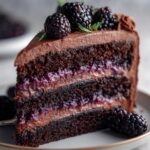
Angry Chocolate Blackberry Layer Cake in 2 Steps
- Total Time: 1 hour 5 minutes
- Yield: 12 servings 1x
- Diet: Vegetarian
Description
A decadent chocolate layer cake with a luscious blackberry filling and rich chocolate frosting.
Ingredients
- 2 cups all-purpose flour
- 1 3/4 cups granulated sugar
- 3/4 cup unsweetened cocoa powder
- 1 1/2 teaspoons baking soda
- 1 teaspoon baking powder
- 1 teaspoon salt
- 2 large eggs
- 1 cup buttermilk
- 1 cup strong black coffee, hot
- 1/2 cup vegetable oil
- 1 teaspoon vanilla extract
- 2 cups fresh blackberries
- 1/2 cup granulated sugar (for filling)
- 2 tablespoons lemon juice
- 1 cup unsalted butter, softened
- 4 cups powdered sugar
- 3/4 cup unsweetened cocoa powder
- 1/2 cup milk
- 1 teaspoon vanilla extract (for frosting)
Instructions
- Preheat oven to 350°F (175°C). Grease and flour two 9-inch round cake pans.
- In a large bowl, whisk together flour, sugar, cocoa powder, baking soda, baking powder, and salt.
- In a separate bowl, whisk together eggs, buttermilk, hot coffee, vegetable oil, and vanilla extract.
- Pour the wet ingredients into the dry ingredients and mix until smooth.
- Divide batter evenly between the prepared pans.
- Bake for 30-35 minutes, or until a wooden skewer inserted into the center comes out clean.
- Let cakes cool in pans for 10 minutes, then invert onto a wire rack to cool completely.
- For the blackberry filling, combine blackberries, 1/2 cup sugar, and lemon juice in a saucepan. Cook over medium heat, stirring occasionally, until berries break down and mixture thickens, about 15-20 minutes. Let cool completely.
- For the chocolate frosting, beat softened butter until creamy. Gradually add powdered sugar and cocoa powder, alternating with milk, until smooth and spreadable. Stir in vanilla extract.
- Place one cake layer on a serving plate. Spread the blackberry filling over the cake. Top with the second cake layer.
- Frost the top and sides of the cake with chocolate frosting.
Notes
- Ensure all ingredients are at room temperature for best results.
- Do not overmix the cake batter.
- Cool the blackberry filling completely before assembling the cake.
- Prep Time: 30 minutes
- Cook Time: 35 minutes
- Category: Dessert
- Method: Baking
- Cuisine: American
Nutrition
- Serving Size: 1 slice
- Calories: 650
- Sugar: 75g
- Sodium: 400mg
- Fat: 30g
- Saturated Fat: 15g
- Unsaturated Fat: 10g
- Trans Fat: 0g
- Carbohydrates: 90g
- Fiber: 5g
- Protein: 8g
- Cholesterol: 80mg
Keywords: chocolate cake, blackberry cake, layer cake, chocolate frosting, fruit filling