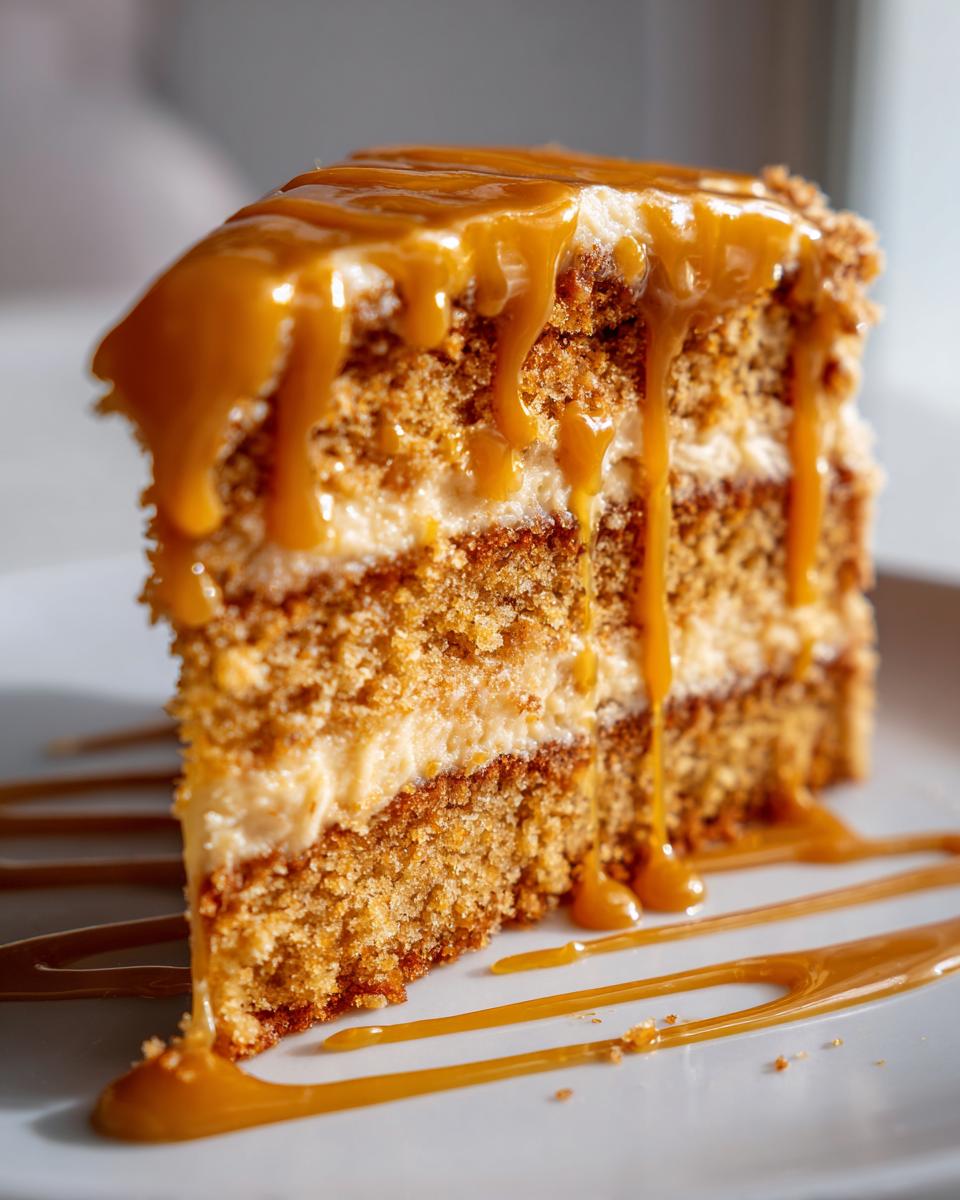
Oh, my friend, have I got a dessert confession for you today! When I think about truly decadent baking—the kind that makes the whole house smell amazing and guarantees happy sighs from anyone who takes a bite—it has to be butterscotch. Forget those lackluster store-bought caramels; we’re going deep into the chewy, buttery, brown-sugar magic. This recipe for the Ultimate Butterscotch Cake is my absolute pride and joy. It’s not just rich; it’s unbelievably moist!
I spent ages trying to crack the code for a butterscotch cake that didn’t dry out two hours after cooling. Honestly, I think I finally succeeded when I stopped obsessing over complicated techniques and focused on the ingredients themselves. The combination of brown sugar, buttermilk, and that perfectly cooked homemade glaze is what locks in the moisture. Seriously, this cake will ruin you for all other butterscotch desserts. It truly stands up tall and proud!

Why You Will Love This Ultimate Butterscotch Cake
I know you have countless cake recipes saved online, so why should you give this one counter space? Trust me, this isn’t just another pretty layer cake. It’s the kind of recipe you bookmark, print out, and then inevitably spill coffee on because you use it so much. Here’s why this flavor combination just works:
- It’s Unbelievably Moist: That’s the whole point, right? Between the buttermilk and the way the butter and sugars are creamed, this cake stays soft for days. No more dry edges!
- Authentic, Deep Flavor: We’re cooking the brown sugar and butter down for the glaze, which gives you that profound, almost smoky butterscotch depth that just screams *homemade*. It’s not shy, I promise.
- Perfectly Balanced Sweetness: Because we use both granulated and brown sugar in the batter, you get beautiful structure and that classic caramel undertone that cuts through the rich sweetness of the frosting.
- It’s Surprisingly Quick: For a cake that tastes this gourmet, the hands-on time is ridiculously short. You’re looking at about an hour and a half total if you move along briskly. You can even check out some of my other quick fixes over here if you’re short on time like these cookie bars.
- It’s Your New Go-To Crowd Pleaser: Seriously, bring this to any potluck or birthday, and prepare to have people beg you for the recipe. It’s sophisticated enough for company but easy enough for a Tuesday night treat.
Ingredients for the Ultimate Butterscotch Cake
Listen, when you’re dealing with a flavor as special as butterscotch, you can’t skimp on the basics. Quality matters here—it’s the difference between a caramel cookie flavor and true, deep butterscotch richness. If you can spring for good vanilla, do it! It really shines through in the final product. These measurements are what my notes call for, so stick close!
For the cake layers, you’ll need standard pantry staples mixed with our star players:
- 1 cup unsalted butter, softened (Make sure this is truly room temperature—not melted! It needs to be spreadable.)
- 1 cup packed light brown sugar (Don’t just scoop it; press it firmly into the measuring cup!)
- 1/2 cup granulated sugar (For structure and that classic cake lift.)
- 4 large eggs (Again, room temperature is best for mixing properly!)
- 1 teaspoon vanilla extract
- 2 1/2 cups all-purpose flour
- 1 teaspoon baking powder
- 1/2 teaspoon baking soda
- 1/2 teaspoon salt
- 1 cup buttermilk (If you don’t have buttermilk, you can whip up a quick substitute—I detailed my favorite method for making heavy cream at home that works perfectly here!)
- 1/2 cup butterscotch chips (These are optional, but honestly, why skip the extra bang of butterscotch flavor?)
For the Butterscotch Glaze
This glaze is the crowning glory, and it’s best made just after the cakes come out of the oven. It needs a tiny bit of cooling time before it gets spooned over the cake, so timing your assembly is key!
- 1/2 cup butter
- 1 cup brown sugar
- 1/4 cup milk
- 1 teaspoon vanilla extract
- 2 cups powdered sugar
Essential Equipment for Your Ultimate Butterscotch Cake
Okay, setting up your station—your *mise en place*, as the fancy chefs call it—is half the battle won before you even crack an egg. You don’t need a million fancy gadgets for this recipe, but a few key items make the process so much smoother. Prepping these first means you won’t be frantically searching for a whisk while your butter melts!
Here is the gear pile I always have ready before I start mixing this cake:
- Electric Mixer: A stand mixer is lovely, but a sturdy hand mixer works just fine. You really need some serious power for creaming that butter and sugar until it’s truly light and fluffy.
- Two 9-Inch Round Cake Pans: This is the sweet spot for baking time. If you use deeper pans, you’ll definitely need to increase your baking time, and nobody wants a raw middle!
- Saucepan: You need a small, heavy-bottomed saucepan for cooking down that amazing glaze. A thin one might scorch the sugar, and that’s a burnt flavor we absolutely can’t have here!
- Wire Cooling Rack: Essential! As soon as those cakes come out, they need to breathe and start cooling immediately on a rack so the bottoms don’t get soggy.
- Spatulas and Whisk: You’ll need a good flexible spatula for scraping down the bowl corners—seriously, don’t let any of that precious batter stick to the sides! And a reliable whisk for the glaze.
Double-check you have all these things ready to go. A smooth bake means starting organized, and that always guarantees a better result for everyone!
Step-by-Step Instructions for the Ultimate Butterscotch Cake
Okay, now for the fun part! Following these steps to the letter is how we get that unbelievably moist texture. If you’ve already done your prep work and have all your ingredients measured out, this whole process flies by. Remember that crucial first step: treating your butter and sugar right! That initial creaming process is where the air goes into the whole cake, so don’t rush it. You want it genuinely pale and fluffy before those eggs even think about joining the party.
Baking the Ultimate Butterscotch Cake Layers
First things first: get that oven warmed up! We need it steady at 350°F (175°C). While it’s getting happy, grease and flour those two 9-inch round pans. This is your insurance policy against sticking, so make sure you cover every surface!
In your largest bowl—or your mixer bowl—it’s time to cream that butter, brown sugar, and granulated sugar. Beat it until it’s light and fluffy. I mean it! Beat it until it looks almost whipped. Then, you add your four eggs one by one, making sure each one is totally incorporated before you invite the next one in. A quick splash of vanilla at the end of this wet mix finishes it off.
Now, switch gears to your dry ingredients. In a separate bowl, whisk together the flour, baking powder, baking soda, and salt. This simple step ensures everything is evenly distributed, so you don’t have a salty bite or a baking soda clump.
Here comes the tricky bit: alternating. We add the dry mix and the buttermilk in stages. You must start and end with dry. So, about a third of the flour mix goes in, you mix *just* until combined—we’re talking barely a few seconds! Don’t overmix the flour, or you’ll develop glutens and end up with a tough cake. Seriously, stop mixing the second you see streaks disappear. Then add half the buttermilk, mix gently, add another third of the flour, the rest of the buttermilk, and finish with the last bit of flour.
If you’re adding those optional butterscotch chips, fold them in gently now. Divide that batter evenly between your two prepared pans. They go into the oven for 30 to 35 minutes. You’re looking for that wooden pick test—it has to come out clean! Let the cakes cool in the pan for about 10 minutes before you flip them out onto a wire rack to finish cooling completely. They must be stone cold before you even think about glazing!
Preparing the Homemade Butterscotch Glaze
This glaze is what makes this cake legendary, and it’s so easy! Grab a small, heavy saucepan. Over medium heat, we’re going to melt the remaining 1/2 cup of butter right in there along with that full cup of brown sugar. Stir this mixture constantly. You need to cook it until that sugar is completely dissolved and the mixture looks totally uniform—no gritty sugar bits left! That usually takes about three or four minutes.
Once it’s smooth, pull the pan off the heat immediately. We don’t want this mixture to get too hot, or it will break the powdered sugar later. Stir in the milk and the vanilla extract. Let this liquid cool down just slightly—maybe five minutes—until it’s warm, not piping hot.
Now, bring on the powdered sugar! Whisk in those 2 cups of powdered sugar gradually. If you find this part chunky, don’t panic! Sometimes the powdered sugar clumps up, but you can smooth it right out using a trick I learned for fluffy brown sugar icing. Just keep whisking until you get a smooth, thick, pourable consistency. If it seems too stiff, add a tiny splash more milk, but be careful!
Assembling Your Ultimate Butterscotch Cake
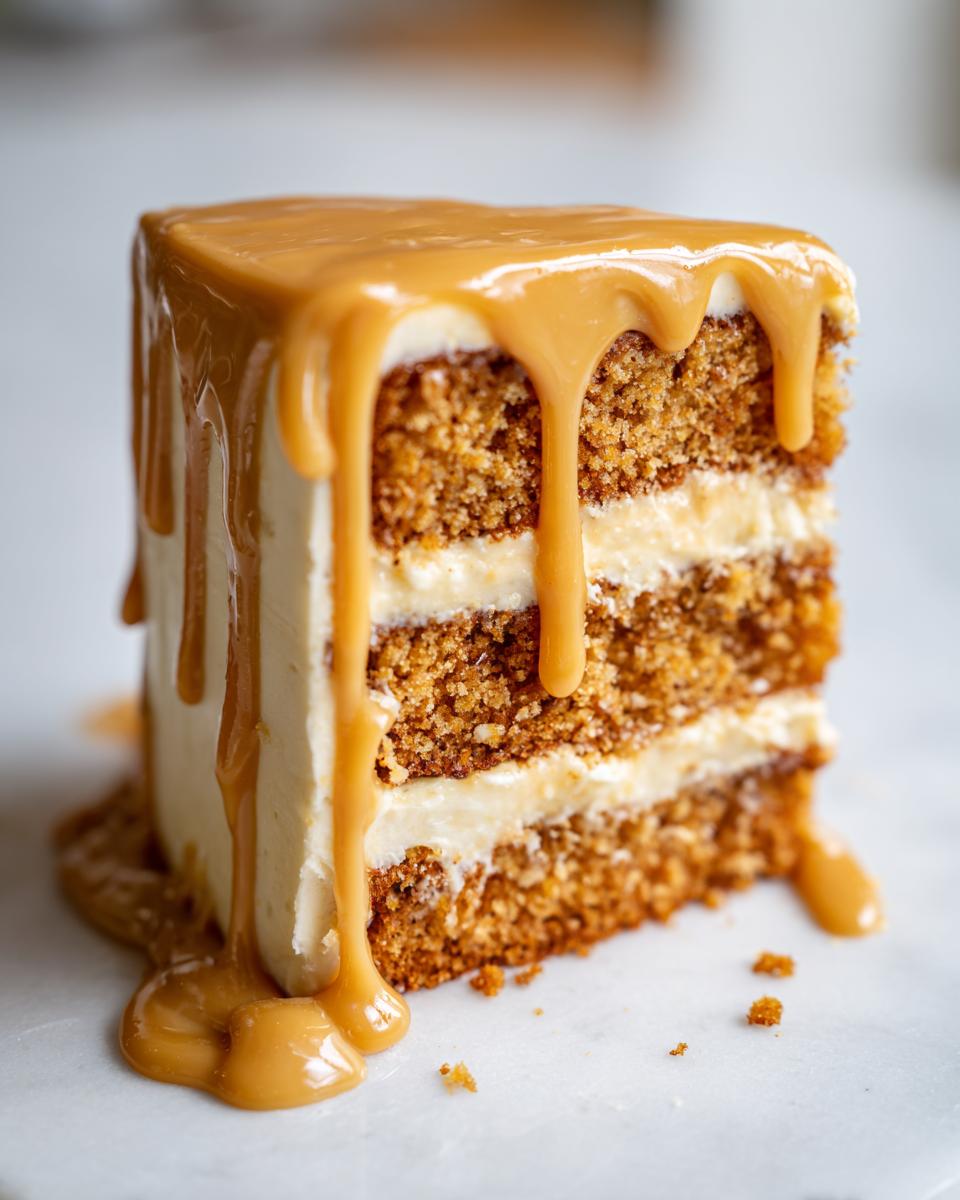
Once those layers are completely cool—I mean *cold* to the touch—it’s time to build this beauty. Take one layer, place it on your serving plate or cake stand. Pour about half of that warm butterscotch glaze right over the top and spread it carefully to the edges. It should be thick enough that it doesn’t run straight off the sides, but smooth enough to look glossy.
Gently set your second cake layer right on top of that glaze. Use the rest of the glorious glaze to cover the top layer. You’ll want to get it moving fast, because as soon as that hot sugar mixture hits the cool cake, it starts to firm up. If you want that perfectly shiny, drippy look, spread it fast and let gravity do the rest! Just work quickly so the glaze flows nicely.
Tips for Baking the Perfect Ultimate Butterscotch Cake
Baking is chemistry, but for home cooks, it’s mostly just intuition we build over time. I’ve made this cake so many times I could practically assemble it in the dark, but I want to save you any potential heartache! Here are a few non-negotiable tips to guarantee the very best result from this recipe. If you nail these tiny details, the cake practically bakes perfectly on its own.
First off, let’s talk temperature. I mentioned it above, but it bears repeating: your butter and your eggs must be truly room temperature. If the butter is too cold, it won’t cream properly with the sugars, and you lose all that crucial aeration we need for a light crumb. If your eggs are ice-cold right from the fridge, they can ‘shock’ the creamed butter mixture, causing it to curdle a bit. Take them out an hour before you start!
My second big tip is about that brown sugar! The recipe asks for packed light brown sugar in the cake, but for a truly profound, almost molasses-like depth—the kind you find in really old-school desserts—try swapping half of the light brown sugar for dark brown sugar. It changes the flavor profile in the most wonderful way! If you aren’t sure about that variation, stick to the recipe for now, but keep that dark brown sugar swap in your back pocket for next time. You can even try swirling a bit of homemade buttercream on top next time—I have a great recipe for favorite buttercream frosting if you want something lighter than the glaze!
Finally, when you get to the glaze—and this is crucial—work quickly once you add the powdered sugar. The mixture of melted butter, sugar, and milk is unstable until the powdered sugar stabilizes it. If you let the liquid mixture cool down too much, the powdered sugar will stiffen it immediately, and you’ll end up scraping heavy clumps instead of pouring a smooth sheet. It needs to be warm enough to pour nicely, but definitely not hot enough to melt your cake layers.
Variations for Your Ultimate Butterscotch Cake
Now that you’ve mastered the basic, delicious recipe, I want to talk about making it yours! Baking should always feel personal, right? These cakes are so sturdy and flavorful that they don’t really need much fuss, but I always encourage people to play a little bit when they’re feeling confident. Think of these as little tune-ups to match whatever mood you’re in.
One easy thing you can do is amp up the base flavor using the dark brown sugar trick I mentioned earlier. If you want a richer, almost toffee-like note running through the actual cake crumb, swap out half of the light brown sugar in the batter portion for dark brown sugar. It adds this wonderful, slightly deeper molasses profile that complements the glaze perfectly. It really takes the flavor up a notch without changing the structure at all.
If you want a little texture contrast, chopped toasted nuts are divine here. Pecans or walnuts work beautifully with butterscotch—they give you a nice little crunch against that super moist crumb. Gently fold in about a cup of your favorite toasted nuts right at the very end, just like you would the optional chips. Just make sure they are totally cooled before they go in!
Another neat little trick for adjusting the tanginess comes directly from my notes: you can swap out the buttermilk for sour cream if you happen to have some sitting around. Sour cream is a bit thicker than buttermilk, so you might need to thin it down with a teaspoon or two of regular milk to get the right consistency in the batter. This substitution gives the cake a lovely, subtle tanginess that stops it from tasting entirely too sweet, which I personally adore.
If you’re feeling really adventurous and want to step away from the warm notes entirely, you could look at citrus! I know, it sounds wild, but I sometimes add a tiny bit of lemon or orange zest into the wet ingredients. If you’re into citrus, you absolutely have to check out my recipe for limoncello cake—it’s a complete departure but shows how versatile a good buttery batter can be!
Storage and Make-Ahead Tips for the Ultimate Butterscotch Cake
This is where good planning meets great taste, because you definitely want to save some of this cake for later! The good news is that thanks to that rich glaze and the moist crumb structure, this cake keeps beautifully. You don’t have to bake it all on the day you plan to eat it, which is a huge win for party planning!
When it comes to storing the fully glazed cake, I highly recommend keeping it covered loosely at cool room temperature. Because the glaze has a high concentration of butter and sugar, it holds up way better on the counter than in the fridge. Cold air dries out cake layers fast, and that will make your beautiful butterscotch layers just melt away into a stiff, crumbly mess. If your kitchen is particularly warm or humid, then covering it tightly with plastic wrap and sticking it in the fridge is okay, but let it sit out on the counter for at least an hour before serving to bring that moisture and flavor back!
If you want to make components ahead, you’ve got options:
- Bake the Layers Ahead: You can absolutely bake the cake layers up to two days in advance. Once they are completely cool, wrap each layer tightly in plastic wrap, and then maybe wrap them again in foil. Store them on the counter. They stay great that way! Do not glaze them until the day you plan to serve them—that glaze sets up fast once it’s applied.
- Glaze Ahead (Use Caution!): You can make the glaze the day before, but this is where you have to watch it. Store the glaze in an airtight container at room temperature. When you pull it out to use it, it will be very firm—think hard fudge. You will need to gently reheat it over very low heat on the stovetop, stirring constantly, until it melts back down to a pourable consistency. If it seems too thin after reheating, you can whisk in a spoonful of powdered sugar until it thickens up slightly again. If you reheat it too much, it separates, and then you’re back to Plan A!
Because the glaze needs that nice pourable texture, I generally prefer baking the cakes one day and assembling them the next. It’s less fuss when company is coming over, and the cakes are guaranteed to be perfectly cool by the time you’re ready to frost them!
Serving Suggestions for This Ultimate Butterscotch Cake
So, you’ve made this glorious, glistening cake. Congratulations! Now comes the fun part: deciding what to serve alongside it to make the experience absolutely unforgettable. Since this cake is so rich and deeply flavored with that caramelized brown sugar note, you actually don’t need to do much to dress it up. It’s practically perfect naked. But if you’re serving it after a big meal or want to elevate it slightly, I have a few ideas that just click with that butterscotch sweetness.
For me, sometimes less is simply more. This cake is already a heavyweight champion of dessert, so pairing it with something light and creamy is usually the answer. A big scoop of high-quality vanilla bean ice cream is honestly non-negotiable for me sometimes. The cold temperature and the pure vanilla flavor provide such a nice contrast to the warm, sticky-sweet glaze. It’s the classic combination for a reason!
If you’re serving this in the fall or winter, pairing it with a hot beverage makes the whole experience feel cozy and complete. A really strong, dark roast coffee is fantastic because the bitterness cuts right through the sugar content. Think less of that milky, flavored coffee shop stuff and more of a pure, freshly brewed cup—it really balances out the richness.
For those looking for a bit of freshness, don’t overthink it! A side of very lightly sweetened whipped cream is always welcome. However, if you want a pop of color and acidity to balance that butterscotch, try serving it with some fresh, slightly tart red berries. Think raspberries or even some sliced strawberries that haven’t been sugared up. The little bit of bright acidity cleanses the palate between bites of that heavy, sweet cake. It sounds odd, but trust me, the fruit makes the butterscotch flavor pop even more!
Basically, anything that offers a slight temperature contrast (cold ice cream) or a flavor contrast (bitter coffee or tart fruit) will make your spectacular cake shine even brighter. Enjoy every single bite!
Estimated Nutrition for the Ultimate Butterscotch Cake
Okay, let’s talk about the numbers, because let’s be real—this cake is a treat! I always feel better eating something decadent when I have at least a ballpark idea of what’s inside. Remember, this is going to be an estimate, okay? It depends on exactly how much butter you used in that glaze and the brand of flour, but this gives you a good baseline for what happens when you combine all that brown sugar magic.
If you divide this recipe by the 12 servings listed, here is the general breakdown we’re looking at. Please treat these figures as an honest suggestion rather than a strict medical analysis. We’re baking for joy here, not for spreadsheets!
This is the data I pulled from my original batch tests:
- Serving Size: 1 slice
- Calories: 450 (Yeah, it’s rich, but seriously worth it!)
- Sugar: 55g (That’s where all that beautiful butterscotch flavor comes from!)
- Sodium: 250mg
- Fat: 22g
- Saturated Fat: 14g
- Unsaturated Fat: 8g
- Trans Fat: 0.5g
- Carbohydrates: 60g
- Fiber: 1g
- Protein: 4g
- Cholesterol: 95mg
See? A satisfying slice of pure joy! Knowing that you made that butterscotch glaze from scratch just makes those 450 calories taste even better. Don’t stress too much about the numbers; just make sure you savor every single crumb when you sit down to eat it!
Share Your Ultimate Butterscotch Cake Experience
Alright, my friend, the mixing is done, the cooling is done, and hopefully, the eating is going wonderfully! But the story of this cake isn’t over until I hear from you. I pour my heart and soul into making sure these recipes work perfectly in real kitchens, not just my own, and that means I need your feedback!
Did this cake hit that perfect moist spot you were looking for? Maybe you tried one of my suggested variations, like adding toasted pecans, or perhaps you found a new trick for getting that glaze just right? Don’t keep those secrets to yourself!
- Rate That Cake! If you had success, please take a moment to leave a star rating on the recipe card above. It really helps other bakers trust this recipe just as much as I do!
- Tell Me Everything in the Comments: I absolutely love reading your notes! Drop a comment below telling me what you thought—was your family begging for a second slice? Did the kids love the chips? Your real-world experience helps build our little baking community.
- Show Off Your Masterpiece: Seriously, I want to see this glistening butterscotch beauty! Snap a picture of your finished layer cake—especially that glossy glaze—and tag me on social media using the hashtag #MyButterscotchMagic. I try to share as many of your glorious creations as I can!
If you ran into any trouble at all, or if something just didn’t seem to line up with my instructions, please reach out directly through the contact page. I really want to help you troubleshoot so we can get that perfect slice for you next time. Happy baking, and thank you for trusting me with your ovens!
Print
Ultimate Butterscotch Cake
- Total Time: 60 min
- Yield: 12 servings 1x
- Diet: Vegetarian
Description
A rich and moist cake featuring a homemade butterscotch flavor.
Ingredients
- 1 cup unsalted butter, softened
- 1 cup packed light brown sugar
- 1/2 cup granulated sugar
- 4 large eggs
- 1 teaspoon vanilla extract
- 2 1/2 cups all-purpose flour
- 1 teaspoon baking powder
- 1/2 teaspoon baking soda
- 1/2 teaspoon salt
- 1 cup buttermilk
- 1/2 cup butterscotch chips (optional)
- For Butterscotch Glaze: 1/2 cup butter, 1 cup brown sugar, 1/4 cup milk, 1 teaspoon vanilla extract, 2 cups powdered sugar
Instructions
- Preheat your oven to 350°F (175°C). Grease and flour two 9-inch round cake pans.
- In a large bowl, cream together the softened butter, brown sugar, and granulated sugar until light and fluffy.
- Beat in the eggs one at a time, mixing well after each addition. Stir in the vanilla extract.
- In a separate bowl, whisk together the flour, baking powder, baking soda, and salt.
- Gradually add the dry ingredients to the wet ingredients, alternating with the buttermilk, beginning and ending with the dry ingredients. Mix until just combined.
- Fold in the butterscotch chips, if using.
- Divide the batter evenly between the prepared pans.
- Bake for 30 to 35 minutes, or until a wooden pick inserted into the center comes out clean.
- Let the cakes cool in the pans for 10 minutes before inverting them onto a wire rack to cool completely.
- Prepare the glaze: In a saucepan over medium heat, melt the 1/2 cup butter with the brown sugar. Stir until the sugar dissolves.
- Remove from heat and stir in the milk and vanilla extract. Let cool slightly.
- Gradually whisk in the powdered sugar until the glaze is smooth.
- Once the cakes are cool, spread the glaze over the top of one layer and place the second layer on top. Pour remaining glaze over the top layer.
Notes
- For a deeper butterscotch flavor, use dark brown sugar in the cake batter.
- You can substitute sour cream for buttermilk for a slightly tangier cake.
- The glaze will set as it cools, so work quickly when applying it.
- Prep Time: 25 min
- Cook Time: 35 min
- Category: Dessert
- Method: Baking
- Cuisine: American
Nutrition
- Serving Size: 1 slice
- Calories: 450
- Sugar: 55g
- Sodium: 250mg
- Fat: 22g
- Saturated Fat: 14g
- Unsaturated Fat: 8g
- Trans Fat: 0.5g
- Carbohydrates: 60g
- Fiber: 1g
- Protein: 4g
- Cholesterol: 95mg
Keywords: butterscotch cake, homemade glaze, brown sugar cake, layer cake, dessert