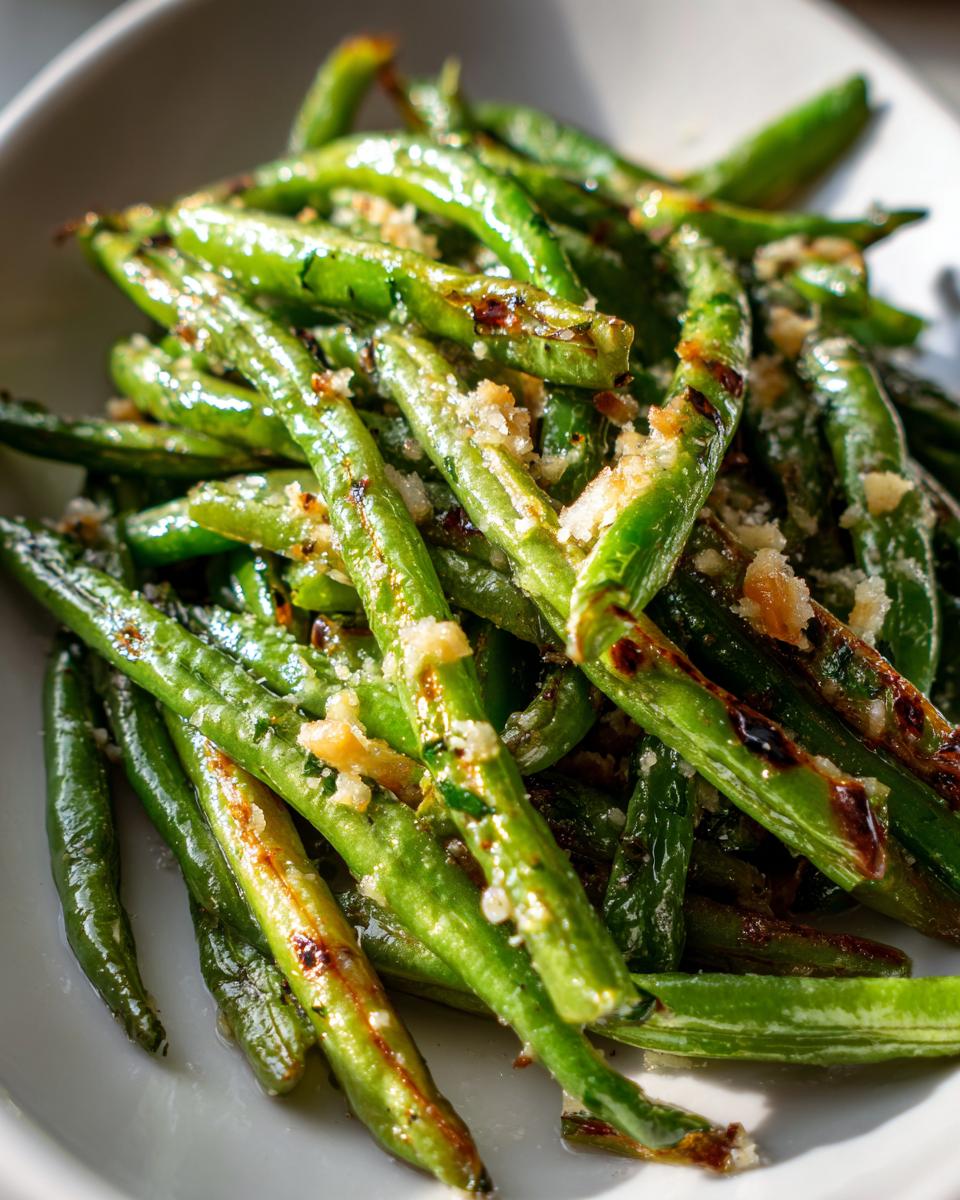
I don’t know about you, but sometimes the main course takes up all my brain space. When that happens, I need a side dish that’s basically perfect with zero fuss. Seriously, I’m talking about something that tastes like you slaved over it but only took ten minutes to make. That’s where these **Cheesy Garlic Green Beans** come in. They popped up on our dinner rotation completely by accident one Tuesday, and now, wow, my family demands them at least twice a month. They are crispy, salty, packed with that deep roasted garlic flavor, and that melted Parmesan topping? Forget about it. This recipe is proof that simple ingredients, treated right, always win.

Why You Will Love These Cheesy Garlic Green Beans
Look, I get busy. Weeknights are chaos! That’s why this recipe is one of my all-time favorites. It’s just so rewarding for how little effort you put in. You end up with vibrant, savory green beans that taste way more complicated than they actually are. Plus, they get that beautiful crunch when you roast them just right. It’s the ultimate side dish hero.
- They taste restaurant-quality but use ingredients you probably already have in the pantry.
- The combination of sharp Parmesan and mellow roasted garlic is just irresistible.
- Clean up is an absolute breeze—mostly just one baking sheet!
Quick Prep Time
Seriously, you are looking at maybe 10 minutes max to get these prepped and into the oven. Trimming the beans and tossing them with the oil and garlic is lightning fast. You’re done before your oven even hits 400 degrees!
Perfect Side Dish for Any Meal
These Cheesy Garlic Green Beans are so versatile. They hold up beautifully next to a simple weeknight roast chicken, but honestly, they’re fancy enough to feature on your holiday table next to the turkey. No matter the occasion, they always disappear first!
Gathering Ingredients for Cheesy Garlic Green Beans
Okay, the ingredient list for these amazing **Cheesy Garlic Green Beans** is short, which is exactly what I love. You don’t need a million fancy things to make magic happen. We’re using one pound of fresh green beans, a good glug of olive oil, some salt, pepper, and the star trio: fresh garlic, and of course, that glorious Parmesan cheese.
You’ll need about three cloves of garlic, minced really small. Don’t even think about that jarred stuff if you can help it; fresh garlic makes a world of difference here. And for the cheese? Go for the good stuff, the kind you grate yourself if you can grab a wedge. It melts so much better!
Specific Ingredient Notes and Substitutions
Now, home cooks always ask me about substitutions, especially for green beans. If you’re in a rush, you can absolutely use frozen beans. But listen closely: you must thaw them first and then pat them completely dry with paper towels before you toss them with the oil. If they’re wet, they steam instead of roast, and we want crispiness!
Also, if you like a little kick—and I often do—make yourself a rule to add a pinch of red pepper flakes right when you season the finished product. It just wakes up the garlic and cheese beautifully. If you ever need a homemade substitute for cream in another dish, I found this great guide on making your own heavy cream at home, but for this recipe, stick to the oil!
Step-by-Step Guide to Perfect Cheesy Garlic Green Beans
Getting these **Cheesy Garlic Green Beans** on the table is so straightforward; you’ll wonder why you ever bothered steaming them again! The secret is getting the oven roaring hot right at the start. We need that heat to crisp up those beans properly before we introduce the dairy.
Preparing and Roasting the Green Beans
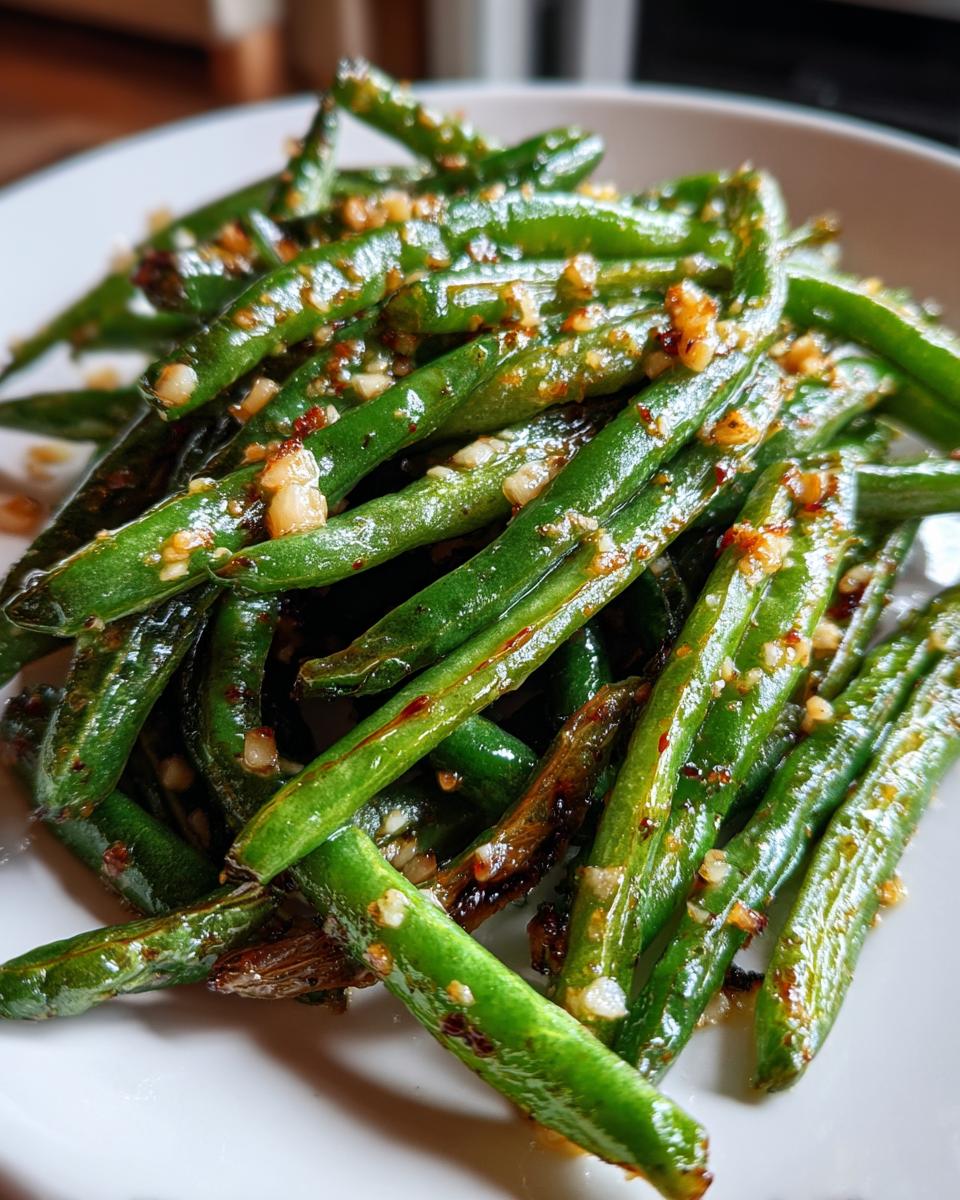
First things first: get your oven preheated to 400 degrees Fahrenheit. While it’s heating up, grab your trimmed green beans. In a medium bowl—don’t use a huge bowl, you want plenty of room to toss—drizzle everything with the olive oil and scatter that minced garlic all over. Toss it really well until every bean is coated. That oil is the carrier for all that great garlic flavor!
Next, and this is key for roasting versus steaming, spread those coated beans onto your baking sheet in a single layer. If they’re piled up, they’ll steam, and we want them crispy! Pop that sheet into the hot oven and let them roast for a solid 15 minutes. Go ahead and check out my crispy Parmesan zucchini while you wait—it uses a similar technique!
Adding the Cheese Finish to Your Cheesy Garlic Green Beans
When the 15 minutes are up, you’ll pull the tray out. The beans should look slightly wrinkled and tender-crisp. Now, quickly sprinkle that half-cup of shredded Parmesan evenly over the top. Don’t cover them too densely, or it won’t melt right! Slide them back into the oven for just another 5 to 7 minutes.
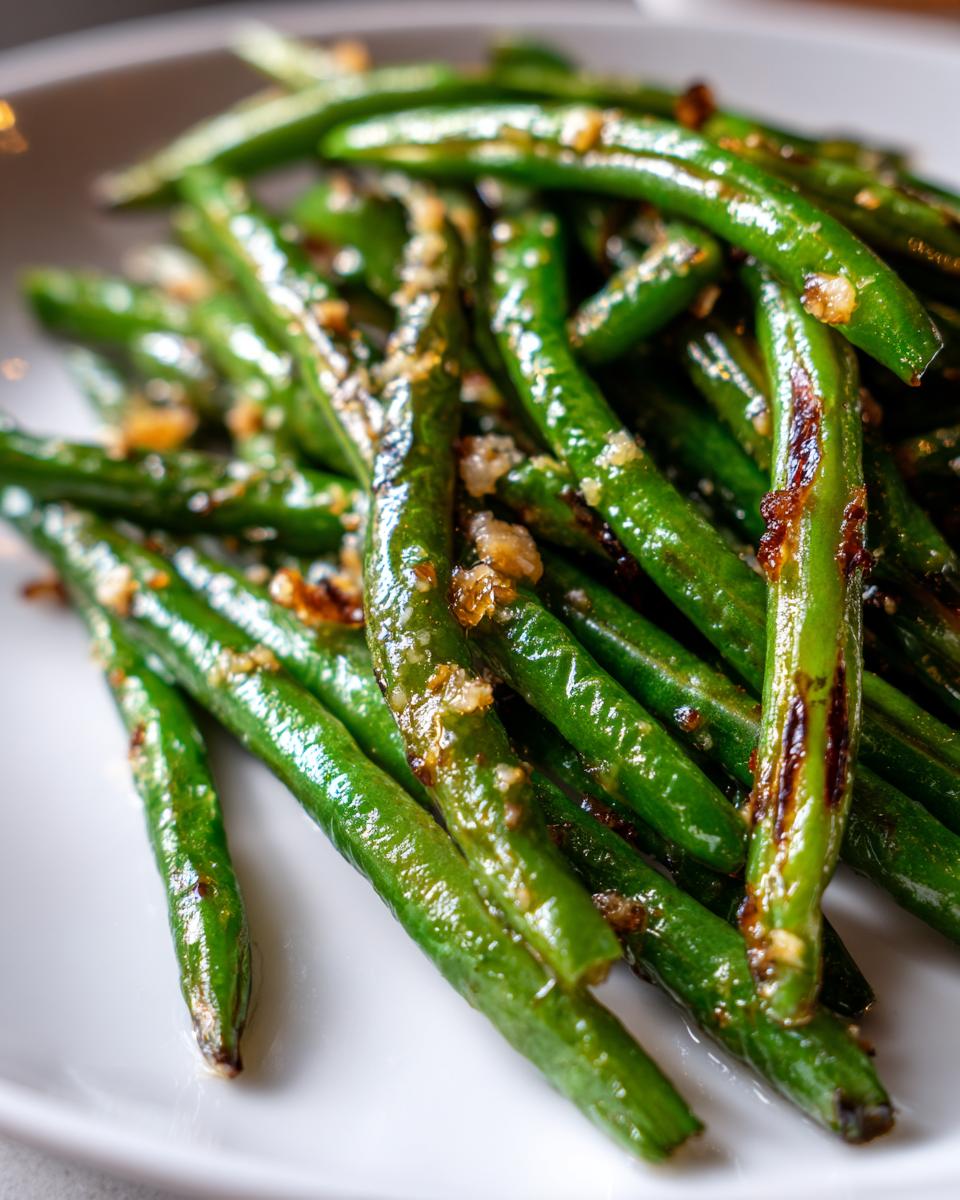
You’re watching for two things here: the cheese needs to be fully melted and just starting to turn golden at the edges. That’s when you know it’s done. Once they come out, immediately hit them with that salt and pepper. Serve them piping hot!
Expert Tips for the Best Cheesy Garlic Green Beans
I’ve made this recipe way too many times to count, and over the years, I’ve picked up a few little tricks that elevate these **Cheesy Garlic Green Beans** from great to absolutely legendary. These aren’t really complicated steps, but they make a huge difference in texture and flavor, which is what separates a good side dish from the one everyone asks for the recipe to!
First and most important tip: Please use freshly grated Parmesan cheese. I know, I know, the pre-shredded stuff is convenient, but it’s coated in anti-caking agents. When you put that in the oven, it clumps up and often browns too fast or just sits there like dusty little chips. Freshly grated melts smoothly and gives you that beautiful, uniform, golden blanket over the beans. It’s worth the extra minute of grating, trust me! If you’re looking for other great cheesy garlic ideas, check out this recipe for juicy garlic parmesan skewers—the flavor profile is fantastic.
My second biggest tip deals with the garlic. Since we only bake the beans for 15 minutes before the cheese goes on, we risk having raw-tasting garlic or, worse, burned garlic. If you mince your garlic super, super fine, it tends to burn quickly in that high heat. If you prefer a slightly milder, roasted flavor, you can toss the minced garlic in the oil and let it sit for a good five minutes *before* you add the beans to the bowl for tossing. This gives the oil a chance to softly infuse with the garlic flavor without the tiny bits scorching in the oven.
Finally, remember what I said about spreading the beans in a single layer? That applies even if you have to use two trays! Never overcrowd the baking sheet. If the beans are layered on top of each other, the steam gets trapped, and you end up with soggy, wilted beans instead of those lovely, slightly blistered tips we’re aiming for. Give them space to breathe and roast!
Serving Suggestions for Cheesy Garlic Green Beans
These **Cheesy Garlic Green Beans** are such a crowd-pleaser because they go with literally everything! When I serve them on a busy night, they are the perfect counterpoint to anything rich or creamy. They cut right through that heaviness with their salty, garlicky bite.
They pair absolutely beautifully with baked salmon, as the freshness of the beans balances the richness of the fish. If you’re making something comforting, like a big pasta dish, these are great, too. I highly recommend serving them alongside a main dish like my favorite Tuscan Chicken. Also, if you want another green veggie without the cheese, maybe roast some asparagus tossed only with lemon juice. Honestly, though, they are so good, you could probably serve them next to a bowl of cereal and no one would complain!
Storing and Reheating Your Cheesy Garlic Green Beans
So, you made an enormous, glorious batch of **Cheesy Garlic Green Beans**, and now you actually have leftovers—which is a problem I frequently face because they are *that* delicious! Don’t sweat it; storing and reheating these is super easy, but we need to be smart about it to maintain that perfect texture we worked so hard for.
The best way to store them is in an airtight container in the refrigerator. They’ll keep beautifully for about three to four days. Just let them cool down completely on the pan before you put the lid on—if you seal them while they are warm, you’ll just create steam inside the container, and that guarantees sogginess when you go to reheat them later. Nobody wants soggy cheese or limp beans!
Reheating is where you have a choice based on how much crunch you still crave. The microwave is fast, sure, but it really turns that gorgeous Parmesan cheese into a chewy layer. If you use the microwave, only zap them for 30 seconds at a time, stirring halfway through.
My absolute favorite way to bring these back to life is the oven or toaster oven. Spread the leftover **Cheesy Garlic Green Beans** onto a clean baking sheet—again, single layer, resist the urge to dump them all in a pile! Bake them at a low temperature, maybe 325 degrees, for about 5 to 8 minutes. This gentle heat re-crisps the beans slightly and melts the cheese again without burning everything. It tastes almost exactly like they just came out of the oven the first time around!
Frequently Asked Questions About Cheesy Garlic Green Beans
I get so many questions about everything, from substitutions to timing, which tells me you all love these incredible **Cheesy Garlic Green Beans** as much as my family does! Here are the few things I hear most often popping up in my DMs and comments regarding the recipe. Hopefully, this clears things up so you can whip up a perfect batch tonight!
Can I make Cheesy Garlic Green Beans ahead of time?
You totally can prep ahead, which is great for entertaining! I recommend trimming and tossing your green beans with the oil and garlic mixture a few hours ahead of time. Store that bowl covered tightly in the fridge. However, I strongly advise you *not* to add the Parmesan cheese until about 10 minutes before you are actually ready to bake them. If the cheese sits on there too long, it can get damp or start clumping weirdly before it even hits the heat, which ruins that perfect melted texture we want.
What kind of cheese works best for Cheesy Garlic Green Beans?
Parmesan is my ultimate favorite—it offers that sharp, salty nuttiness that complements the garlic perfectly. You really can’t go wrong there. But if you’re looking to mix it up or don’t have enough Parmesan on hand, Pecorino Romano is a fantastic, slightly sharper substitute. It’s in the same family as Parmesan, so the melt factor is similar! If you have a milder palate, you could try using half Parmesan and half a low-moisture, finely shredded mozzarella or even a mild white cheddar. Just remember that cheddar tends to release a bit more oil than pure Parmesan.
Since we rely so much on cheese in this house, I often make things like this **Cheesy Garlic Green Beans** recipe right after I make a big cheesy main dish, like my Garlic Parmesan Chicken Pasta Bake. It’s always good to have extra cheese grated and ready to go!
Estimated Nutritional Snapshot for Cheesy Garlic Green Beans
Now, I always bake based on taste and love, not numbers, but I know a lot of you are tracking macros or watching things like sodium, so here is a quick breakdown of what these **Cheesy Garlic Green Beans** usually clock in at. Remember, these are just estimates, especially depending on how much oil you use or the exact brand of Parmesan you grab!
This snapshot is based on four generous servings:
- Calories: 150
- Total Fat: 10g (with 4g being saturated fat—mostly from that lovely cheese!)
- Carbohydrates: 10g
- Protein: 8g
Since our main ingredients are green beans and Parmesan, we get a nice dose of fiber, too, coming in around 4 grams per serving. It’s a seriously tasty side that doesn’t derail your entire meal plan!
Share Your Cheesy Garlic Green Beans Creations
That’s it! You are officially ready to serve up the crispiest, cheesiest, most garlicky green beans anyone has ever tasted. My heart swells seeing my simple family staples become part of your busy weeknights. The whole point of sharing these recipes is to bring a little joy and amazing flavor into your own kitchen.
Once you’ve made this batch of **Cheesy Garlic Green Beans**, I absolutely need to know what you thought! Head down to the comments section below, give the recipe a star rating—did you go five stars? I hope so!—and tell me everything.
Most importantly, I want to know what you served them with! Did they accompany your Sunday roast, or were they holding their own next to a plate of grilled sausages? Finding the perfect main dish pairing is half the fun. Speaking of treats, if you ever need a spectacular dessert that’s almost as easy as these beans, you should sneak a peek at how to make an easy cheesecake recipe. Happy cooking, and enjoy those cheesy edges!
Print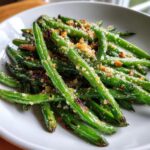
Cheesy Garlic Green Beans
- Total Time: 32 min
- Yield: 4 servings 1x
- Diet: Vegetarian
Description
Simple recipe for green beans baked with garlic and cheese.
Ingredients
- 1 lb fresh green beans, trimmed
- 2 tablespoons olive oil
- 3 cloves garlic, minced
- 1/2 cup shredded Parmesan cheese
- 1/4 teaspoon salt
- 1/8 teaspoon black pepper
Instructions
- Preheat your oven to 400 degrees Fahrenheit.
- Toss the trimmed green beans with olive oil and minced garlic in a bowl.
- Spread the coated green beans in a single layer on a baking sheet.
- Bake for 15 minutes.
- Remove the baking sheet from the oven and sprinkle the Parmesan cheese over the beans.
- Return to the oven and bake for another 5 to 7 minutes, or until the cheese is melted and lightly browned.
- Season with salt and pepper before serving.
Notes
- You can use frozen green beans; thaw and pat them dry before coating with oil and garlic.
- For extra flavor, add a pinch of red pepper flakes with the salt and pepper.
- Prep Time: 10 min
- Cook Time: 22 min
- Category: Side Dish
- Method: Baking
- Cuisine: American
Nutrition
- Serving Size: 1/4 of recipe
- Calories: 150
- Sugar: 2
- Sodium: 350
- Fat: 10
- Saturated Fat: 4
- Unsaturated Fat: 6
- Trans Fat: 0
- Carbohydrates: 10
- Fiber: 4
- Protein: 8
- Cholesterol: 15
Keywords: green beans, cheesy, garlic, Parmesan, side dish, baked vegetables