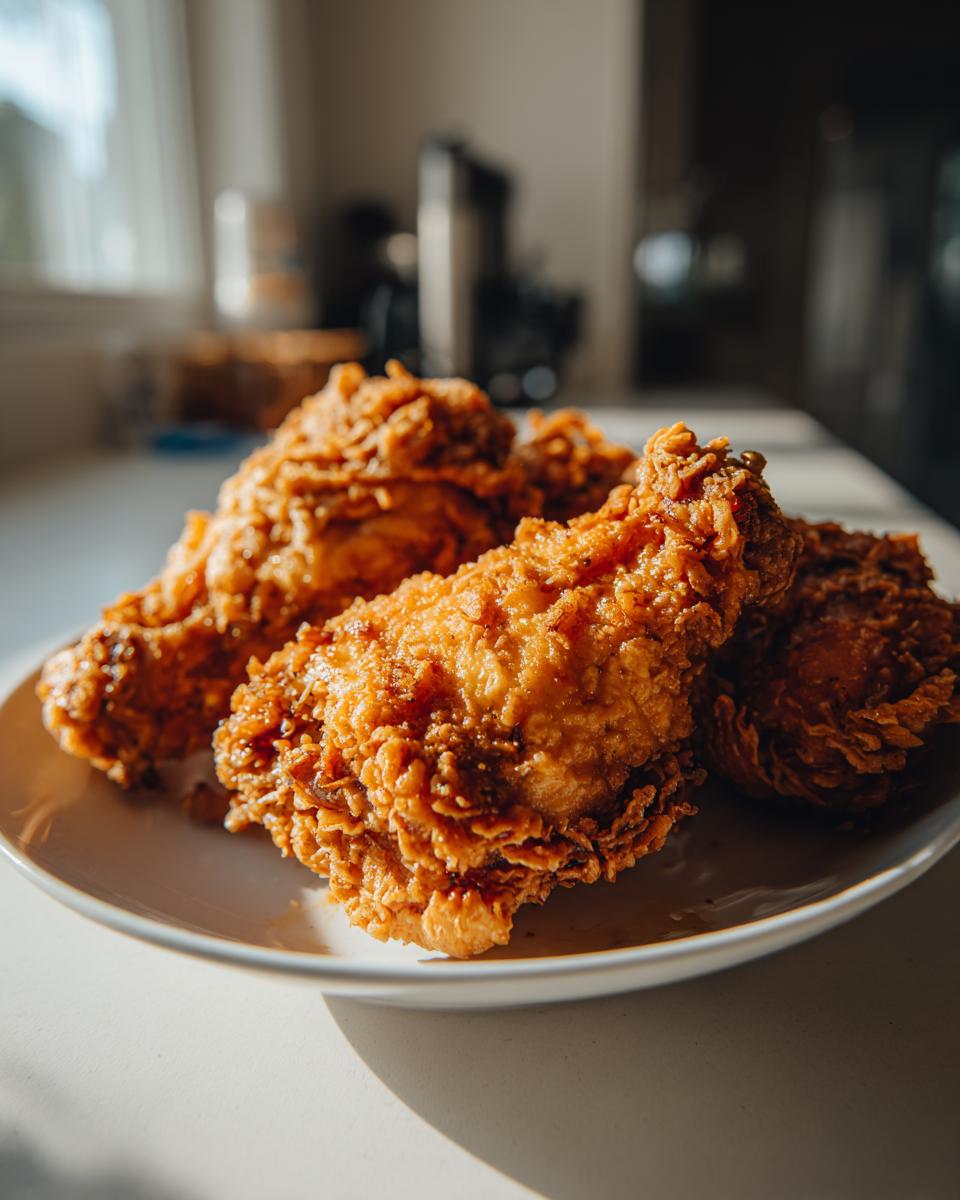
There is nothing on this earth quite like that first bite of perfectly crispy fried chicken. I mean, the shattering sound of the crust before you even hit the juicy meat underneath? Heaven! But for me, plain fried chicken just wasn’t cutting it anymore. I spent ages trying to get that deep, savory flavor just right without burning the coating. Trust me, I burned a lot of garlic trying!
This specific Garlic Fried Chicken recipe is the winner, hands down. The real magic isn’t just dumping garlic powder everywhere; it’s about marrying the intense fresh garlic directly with the flour dredge after a quick buttermilk soak. It’s the simple step that makes every single bite intensely flavorful and gives you that savory punch you’re chasing. After so many attempts—some too salty, some too soggy—I finally perfected this balance and I know you’re going to love it.

Why This Garlic Fried Chicken Recipe Stands Out
So, why toss out all your old fried chicken recipes and give mine a try? Honestly, it comes down to how addictive this garlic flavor is when it hits that hot oil. It’s truly spectacular, and it doesn’t require fancy equipment or a whole day in the kitchen. I think that’s what makes it my weeknight hero!
Here’s what this method knocks out of the park every single time:
- Intensely Garlicky Flavor: We punch up the garlic right into the coating so it permeates every crispy piece, avoiding that dusty, bland flavor you sometimes get.
- Superior, Lasting Crispiness: The combination of flour and cornstarch locks everything in, giving you that fantastic crunch factor. I promise, it stays crispy longer than your average breading!
- Simple Dredging Process: While it tastes gourmet, the steps are straightforward. Soak it, season it, fry it. That’s really it. If you want to see another super crispy chicken method, check out my guide to Popcorn Chicken, which uses a similar coating trick.
Essential Ingredients for Perfect Garlic Fried Chicken
You really can’t cheat on fried chicken ingredients, folks! This recipe depends on having the right players on your team to get that restaurant-level crispiness and huge flavor. We need about two full pounds of chicken pieces—I always grab a mix of thighs and drumsticks because they stay juiciest. Then grab one cup of all-purpose flour, a half cup of cornstarch (that’s your secret weapon for crispiness, don’t skip it!), salt, fresh black pepper, paprika for color, and just a pinch of cayenne for a tiny background heat.
But let’s talk about the stars of the show: the buttermilk and the garlic. You need a full cup of buttermilk to give that chicken meat incredible tenderness—it breaks down the fibers just enough. If you run out, you can whip up a quick batch at home; I have a simple guide for making heavy cream at home that you can turn into a buttermilk substitute in a pinch. And finally, the garlic! You need four glorious cloves, minced very, very finely. Fresh garlic hands-down beats dried powder here; it toasts up beautifully in the oil without burning right away, giving the crust that signature savory depth.
Ingredient Notes and Substitutions for Garlic Fried Chicken
The buttermilk soak is non-negotiable for me; it tenderizes the chicken right down to the bone so when you pull that beautiful fried crust away, the meat is just falling off. Don’t let the chicken sit in the fridge for more than 30 minutes in the buttermilk, though; too long and the meat can get slightly mushy before it hits the fryer.
Also, try to make sure your chicken pieces aren’t fridge-cold when you drop them into that hot oil. I usually take them out while I’m mixing up my dredge and let them hang out on the counter for about twenty minutes. Bringing them closer to room temperature helps them cook more evenly from end to end. Nobody wants dry white meat next to a perfectly browned skin, right?
Step-by-Step Instructions for Making Garlic Fried Chicken
Okay, let’s get cooking! This is where the transformation happens, and I promise, if you follow these steps closely, you’ll have the best Garlic Fried Chicken of your life. Keep your cutting board clear and have a paper towel-lined plate or—even better—a wire rack ready for when they come out of the oil. We want air circulation to keep that bottom layer crispy too!
First things first: the chicken needs its buttermilk bath. Just let those pieces sit for the full 30 minutes; it really helps them absorb that tang and get tender inside. While they are chilling out, go ahead and get your dredging station ready. This is serious business, so don’t rush it!
Preparing the Chicken Coating for Garlic Fried Chicken
Grab a sturdy bowl and mix up all your dry ingredients: the flour, the cornstarch, salt, pepper, paprika, and cayenne. Make sure you get everything really married together before adding the moisture element. Then, because this is *garlic* fried chicken, we add the four cloves of finely minced garlic right into the flour mixture. Use a fork or whisk to break up any clumps of garlic so it’s evenly dispersed throughout the flour mixture. It should look beautifully freckled with garlic bits!
Now, take your chicken pieces out of the buttermilk rig. Don’t shake off every last bit of buttermilk; you want some of that wetness to help the coating stick. Dredge each piece thoroughly in the seasoned flour. Here’s a key step: press that coating onto the chicken! Really pat it down. If you want that extra-shattering crust, this is where you double dredge. Pop it back into the buttermilk for just a quick second—literally just a dip—and then back into the flour mixture again, pressing hard one more time. Let those coated pieces rest on a clean plate for about five minutes before frying. This resting time lets the coating hydrate and adhere perfectly, which is essential for crispiness. If you want to learn how to manage internal temperatures flawlessly, I found this great explanation about controlling steak doneness that actually applies perfectly to chicken too: Check out my article on temperature secrets here!
Frying Technique for Crispy Garlic Fried Chicken
Time for the hot oil! You absolutely must use a heavy pot or deep skillet for this. Heat up your vegetable oil until it hits a solid 350 degrees Fahrenheit (175 degrees Celsius). Using a thermometer is crucial here; if it’s too cool, you get greasy chicken, and if it’s too hot, the outside burns before the inside cooks. Safety first, always handle that hot oil with extreme care!
Carefully lower your dredged chicken pieces into the oil one by one. Do not overcrowd the pan! I know it’s tempting to squeeze in one more piece, but if you drop the oil temperature too much, you’ll lose that amazing crispiness. Fry for about 6 to 8 minutes on the first side until you see that gorgeous deep golden-brown color. Flip gently and repeat on the other side for another 6 to 8 minutes.

You must confirm it’s done, especially with thicker pieces like thighs. Pull one piece out and use a meat thermometer—it needs to hit a safe 165 degrees Fahrenheit (74 degrees C) internally. Once they hit temperature, pull them out immediately and set them on a wire rack, not paper towels if you can help it, to drain off the excess oil. That rack keeps the bottoms from steaming and getting soggy!
Expert Tips for Achieving the Best Garlic Fried Chicken Crust
I learned these little tricks after making batch after soggy batch, so listen up! That resting period I mentioned right after rolling the chicken in the final coat of seasoned flour is honestly a game-changer. Give those coated pieces a solid five minutes just sitting there. It allows the flour and moisture to really bond; it’s like the breading gets shy and holds on tighter before it gets tossed into the heat.
Also, managing that oil temperature is serious business. If you’re frying more than three pieces at a time, the temperature inevitably drops below 350°F. You have to let the oil recover between batches! Wait about two full minutes after pulling a batch out before you drop the next one in. This recovery time ensures that crisp crust instead of a greasy mess. If you manage your oil well, you can check out how I season my fries to match—it’s all about the crunch management! You can read about my perfected french fry seasoning theory over here.
Serving Suggestions for Your Garlic Fried Chicken
Now that you’ve got this incredible, flavor-packed garlic fried chicken resting on its rack, you need the perfect lineup of sides, don’t you? You can’t just eat straight chicken, although I’ve definitely been tempted!
This rich, savory, and garlicky flavor profile needs sides that can either cut through the richness or complement the deep savory notes without fighting them. I always default to something creamy or something bright and a little sweet to balance out all that crispy goodness.
You absolutely need some creamy mashed potatoes—nothing beats soaking up a little chicken drippings with potatoes. If you’re feeling ambitious, a quick coleslaw with a little vinegar tang wakes up your palate between bites.
But if you want something unexpected that everyone always asks me for, try pairing it with sweet vegetables. My ultimate favorite pairing is these honey-roasted carrots. The sweetness of the carrots and the honey glaze plays so beautifully off the saltiness and garlic kick of the chicken. It’s honestly restaurant-worthy!
Storage and Reheating of Leftover Garlic Fried Chicken
I’m not going to lie; there are rarely leftovers when I make this batch of garlic fried chicken because my family devours it! But on the rare occasion we have some beautiful, golden-brown pieces remaining, you have to store and reheat them correctly, or that hard-earned crispiness just vanishes. That’s a kitchen tragedy in my book!
The absolute key to proper storage is air circulation. Never, and I mean *never*, put hot fried chicken into a sealed container. You’re just steaming it from the inside out, and you may as well just dunk it in lukewarm water. Wait until the chicken is completely cool to the touch—and I mean room temperature—before you mess with it.
Once it’s totally cooled down, place the chicken pieces on a plate lined with a paper towel and immediately tuck that into an airtight container. It will keep safely in the refrigerator for about three to four days. If you try to keep it longer than that, the texture really starts to suffer, and honestly, the flavor isn’t as punchy.
The Best Way to Bring Back That Crunch
We need to talk about the microwave—just avoid it. Microwaves are the enemy of crispiness; they just turn batter soft and sad. If you want that shattering crust back, you have two fantastic options depending on how much time you have.
For the absolute best results, use your oven. Preheat it to about 375 degrees Fahrenheit (around 190°C). Set the chicken pieces right on a wire rack placed over a baking sheet. The rack is important because it allows heat to circulate underneath, crisping up the bottom crust just like it was fresh. Let it heat for about 10 to 15 minutes, depending on the size of the piece, until it’s piping hot all the way through.
When You Need Crispy Chicken Fast
If you have an air fryer, this is where it truly shines! It revives fried foods better than anything else. Pop the cooled chicken pieces into the basket, making sure there’s a little space between them so the air can hit all sides evenly. Set the air fryer to 360°F (about 180°C) and let it run for about 5 to 7 minutes. Give them a quick peek at the five-minute mark. The results are shockingly close to just-fried perfection!
I usually skip the oven when I’m short on time and break out the air fryer. It’s fast, efficient, and saves the integrity of that beautiful garlic crust we worked so hard to perfect!
Frequently Asked Questions About Garlic Fried Chicken
Can I bake or air fry this Garlic Fried Chicken recipe instead of frying?
Oh, I totally get wanting a lighter version! You can definitely try baking or air frying, but you won’t get the exact texture this recipe is famous for. Frying creates those bubbles and that intense crunch we love. If you bake, use a wire rack over a baking sheet so air gets underneath, and try spraying the chicken coating with a little cooking spray before baking at 400°F (200°C). For the air fryer, use the settings I mentioned earlier—it gives you much better crisp results than the oven. If you’re looking for a totally different chicken dinner, maybe try my guide on making a fantastic chicken burger instead!
How do I stop the minced garlic in the coating from burning?
That’s the number one question folks ask when they see fresh garlic in the dredge! The key here is twofold. First, mince it really, really fine. If you have big chunks, they burn almost instantly. Second, the buttermilk soak is your insurance policy. The wet chicken going into the flour helps absorb some of the free-floating garlic bits, and the buttermilk itself shields the meat slightly. But the biggest thing is maintaining that crisp 350°F oil temperature. When the oil is hot enough, it seals the crust quickly before the garlic has a chance to scorch.
What is the absolute best oil to use for deep frying this chicken?
For deep frying, you need an oil with a high smoke point, period. I almost always reach for basic vegetable oil because it’s neutral in flavor and handles the heat beautifully without adding any weird taste to your beautiful Garlic Fried Chicken. Canola oil is a fantastic, budget-friendly second choice. Just make sure you use enough oil to fully submerge the chicken pieces so they cook evenly. Don’t skimp on the depth!
Why is cornstarch included in the dry mix?
Ah, the cornstarch—that’s pure texture magic! While the flour gives you the bulk of the coating, cornstarch is what delivers that super light, shatteringly crisp texture that stays crunchy longer. It absorbs moisture differently than flour does during the frying process. It’s the secret to making store-bought tasting fried chicken right in your kitchen!
Nutritional Estimates for Garlic Fried Chicken
Okay, let’s talk reality for a second. This is glorious, deep-fried, flavor-packed chicken, so while it’s the best thing you’ll ever eat, it’s not exactly health food! I always try to keep a rough idea of what I’m eating, even with indulgent meals like this because, well, balance, right?
These numbers are based on my best calculations. Since everyone uses slightly different cuts of chicken or fries theirs for a little longer, these figures are just guidelines. They are based on one serving, which is roughly equal to one standard piece of chicken like a thigh or drumstick that has been cooked according to the recipe instructions.
For a single serving, here’s the snapshot of what you are looking at:
- Calories: Around 450 per piece. It’s a dinner centerpiece, not a light snack!
- Total Fat: About 28 grams. Remember, a lot of this is the healthy oil we used for frying, but it still counts!
- Protein: This is where it shines—a massive 32 grams of protein, which keeps you feeling satisfied for ages.
- Carbohydrates: Fairly low, around 15 grams, mostly coming from the flour and cornstarch coating.
- Sodium: We season this chicken well, so expect around 650mg of sodium. You can definitely cut back on the salt in the dredge if you’re watching sodium intake closely!
So, enjoy it guilt-free when you make it, because it is worth every single calorie. It’s best paired with those lighter sides we talked about earlier to keep the meal balanced!
Share Your Crispy Garlic Fried Chicken Experience
That’s honestly everything you need to know to create the most flavorful, crispy Garlic Fried Chicken right in your own kitchen! I truly hope this recipe becomes a staple at your house just like it is at mine. The smell alone is worth the effort, right?
When you get a chance to try this out—and I really hope that’s soon!—I would absolutely love to hear how it went for you. Did the buttermilk do its job? Did your garlic crust stay perfectly crisp?
Head down to the comments section below! Leave me a star rating and tell me which piece of chicken you tried first—the thigh or the drumstick? If you snap a picture of your golden, garlicky masterpiece, please tag me on social media! I love seeing your kitchen successes. If you are looking for another great chicken option to try next week, perhaps a lighter option like my fantastic chicken salad is just the ticket!
Happy cooking, and enjoy every single crunch!
Print
Garlic Fried Chicken
- Total Time: 40 min
- Yield: 4 servings 1x
- Diet: Low Calorie
Description
Crispy fried chicken seasoned heavily with garlic.
Ingredients
- 2 lbs chicken pieces (drumsticks, thighs)
- 1 cup all-purpose flour
- 1/2 cup cornstarch
- 2 teaspoons salt
- 1 teaspoon black pepper
- 1 teaspoon paprika
- 1/2 teaspoon cayenne pepper
- 4 cloves garlic, minced
- 1 cup buttermilk
- Vegetable oil for frying
Instructions
- In a bowl, mix flour, cornstarch, salt, pepper, paprika, and cayenne pepper.
- Place chicken pieces in a separate bowl and cover with buttermilk. Let sit for 30 minutes.
- Remove chicken from buttermilk, letting excess drip off.
- Add minced garlic to the flour mixture and mix well.
- Dredge each piece of chicken thoroughly in the seasoned flour mixture, pressing to coat.
- Heat vegetable oil in a deep skillet to 350 degrees F (175 degrees C).
- Carefully place chicken pieces into the hot oil, avoiding overcrowding the pan.
- Fry for 6-8 minutes per side, until golden brown and cooked through (internal temperature reaches 165 degrees F or 74 degrees C).
- Remove chicken and place on a wire rack to drain excess oil.
Notes
- For extra crispiness, double dredge the chicken: coat in flour, dip briefly back into buttermilk, then coat in flour again.
- Maintain oil temperature for consistent cooking.
- Prep Time: 15 min
- Cook Time: 25 min
- Category: Dinner
- Method: Frying
- Cuisine: American
Nutrition
- Serving Size: 1 piece
- Calories: 450
- Sugar: 1
- Sodium: 650
- Fat: 28
- Saturated Fat: 7
- Unsaturated Fat: 21
- Trans Fat: 0
- Carbohydrates: 15
- Fiber: 1
- Protein: 32
- Cholesterol: 110
Keywords: garlic fried chicken, crispy chicken, fried chicken recipe, easy fried chicken, garlic seasoning