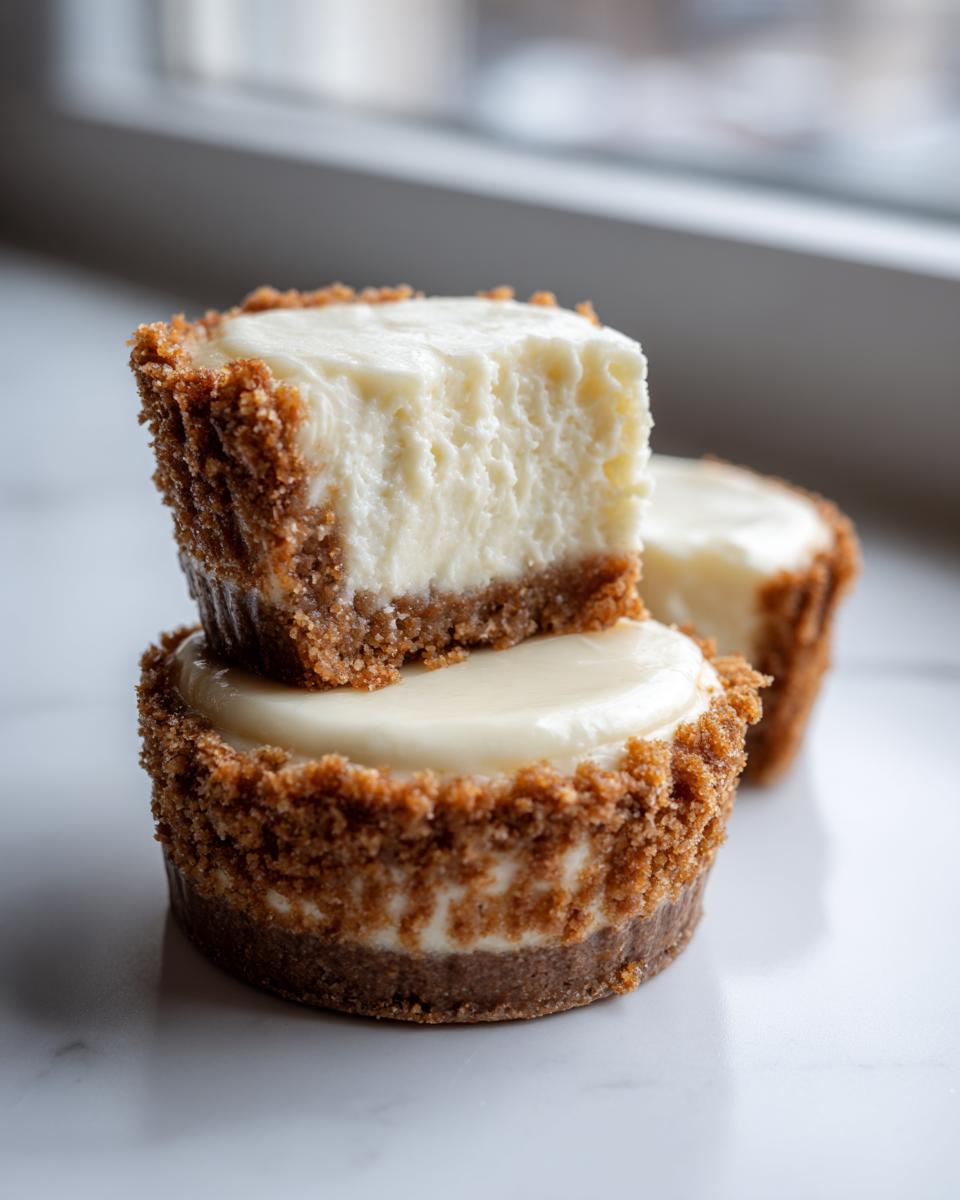
Sometimes you just don’t want to cut a giant cake, right? That’s why individual desserts stole my heart! Forget messy slicing; these amazing **Mini Cheesecakes** are my go-to answer whenever I have people over, or honestly, even when it’s just me craving something sweet. They bake up perfectly portioned every single time, which is the real magic trick here. The graham cracker crust is just buttery enough, and the filling sets up so divinely smooth, no water bath required!

Trust me, these tiny treasures are unbelievably easy. I whipped up a batch last week when unexpected guests showed up, and they were a massive hit. Nobody can resist a perfectly satisfying, two-bite cheesecake!
Why You Will Love Making These Mini Cheesecakes
Honestly, these win every time for a few simple reasons. You don’t need fancy techniques to get that restaurant-quality taste right in your own muffin tin. They’re totally reliable and just so satisfying!
- They are perfectly portioned—no slicing stress, ever!
- They bake up gorgeously dense and creamy, just like the big ones, without needing a fussy water bath.
- They use basic pantry staples, making them perfect for last-minute treats.
- If you want the recipe for the standard full-size version, check out my easy cheesecake recipe for comparison!
Essential Ingredients for Perfect Mini Cheesecakes
Okay, the beauty of these **Mini Cheesecakes** is that they don’t require any secret ingredients or rare finds. We just need good quality basics handled the right way. The most important rule? You absolutely must ensure your cream cheese is fully softened. I mean room temperature soft, not just wiggling a little bit soft. Lumps are the enemy of a smooth cheesecake filling, and nobody wants a lumpy bite!
Crust Ingredients
For that perfect buttery base that holds everything together, you’ll need:
- 1 1/2 cups graham cracker crumbs – make sure these are fine!
- 1/4 cup granulated sugar
- 6 tablespoons unsalted butter, and yeah, it has to be melted down first.
Filling Ingredients for Mini Cheesecakes
This is where the classic flavor comes in. Make sure you grab two good, large eggs for this part. The richness comes from the following:
- 16 ounces cream cheese, completely softened—don’t skip this step!
- 1/2 cup granulated sugar
- 2 large eggs
- 1 teaspoon vanilla extract
Step-by-Step Instructions for Baked Mini Cheesecakes
Alright, let’s get these beauties in the oven! Baking these little sweethearts is surprisingly fast. We are using a standard 12-cup muffin tin, so make sure you get those paper liners nestled in there first. And here’s a little secret: pack that crust down firmly! I use the flat bottom of a small measuring cup to really get it snug against the liner so it doesn’t crumble when you try to lift it out later. Once that’s done, a quick 5-minute head start in the heat sets the base perfectly.
If you want to see how I handle bigger, similar desserts, I recently made some mini pineapple upside-down cheesecakes and the crust prep is almost identical!
Preparing the Graham Cracker Crust Base
First things first: preheat your oven to 325 degrees Fahrenheit. Line those 12 muffin cups well. In a bowl, toss together your graham cracker crumbs and the 1/4 cup of plain sugar. Pour in the melted butter and stir until all those crumbs look damp, like wet sand. Spoon about one tablespoon right into the bottom of each liner and press it down well. Then, pop the tin into the hot oven for exactly 5 minutes to set them. Take ‘em out and let them cool just a tiny bit while you make the filling.
Mixing the Cream Cheese Filling for Mini Cheesecakes
This step is all about smoothness! We need to beat the fully softened cream cheese with the 1/2 cup of sugar until it looks ridiculously smooth, no lumps allowed whatsoever. This is what makes your **Mini Cheesecakes** taste gourmet. Next, add in your eggs, but listen to me: add them ONE at a time. You have to wait until the first one is totally blended in before you introduce the second one. Finally, stir in the vanilla extract. Keep your mixer speed low during this stage!
Baking and Cooling the Mini Cheesecakes
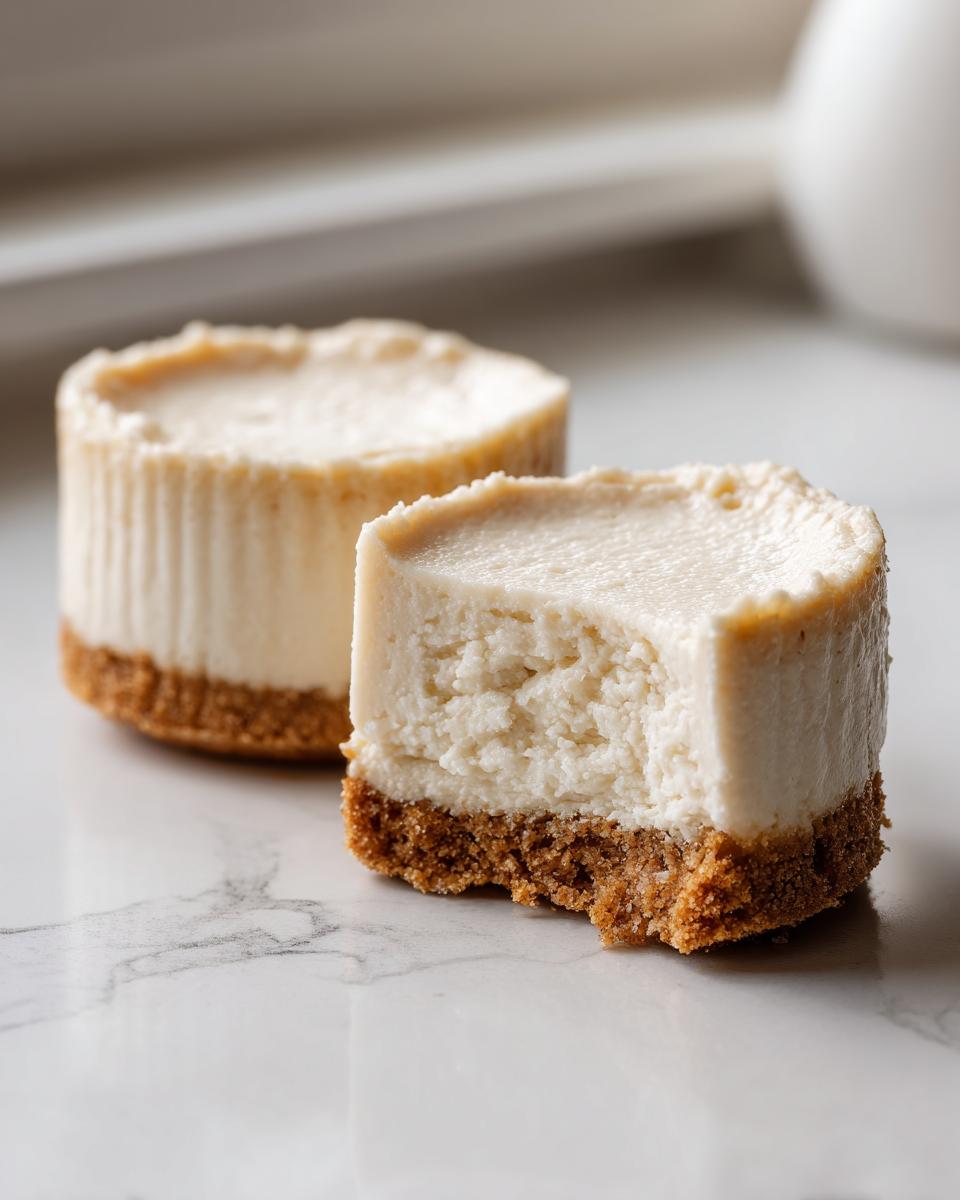
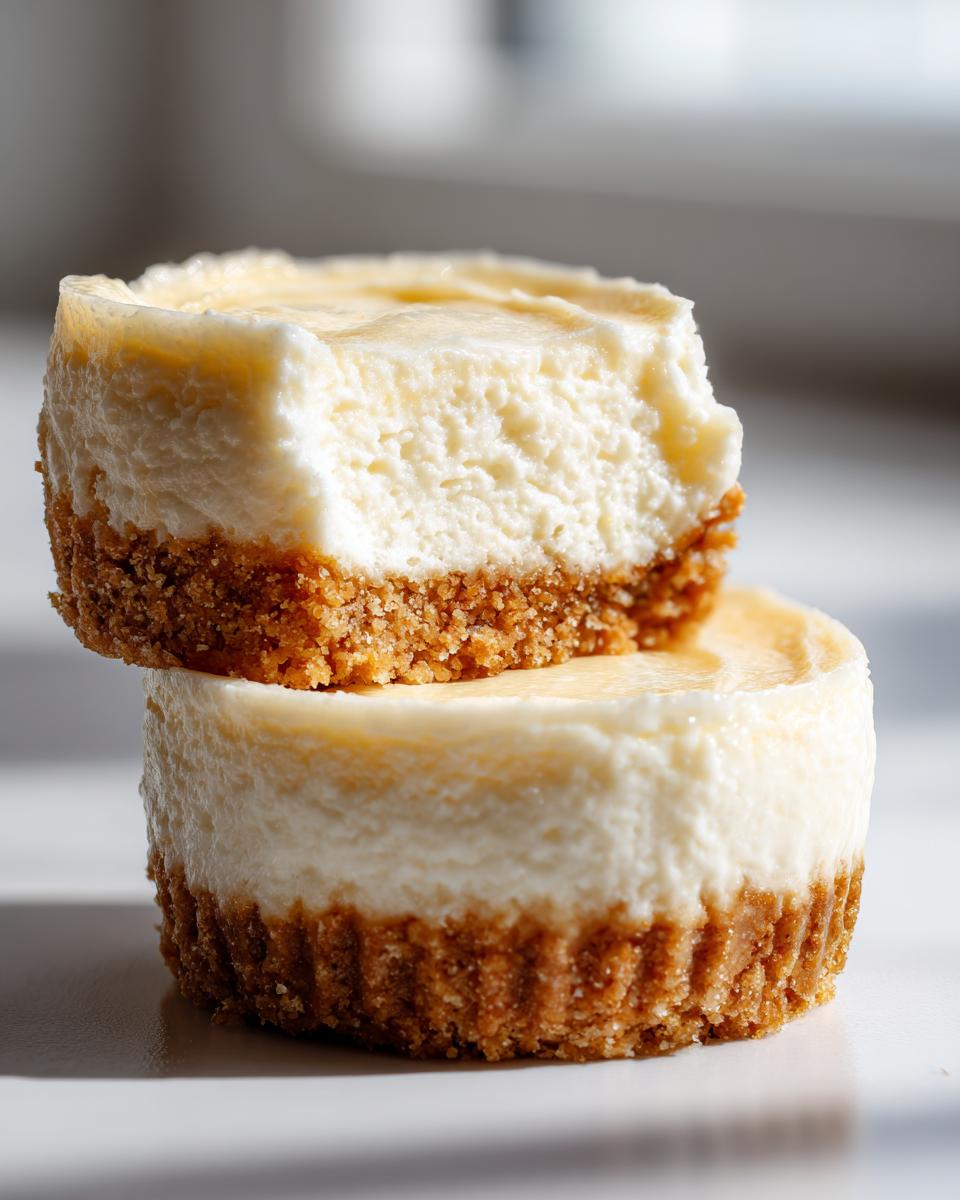
Gently spoon that gorgeous, smooth filling right over your pre-baked crusts. They should look pretty even across all 12 cups. Bake them for about 18 to 20 minutes. The centers should look mostly set but maybe just have a tiny bit of wiggle left—that’s perfect!
Now, this is the most critical part to avoid cracks. When the 20 minutes are up, turn the oven OFF. Don’t open the door, just turn it off. We let them sit inside the cooling oven with the door slightly ajar for a full 30 minutes. This gentle, slow cooling process is our secret weapon against shrinking and cracking! After that half-hour, pull them out onto a wire rack completely, let them come to room temperature, and then they absolutely must chill in the fridge for at least 2 hours before serving.
Tips for Achieving Flawless Mini Cheesecakes
Even though this recipe for **Mini Cheesecakes** is super straightforward, a few little habits in the kitchen really send the texture over the top. I’ve learned these things through trial and error—mostly error when I was first starting out! You want that luscious, velvety bite every time, not a curdled mess.
The absolute number one rule, which I mentioned before because it’s that important, is making sure your cream cheese is truly room temperature. If it’s even slightly cold, you’ll never get that smooth batter, and you’ll end up overmixing trying to force it. That overmixing introduces too much air before baking, and guess what that leads to? Cracks!
Preventing Cracks After Baking
We talked about turning the oven off, but let’s double down on the cooling process because it’s non-negotiable for perfect tops. After that initial 30 minutes lounging in the turned-off oven, take them out. But don’t rush them to the fridge yet! Let them sit on the counter until they are barely warm. Rapid temperature changes shock the delicate cheesecake structure. This slow transition is what keeps the tops beautifully flat and smooth—no ugly fissures!
Getting That Perfect Crust Consistency
Remember how we talked about packing the crust firmly? Well, the second tip is about moisture. If your crust seems too dry even after mixing with the melted butter, that means your graham crackers might have been a bit too fine or dry to begin with. Don’t add extra butter, though! Instead, pull the tin out after that 5-minute pre-bake, give the edges a *very* gentle nudge with the back of a spoon to make sure they haven’t crumbled up the sides, and then proceed.
If you ever want to switch things up entirely and try something savory after all these sweets, these easy chicken tostadas are a weeknight lifesaver! Back to cheesecake perfection, though—just focus on temperature control, and you’ll nail it.
Creative Variations for Your Mini Cheesecakes
Once you master the base recipe for these super easy **Mini Cheesecakes**, you have a perfect little vehicle for experimentation! I love having a batch ready just to see what fun toppings I can throw on top. Since the filling mixture itself is fairly neutral and creamy, it takes on flavors beautifully. Don’t feel like you have to stop at the plain, glorious baked version!
For flavor variations in the batter itself, it’s really simple. When you’re mixing in that last bit of vanilla extract, try swapping it out! Almond extract adds a lovely, slightly nutty warmth that is unexpected. Or, if you want a bright, lively twist, add a teaspoon of lemon zest right in with the sugar and cream cheese. Wow, does that cut through the richness wonderfully!
I’m also obsessed with adding subtle fruit notes. If you have a nice, thick fruit puree—like raspberry or even a tiny bit of pumpkin puree if you’re feeling autumnal—just beat about two tablespoons of it into the cream cheese mixture along with the eggs. You might need to reduce your baking time by a minute or two, since it adds a little extra liquid.
Topping Ideas for That Final Touch
This is where you really get to play dress-up with your **cheesecake bites**. The original notes suggest fresh berries, and honestly, you can never go wrong with that. A simple handful of fresh raspberries or blueberries sprinkled on top looks elegant, and the tartness wakes the whole dessert up.
If you’re feeling like chocolate, a drizzle of good quality melted dark chocolate is divine. Melt it down gently, maybe thin it out with a drop of coconut oil if it seems too thick, and use a fork to zig-zag it artistically over the cooled tops. Or, if you really want to go decadent, try a drizzle of caramel sauce!
If you’re looking for another sweet treat that pairs cream cheese wonderfully, you absolutely must check out my recipe for strawberry cookies with cream cheese frosting. That frosting is truly addictive!
Serving Suggestions for These Mini Cheesecakes
These **Mini Cheesecakes** are so rich and satisfying, you don’t need a ton of sides to make them feel like a complete dessert experience. In fact, I often find the best pairings are things that are lighter or offer a nice contrast to that creamy density. It’s all about balance, right?
When I serve these, usually straight from the fridge so they are nice and firm, I focus on beverages that cut through the richness. A strong cup of black coffee, piping hot, is my absolute favorite pairing. The slight bitterness of the coffee just cleanses your palate between bites of that buttery crust and sweet filling. Don’t even get me started on a simple, refreshing iced tea on a summer afternoon!
Pairing with Fruit Platters
Because the filling is so decadent, balancing it with fresh, bright fruit is a genius move. Instead of just piling toppings on, serve a platter alongside the cheesecakes. Think thinly sliced kiwi, beautiful red strawberries, or even segments of mandarin oranges. The acidity and water content in the fruit make everything feel lighter.
I sometimes even make a very simple, quick fruit syrup—just letting some berries simmer with a tablespoon of sugar until they break down a bit. That tart, homemade syrup drizzled lightly over the chilled **cheesecake bites** is just heavenly. If you’re looking for something totally different to serve alongside your sweet endeavors sometime, you should check out my recipe for the ultimate honey roasted carrots. Savory and sweet, just a completely different world!
The Perfect After-Dinner Treat
These are fabulous on their own as a standalone dessert, but if you’re serving a big meal, a single **mini cheesecake** feels less overwhelming than a giant slice of pie. They’re perfect for little plates after dinner when everyone is already getting full. You can even serve them alongside a small digestif, like a tiny glass of Baileys or a good quality cappuccino, to signal that the meal is officially over and it’s time for a sweet moment.
Storage and Reheating Instructions for Mini Cheesecakes
Now, let’s talk about leftovers, because believe it or not, these **Mini Cheesecakes** often last more than a day in my house! Since they are so rich, the flavor actually deepens a little bit overnight in the fridge, which is a bonus.
The key to keeping them perfect is sealing out any fridge smells. You don’t want your creamy vanilla cheesecake suddenly smelling like last night’s onions, right?
Refrigeration Tips
You need to keep these well chilled. The best way to store them is to make sure they are completely cool first—no warm cheesecakes in the container! Then, place them in an airtight container. If you don’t have a perfect container where they won’t get squished, you can line a standard container with a layer of paper towels, place the cheesecakes in a single layer, cover that layer with more paper towels, and then seal it. This really helps absorb any extra condensation.
Honestly, they taste the absolute best when they are straight out of the fridge—that nice chill keeps the texture firm and creamy. They should last beautifully for about four to five days this way. Always check for any off-smells or changes in texture before digging into one saved from the back of the fridge!
Freezing Your Cheesecake Bites
Yes! You can absolutely freeze these **cheesecake bites**, and it’s a fantastic way to keep them ready for future cravings. The small size helps them freeze and thaw much more evenly than a giant cheesecake.
Here’s how I do it: First, freeze them uncovered on a baking sheet for about an hour until they are completely rock hard. This stops them from sticking together. Once solid, transfer them to a heavy-duty freezer bag, squeezing out as much air as you can before sealing them tightly. They’ll keep great quality in the freezer for up to two months. When you’re ready to eat them, just transfer them to the fridge the night before to thaw slowly!
Frequently Asked Questions About Mini Cheesecakes
I know when you’re baking something as wonderful as cheesecake, you always have a few little doubts swirling around. It’s totally normal! I’ve gathered the questions I get most often from folks trying this recipe so you can feel 100% confident when you start mixing up these delicious **Mini Cheesecakes**.
Can I make the graham cracker crust ahead of time?
Oh, absolutely! This is a great time-saver, especially if you are busy on baking day. You can totally prepare the **graham cracker crust** mixture—that’s the crumbs, sugar, and melted butter combined—and press it into your muffin tin a day ahead of time. Just cover the whole tin tightly with plastic wrap and pop it in the fridge. Leaving it overnight actually helps it compress and get a little sturdier, which is fantastic for holding up that creamy filling once they bake!
What is the best way to prevent the tops of my Mini Cheesecakes from cracking?
This is the million-dollar question in the cheesecake world! The main culprit is temperature shock. You *must* utilize the slow cooling method we talked about earlier. That means turning the oven off and letting them sit inside with the door cracked for 30 minutes. This gently eases them down from baking temperature. Once they are out on the counter, let them reach room temperature before they ever see the cold fridge. Slow and steady wins the race for smooth, uncracked tops on those **cheesecake bites**!
How long do these cheesecake bites last in the refrigerator?
Because the recipe is relatively simple and doesn’t use a lot of heavy stabilizers, they are best eaten fresh, but they hold up wonderfully well! If you store them properly in a tightly sealed container—meaning a layer of paper towels on top is never a bad idea to catch condensation—these little **cheesecake bites** should stay delicious for about 4 to 5 days in the refrigerator. They taste even better on day two, if you can manage to save any!
If you’re curious about other quick and easy meals we whip up around here, you should check out my recipe for this easy chicken ramen bowl. It’s a completely different kind of comfort food, but just as simple!
Nutritional Estimates for These Mini Cheesecakes
Now, I am absolutely *not* a nutritionist, so please take all of this with a giant grain of salt! These numbers are what my standard recipe calculator spits out based on general brand averages for the ingredients we used in these **Mini Cheesecakes**. They are just estimates, okay? We used full-fat cream cheese and butter, so these are definitely a treat, not something you eat every day!
This breakdown covers what you get in one absolutely perfect, individual serving size. If you manage to stop after just one of these creamy **cheesecake bites**, you’ve shown way more willpower than I usually have!
Based on rough calculations, here is what we are usually looking at per standard **mini cheesecake**:
- Serving Size: 1 cheesecake
- Calories: 250
- Fat: 16 grams (which includes about 9 grams of saturated fat—hey, it’s butter, what can you do?)
- Carbohydrates: 22 grams
- Sugar: 18 grams (lots of that comes from the cream cheese and the crust sugar!)
- Protein: 5 grams
- Cholesterol: 55 milligrams
The graham cracker crust adds a bit of fiber (about 1 gram), which is nice, but really, these are meant to be indulgent weekend desserts! Don’t look at the numbers if you are trying to be healthy; just enjoy the pure, unadulterated perfection of that smooth, chilled filling!
Share Your Perfect Mini Cheesecakes Creations
That’s it! You’ve made them, you’ve chilled them, and now I hope you’ve eaten at least one while they were still slightly warm—shhh, don’t tell anyone I said that!
But seriously, hearing from you guys is the best part of sharing these recipes. I put my heart into making sure these **Mini Cheesecakes** turn out just as amazing for you as they do for me, and your feedback is how I know I’m getting it right!
I would absolutely love it if you took a quick second to leave a rating for the recipe right down below. Five stars helps other bakers find this simple, perfect recipe, and honestly, it makes my day when I see those little stars pop up!
Tell Me How It Went!
Did you try a fun topping? Did you make an entire batch just for yourself (totally understandable, by the way)? Drop a comment telling me about your experience. Was the slow cooling trick successful? Did you find it was the easiest **baked cheesecake** you’ve ever tackled?
And please, if you shared a picture of your gorgeous, individual **cheesecake bites** on Instagram or Facebook, tag me! I live for seeing these little desserts on your counters. It’s so rewarding to see my family’s favorite treat showing up in kitchens everywhere. Happy baking, everyone!
Print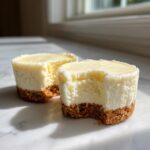
Mini Cheesecakes
- Total Time: 35 min
- Yield: 12 cheesecakes 1x
- Diet: Vegetarian
Description
Simple recipe for individual-sized cheesecakes with a graham cracker crust.
Ingredients
- 1 1/2 cups graham cracker crumbs
- 1/4 cup granulated sugar
- 6 tablespoons unsalted butter, melted
- 16 ounces cream cheese, softened
- 1/2 cup granulated sugar
- 2 large eggs
- 1 teaspoon vanilla extract
Instructions
- Preheat your oven to 325 degrees Fahrenheit. Line a 12-cup muffin tin with paper liners.
- Combine graham cracker crumbs and 1/4 cup sugar in a bowl. Pour in melted butter and mix until crumbs are moistened.
- Press about 1 tablespoon of the crumb mixture into the bottom of each muffin cup. Bake for 5 minutes. Remove from oven.
- Beat the softened cream cheese and 1/2 cup sugar in a separate bowl until smooth.
- Beat in the eggs one at a time, mixing well after each addition. Stir in the vanilla extract.
- Spoon the cream cheese mixture evenly over the crusts in the muffin cups.
- Bake for 18 to 20 minutes, or until the centers are mostly set.
- Turn off the oven and let the cheesecakes cool in the oven with the door slightly ajar for 30 minutes.
- Remove from the oven and cool completely on a wire rack. Refrigerate for at least 2 hours before serving.
Notes
- You can top these with fresh berries or a drizzle of chocolate sauce before serving.
- Ensure your cream cheese is fully softened to prevent lumps in the batter.
- Prep Time: 15 min
- Cook Time: 20 min
- Category: Dessert
- Method: Baking
- Cuisine: American
Nutrition
- Serving Size: 1 cheesecake
- Calories: 250
- Sugar: 18
- Sodium: 150
- Fat: 16
- Saturated Fat: 9
- Unsaturated Fat: 7
- Trans Fat: 0
- Carbohydrates: 22
- Fiber: 1
- Protein: 5
- Cholesterol: 55
Keywords: mini cheesecakes, cheesecake bites, graham cracker crust, easy dessert, baked cheesecake