Okay, listen up! When the summer heat hits and you’re craving something instantly cold, creamy, and totally luxurious, forget those complicated recipes that take forever. I’ve spent years tinkering with frozen drinks—smoothies, slushies, you name it—and I can promise you this: my incredibly easy, flavorful Maple Strawberry Milkshake is the absolute best simple dessert you’ll ever toss into the blender.
Honestly, the combination of bright, sweet strawberries with the deep, slightly woodsy caramel notes of pure maple syrup is just magic. It elevates the whole experience past that boring childhood vanilla base. It’s sophisticated but takes literally five minutes of work. Trust me, once you try this sweetness pairing, you won’t look back!
Why This Maple Strawberry Milkshake Recipe Works
When it comes to a perfect quick treat, this Maple Strawberry Milkshake really shines. It’s not just delicious; it’s fast and perfectly balanced, which is why I keep coming back to it when I need something sweet right now. We want maximum flavor payoff for minimum kitchen time, right? This recipe delivers every single time.

- Speed: We’re talking five minutes total, start to finish. Great for those sudden dessert cravings!
- Texture: Using frozen strawberries locks in that thick, perfect milkshake texture without watering it down.
- Flavor Depth: Maple syrup adds warm, caramel notes that lift the strawberry flavor higher than plain white sugar ever could.
If you love this intense strawberry flavor, you should check out my recipe for strawberry whipped cream—it makes an incredible topping!
Quick Preparation for Your Maple Strawberry Milkshake
Seriously, five minutes! You aren’t even boiling water, you’re just dumping things into a powerful machine. You put in the fruit, the liquid, the syrup, and *whiz*. Because we use frozen fruit instead of waiting around to chill ingredients, you get that immediate, cold, thick result. Minimal effort, maximum bliss. That’s what I call good recipe design!
Perfectly Balanced Sweetness in Every Maple Strawberry Milkshake
Using maple syrup instead of granulated sugar is the real game-changer here. Maple has this lovely, subtle undertone—it’s not just sweet, it’s complex. It works so well with the slightly tart frozen strawberries. It creates a deeper flavor profile that feels much richer than a standard, one-note sweet drink. It just tastes *better*.
Gather Your Ingredients for the Maple Strawberry Milkshake
Alright, getting all your ducks in a row for this amazing treat doesn’t take long, but you do need quality items. Since the flavor profile is so simple—just strawberry and maple—the better your ingredients are, the better your final Maple Strawberry Milkshake will taste. This recipe is designed perfectly to make two generous, frosty servings. You ready?
Here is exactly what you need sitting on your counter:
- Two cups of frozen strawberries. Make sure they are fully frozen—that’s what keeps it thick!
- One cup of regular milk.
- About a quarter cup of pure maple syrup. Seriously, use the real stuff—the stuff in the little plastic bottles that tastes like pancakes is not the same thing!
- One teaspoon of vanilla extract. This just rounds out all the flavors beautifully.
- One cup of vanilla ice cream. Use a good quality brand; it makes a difference when you only have a few ingredients!
Keep those strawberries frozen solid until the second they hit the blender cup. Trust me on that part!
Ingredient Notes and Substitutions for Your Maple Strawberry Milkshake
Because this recipe is so straightforward, you have a little wiggle room, but a few adjustments can make it perfect for your taste. For instance, that quarter cup of maple syrup? That’s my sweet spot, but if you like things super sweet, or if your strawberries are especially tart, feel free to add another splash. Just taste as you go!
For the milk, I always recommend using whole milk. It provides the best mouthfeel and richness, helping that milkshake feel luxurious rather than watery. If you need a dairy alternative, oat milk blends up surprisingly creamy—it’s a really fantastic choice! For those who want something ultra-decadent, you can always mix half whole milk and half heavy cream. If you want to know how to make quick heavy cream at home, I have a little trick for that here.
Don’t skimp on the pure maple syrup; that’s where the distinctive flavor comes from!
Essential Equipment for the Best Maple Strawberry Milkshake
You don’t need a whole array of fancy tools to make something this delicious, which is the beauty of a simple recipe like this Maple Strawberry Milkshake. Honestly, if you have a decent blender, you’re 90% of the way there.
Here is the list of things I always grab before I start chopping or measuring:
- A reliable blender. This is everything. Since we are crushing frozen strawberries and thick ice cream against liquid, you need something with some power so you don’t end up with chunky ice shards.
- Your favorite tall glasses. Presentation matters, even for a quick treat! Maybe use two if you’re serving the full recipe yield, or one gigantic one if you’re feeling extra hungry.
- A good set of measuring cups and spoons. Accuracy really helps here so you get that perfect balance between the strawberry tartness and the maple sweetness we worked so hard for.
- A rubber spatula. You’ll definitely need this to scrape down the thick sides of the blender jar after the second blend. You don’t want to waste a drop of this gorgeous mixture!
See? That’s it! No immersion blenders or special attachments needed. Just a standard blender and you’re set to make the creamiest, maple-kissed strawberry drink.
Step-by-Step Instructions to Make a Maple Strawberry Milkshake
Okay, this is the fun part where we turn those measured ingredients into liquid gold! The secret to a really, truly thick and creamy Maple Strawberry Milkshake—one that doesn’t immediately turn into pink soup—is how you handle the blending. You absolutely cannot just dump everything in at once. We need to build that texture in stages, so trust my process here!
It’s all about integrating the fruit and liquids before tackling the ice cream. If you’re looking for great dairy-free options, I sometimes whip up a batch of chocolate chip cookie shakes, but for this one, we stick to the basics first. Here are the steps to nail the texture.
First Blend: Combining Base Flavors for the Maple Strawberry Milkshake
This first round is about creating our intensely flavored liquid base. Go ahead and grab your blender jar. You want to add the ingredients in this specific order to help your machine work efficiently. First in goes the liquid:
- Pour in your one cup of milk.
- Next, drizzle in that beautiful quarter cup of maple syrup.
- Add your teaspoon of vanilla extract for that little background warmth.
- Toss in all two cups of your frozen strawberries.
Now, pop the lid on tight! You need to blend this mixture until it is completely smooth. You don’t want any chunks of ice or fruit sticking around. Stop the blender, scrape down the sides if you need to, and make sure it’s homogenous. This usually takes about 30 seconds to a minute, depending on your blender power. Taste it quickly here if you want to add more maple—this is your last chance before the ice cream goes in!
Second Blend: Achieving Thick Creaminess in Your Maple Strawberry Milkshake
This is where the magic thickens! Once your base liquid is perfectly smooth and cold, it’s time to add the substance: the vanilla ice cream. Gently scoop that cup of ice cream right into the blender jar on top of the strawberry mix.
Put the lid back on, and start blending again. You’ll notice immediately that it gets much harder for the blades to move—that’s good! That resistance means you’re building that classic, scoopable milkshake texture, not thin juice.
Blend until the mixture is thick and gloriously creamy. Be careful not to over-blend! If you push it too far, the friction from the machine starts to melt the ice cream, and suddenly your thick shake turns soupy. Stop as soon as you see it swirling smoothly but still holding its form. Pour immediately into your chilled glasses and serve right away!
Tips for the Perfect Maple Strawberry Milkshake Texture
I’ve made so many frozen drinks over the years—oops, sometimes I think I’ve forgotten how much ice cream I’ve blended!—that I’ve learned a few tricks to customize the texture of this Maple Strawberry Milkshake exactly how I like it. Because everyone’s blender is different, and everyone has a different ideal level of thickness, you need to know how to troubleshoot a little bit.
If you are aiming for a shake so thick you need a spoon, or maybe you want something you can sip through a wider straw, here is my expert advice based on what I use in my own kitchen. Don’t worry if your first attempt isn’t perfect; a quick blend adjustment always saves the day!
Want It Thicker? Go Heavy on the Frozen Fruit!
The number one way to get that ultra-thick, almost soft-serve consistency is by adjusting your frozen ingredients versus your liquid. If your shake turned out a little too runny after the final blend, it means you had too much milk compared to the frozen volume. Next time, reduce the milk by a quarter cup, or better yet, just toss in another half cup of frozen strawberries!
Another great trick? Use less ice cream and more frozen fruit. Ice cream melts faster than frozen strawberries do, so relying on the fruit keeps it colder and firmer longer. If you find the blender struggling with too much frozen fruit, just add a tablespoon of milk at a time until the blades catch, but stop immediately once it moves smoothly again. If you’re making your own vanilla ice cream first—you should try my recipe for easy creamy vanilla—make sure it’s very firm when you add it in!
Need It Thinner and More Sippable? Add More Milk!
Sometimes, maybe for the kids or if you just prefer a looser consistency, you want something easier to drink right away. If your shake is coming out like cement, don’t panic! You don’t need to dump it out.
Just add one tablespoon of milk at a time, blending briefly after each addition until the texture loosens up to what you prefer. Be cautious! Milk adds up quickly, and you can always add liquidity, but you can’t easily suck it back out once it’s in there. A little patience prevents a watery finish!
Remember, texture is all about that liquid/solid ratio. Play around with it until you find the sweet spot for your own blender.
Serving Suggestions for Your Maple Strawberry Milkshake
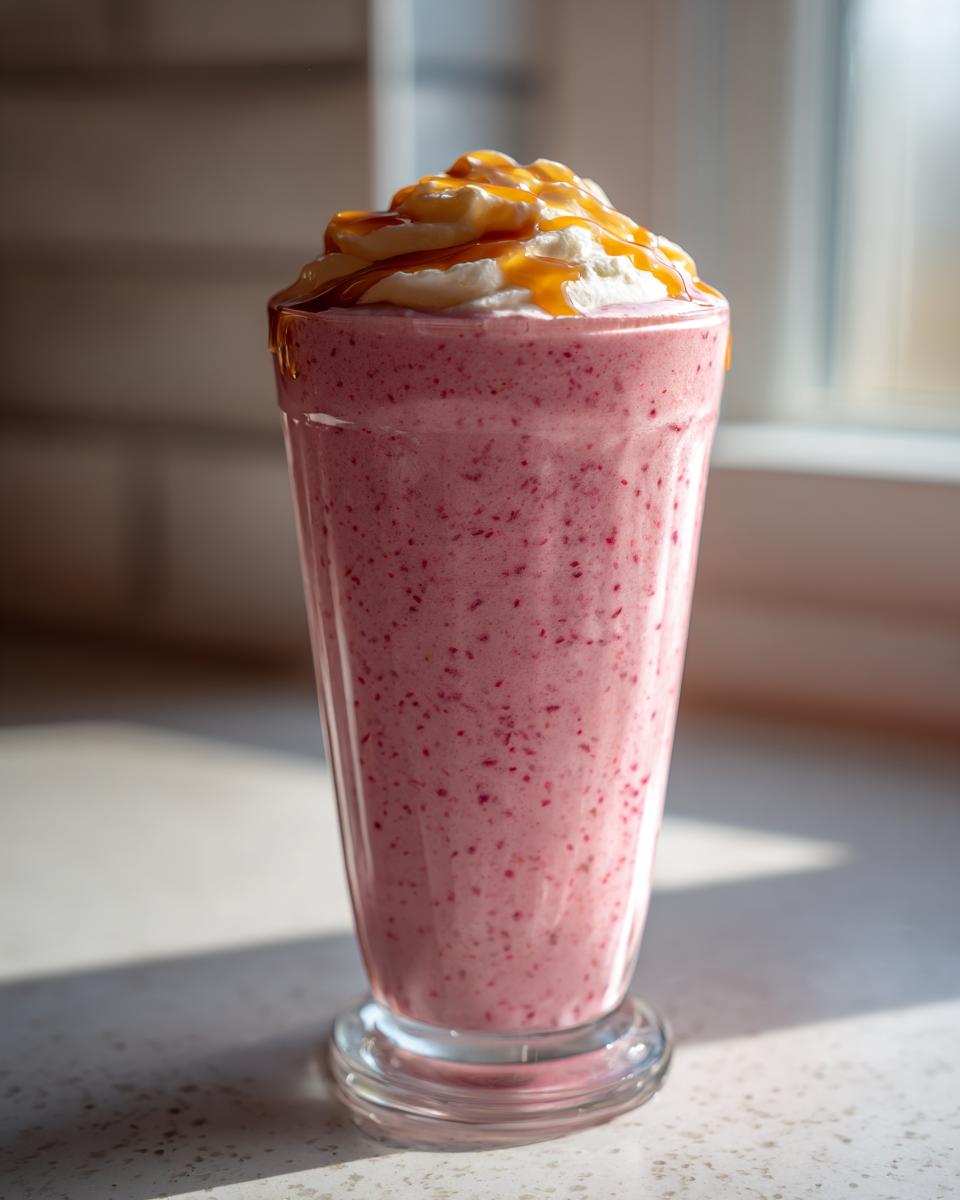
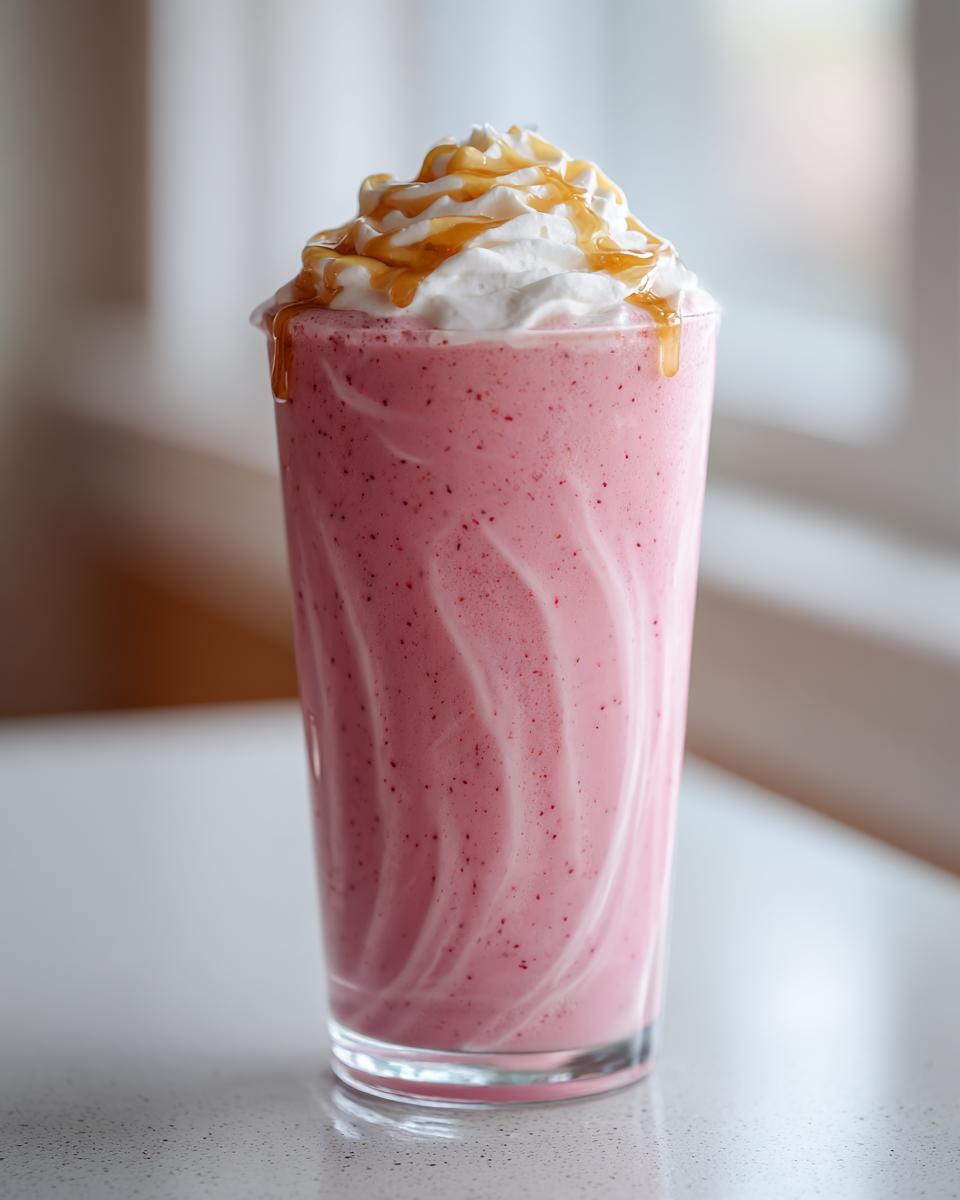
We’ve worked hard to get that perfect, thick, creamy Maple Strawberry Milkshake—we can’t ruin it with a sad presentation now, can we? This drink is gorgeous on its own, the color is so vibrant, but a little garnish really takes it from a quick treat to a real dessert!
Since we kept the base flavor profile simple—pure strawberry and maple—we can add a little flair on top without fighting the main tastes. I usually make two things ahead of time for serving, and it takes maybe ninety extra seconds total.
First, if you’re feeling extra fancy, you have to load it up with whipped cream. Seriously, homemade whipped cream changes everything! If you happened to make a batch of my strawberry whipped cream, stack that high. Otherwise, a nice dollop of plain vanilla whipped topping works perfectly for that classic diner look.
Then, what’s a strawberry drink without a strawberry garnish? Take one perfect, fresh strawberry—make sure it’s clean and dry—and slice a little slit into the bottom so you can perch it right on the rim of the glass. It looks so inviting sitting there!
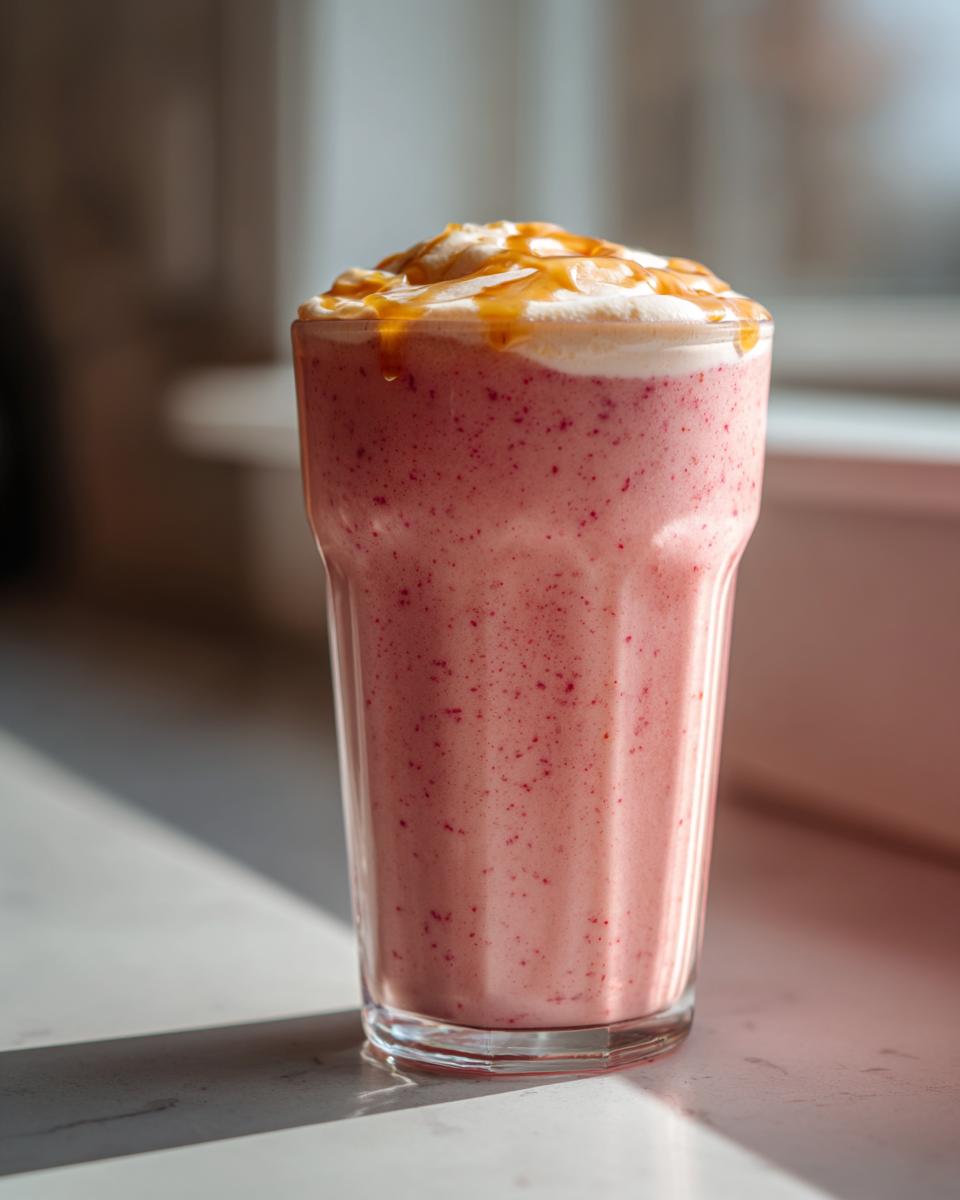
Finally, the maple element needs to make one last appearance. Take a tiny spoon or even a fork and let a slow, thin drizzle of pure maple syrup cascade over the top of the whipped cream. It mixes in with the cream and drips down the side of the shake. Isn’t that just gorgeous? It tells everyone exactly what wonderful flavor is waiting inside this wonderful sweet treat!
Storage and Reheating Instructions for Maple Strawberry Milkshake
Here is the honest truth about this beautiful Maple Strawberry Milkshake: it’s a totally ‘eat it now’ kind of dessert. Because it relies on frozen fruit and ice cream bulk to keep that thick texture, it really doesn’t like being stored. As soon as it warms up even a little bit, it starts separating, and you lose that amazing, dense, spoonable quality we worked so hard to achieve!
I know sometimes life gets in the way! Maybe you made the mixture but then the phone rang and you couldn’t serve it right away. If you absolutely must store it for a short time—and I mean very short, like 15 minutes max—here is what I do to salvage the texture.
First, if you have an extra glass or cup, stick it in the freezer right now to get nice and cold. That chill helps slow down the melting process dramatically.
If your milkshake has started to separate—you know, the lovely pink liquid pooling below the thicker melted portion—don’t pour it out! Just quickly dump the entire contents back into the blender jar. You don’t need to add anything else, though sometimes I toss in a single, lonely frozen strawberry if it looks really sad and watery.
Blend it again! Start slow and pulse it until it comes back together looking thick and creamy once more. Then, immediately pour it into that cup you pre-chilled in the freezer this morning. It won’t be *quite* as perfect as the first pour, but it will be totally drinkable and wonderfully cold!
But honestly, if you plan on saving leftovers—and that’s rare in my house—you’re much better off just making less next time. These are meant to be consumed the second the blender stops whirring!
Frequently Asked Questions About the Maple Strawberry Milkshake
I get so many questions about this recipe, which is wonderful because it means everyone wants to try this fun swirl of strawberry and maple! Most people are asking how to adjust the texture or swap ingredients, which is totally normal when you’re working with frozen fruit. Here are the most common things readers ask me about whipping up this incredible sweet drink.
Can I use fresh strawberries instead of frozen in this Maple Strawberry Milkshake?
Oh, that’s a great question! Listen, fresh strawberries taste amazing, and if that is what you have on hand, go for it. But, remember that the frozen berries are what give us that super thick consistency instantly, right?
If you use fresh strawberries, you absolutely need to compensate for the lack of internal ice crystals. My advice? Add about a half cup of regular ice cubes right into the blender along with your fresh strawberries, milk, and syrup. Blend it up right away! This will help chill and thicken the mixture so it still feels like a hearty milkshake and not just strawberry milk.
What kind of milk works best for a thick Maple Strawberry Milkshake?
For the best texture that mimics that really rich, classic diner-style shake, you want whole milk. It has a higher fat content, and that fat helps carry the flavor and keeps everything super luxurious and creamy when you blend it up. It blends beautifully with the maple syrup, too!
If you want to go even creamier—maybe you’re making this for a special occasion and want to spoil yourselves—try combining half whole milk and half heavy cream. That combo is practically foolproof for thickness. If you’re ever curious about other dairy bases, I have a great post on strawberry banana smoothies that explores different liquid bases for morning drinks, too!
How can I make this Maple Strawberry Milkshake vegan?
That is easy to do, and the flavor profile holds up beautifully without the dairy! You just need to substitute the animal products, which is simple enough nowadays.
For the milk, use any plant-based milk you prefer—almond, soy, or especially oat milk for that extra creaminess. And for the ice cream, find a good quality vegan vanilla ice cream. Most brands work fine, but make sure it’s fully frozen when you add it in. The maple syrup and strawberries are already naturally vegan friendly, so those gorgeous flavors stay exactly the same!
It’s so simple to switch it up and still enjoy this amazing sweet drink!
Estimated Nutritional Snapshot for One Maple Strawberry Milkshake Serving
Now, obviously, every single measurement you use—and how much ice cream you sneak while measuring—is going to change the final result. But for those of you who like to keep track, I’ve put together a rough estimate of what one standard serving of this Maple Strawberry Milkshake looks like based on my core recipe measurements. Think of this as a good guide, not a strict scientific analysis!
These numbers are estimated based on one serving (since the recipe yields two). It’s a dessert, so it’s a little high on the sugar side from the strawberries and the maple, but wow, is it worth it for a sweet summer treat!
Here is the estimated breakdown:
- Serving Size: 1 serving
- Calories: Roughly 350
- Sugar: Around 55g (Remember, a lot of this comes naturally from the fruit and the pure maple syrup!)
- Fat: About 10g total fat
- Saturated Fat: Around 6g (Mostly from the ice cream, naturally)
- Carbohydrates: About 60g
- Protein: About 7g
- Sodium: Very low, around 70mg.
If you are worried about the sugar content, remember you can pull back on that maple syrup, as we talked about earlier in the Ingredient Notes. This recipe is flexible after all! But wow, 350 calories for such a decadent, cold blast of strawberry and maple? I think that’s a pretty good deal for a homemade dessert!
Print
Maple Strawberry Milkshake
- Total Time: 5 min
- Yield: 2 servings 1x
- Diet: Vegetarian
Description
A simple, sweet milkshake featuring strawberries and maple syrup.
Ingredients
- 2 cups frozen strawberries
- 1 cup milk
- 1/4 cup maple syrup
- 1 teaspoon vanilla extract
- 1 cup vanilla ice cream
Instructions
- Place frozen strawberries, milk, maple syrup, and vanilla extract into a blender.
- Blend until smooth.
- Add the ice cream to the blender.
- Blend again until the mixture is thick and creamy.
- Pour into glasses and serve immediately.
Notes
- Adjust the amount of maple syrup to your preferred sweetness level.
- Use whole milk for a richer texture.
- Prep Time: 5 min
- Cook Time: 0 min
- Category: Dessert
- Method: Blending
- Cuisine: American
Nutrition
- Serving Size: 1 serving
- Calories: 350
- Sugar: 55g
- Sodium: 70mg
- Fat: 10g
- Saturated Fat: 6g
- Unsaturated Fat: 4g
- Trans Fat: 0g
- Carbohydrates: 60g
- Fiber: 3g
- Protein: 7g
- Cholesterol: 30mg
Keywords: strawberry, maple, milkshake, frozen fruit, dessert, sweet drink