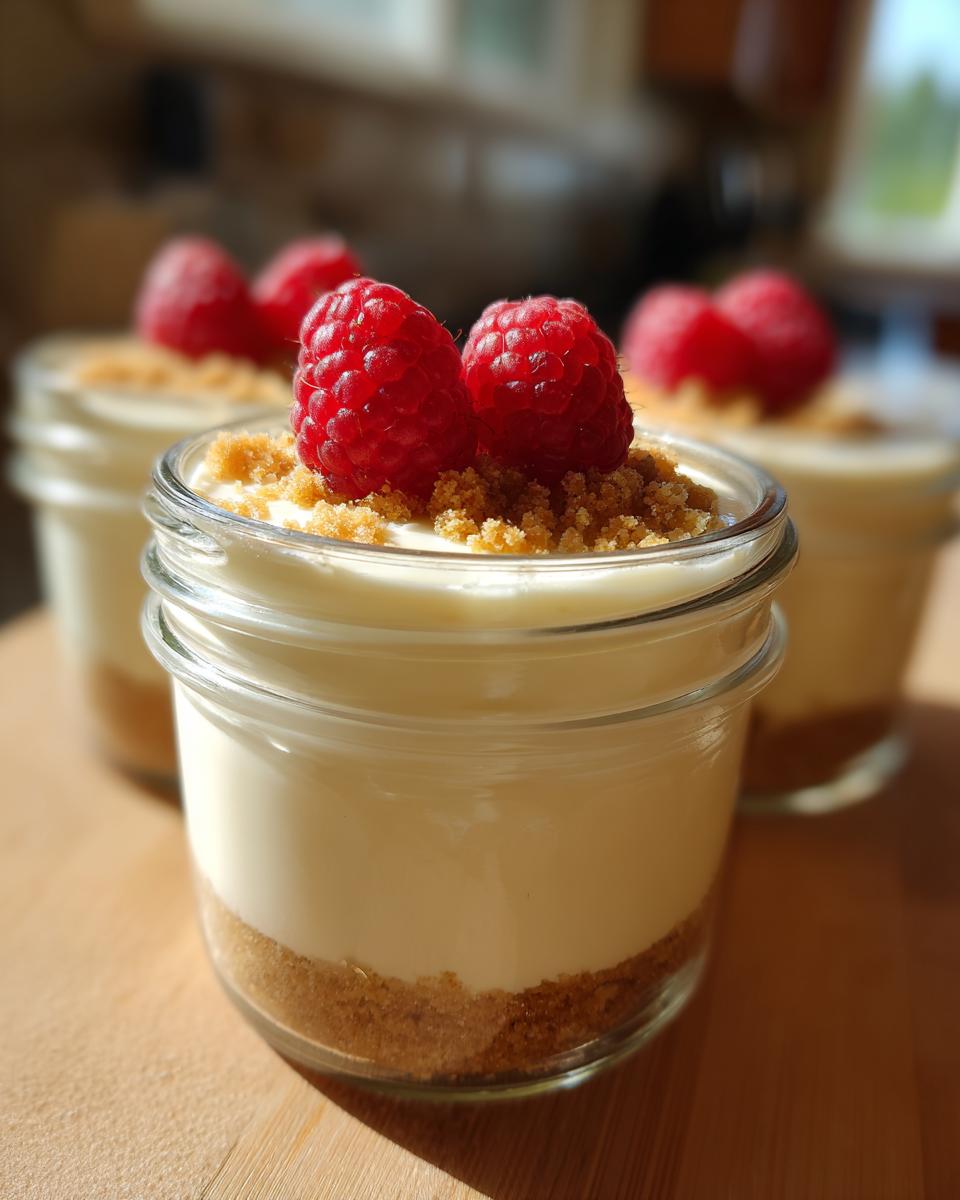
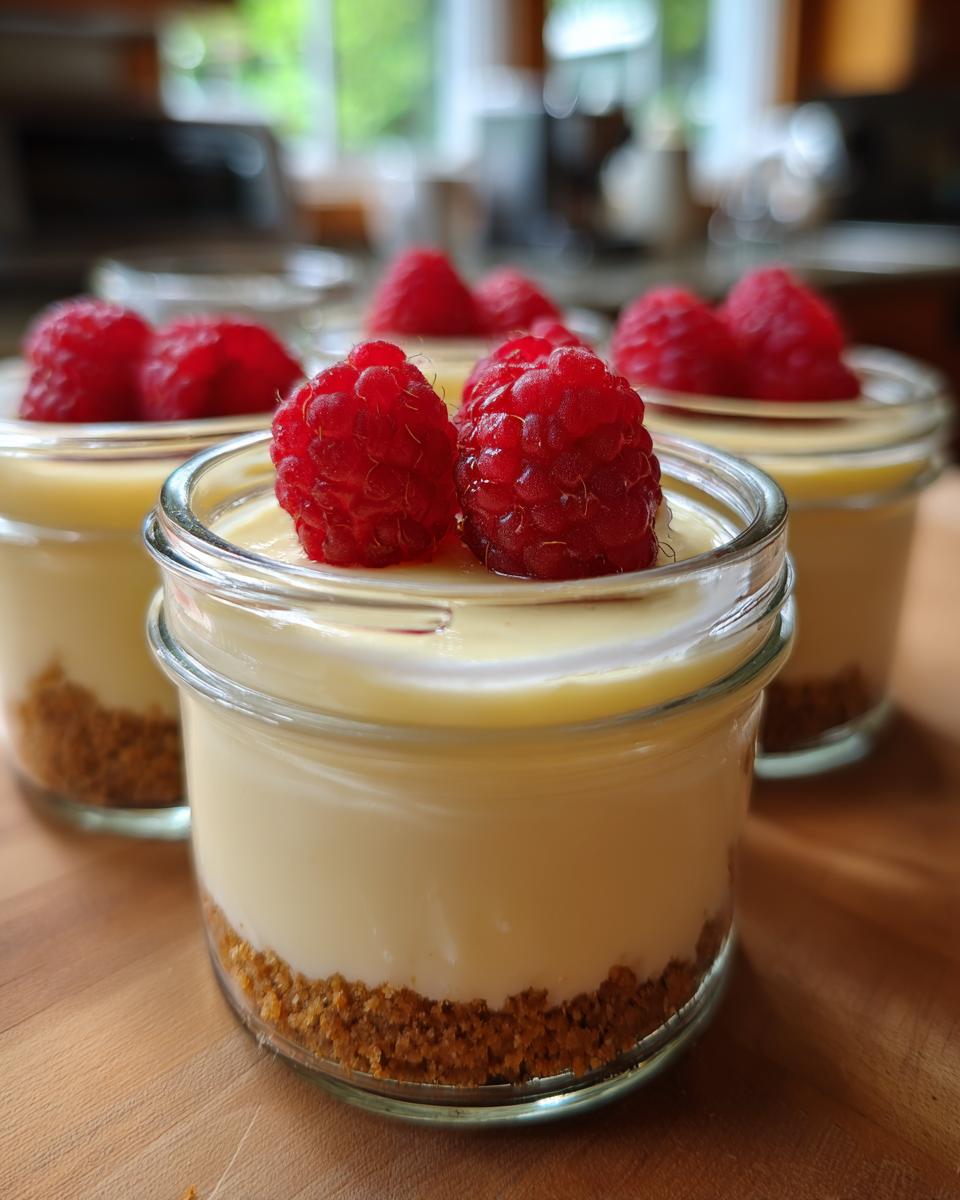
Okay, listen up, because I’ve cracked the code on satisfying that intense dessert craving without feeling guilty later! We all need a little something sweet sometimes, right? Well, I am obsessed with this recipe for High Protein Cheesecake Jars. Seriously, these are game-changers. They’re single-serving, no-bake, and you can mix them up faster than you can decide what marathon to binge-watch next. I whipped up two jars last night because I simply could not resist a creamy, tangy treat that’s secretly packing a protein punch. Forget the baking sheet; these come together almost instantly in individual jars, which means perfect portions every single time. Trust me, you want these in your fridge this week!

Why You Will Love These High Protein Cheesecake Jars
I know that when you’re looking for a healthy dessert, you need things to be fast and effective. These cheesecake jars deliver on every promise. They’re perfect for when you need a single-serve version of your favorite treat, and they require zero oven time! Once you see these benefits, you’ll be making them all the time.
- Major Protein Boost: With nearly 30 grams of protein per jar, this dessert actually supports your fitness goals instead of fighting against them.
- Portion Control is Built In: Since they are already portioned into jars, there’s no worry about mindlessly eating half a pan of cheesecake!
- No Bake, No Fuss: We are keeping things simple! If it needs an oven, I’m not interested on a Tuesday night, and you shouldn’t be either.
- Super Quick Prep: Seriously, chopping the time down to about 15 minutes hands-on means dessert is ready before you finish tidying up the kitchen.
Essential Ingredients for High Protein Cheesecake Jars
You only need a handful of things for these jars, and honestly, they are mostly pantry staples! Getting the texture right means having everything ready to go. Remember, the texture is everything in a no-bake dessert, so don’t substitute the basics!
Here is what you should be pulling out of the pantry:
- Eight ounces of cream cheese. Make sure it’s softened, like elbow-soft, so you don’t end up with chunks when mixing.
- Half a cup of plain, non-fat Greek yogurt. This adds a lovely tang and extra creaminess without extra fat.
- A quarter cup of your favorite protein powder. I use vanilla, but unflavored works great if you want the tang of the cheese to really shine through.
- A quarter cup of sweetener. I stick to erythritol, but use whatever sugar substitute you prefer!
- Just one teaspoon of vanilla extract. Don’t skip this—it marries all the flavors together.
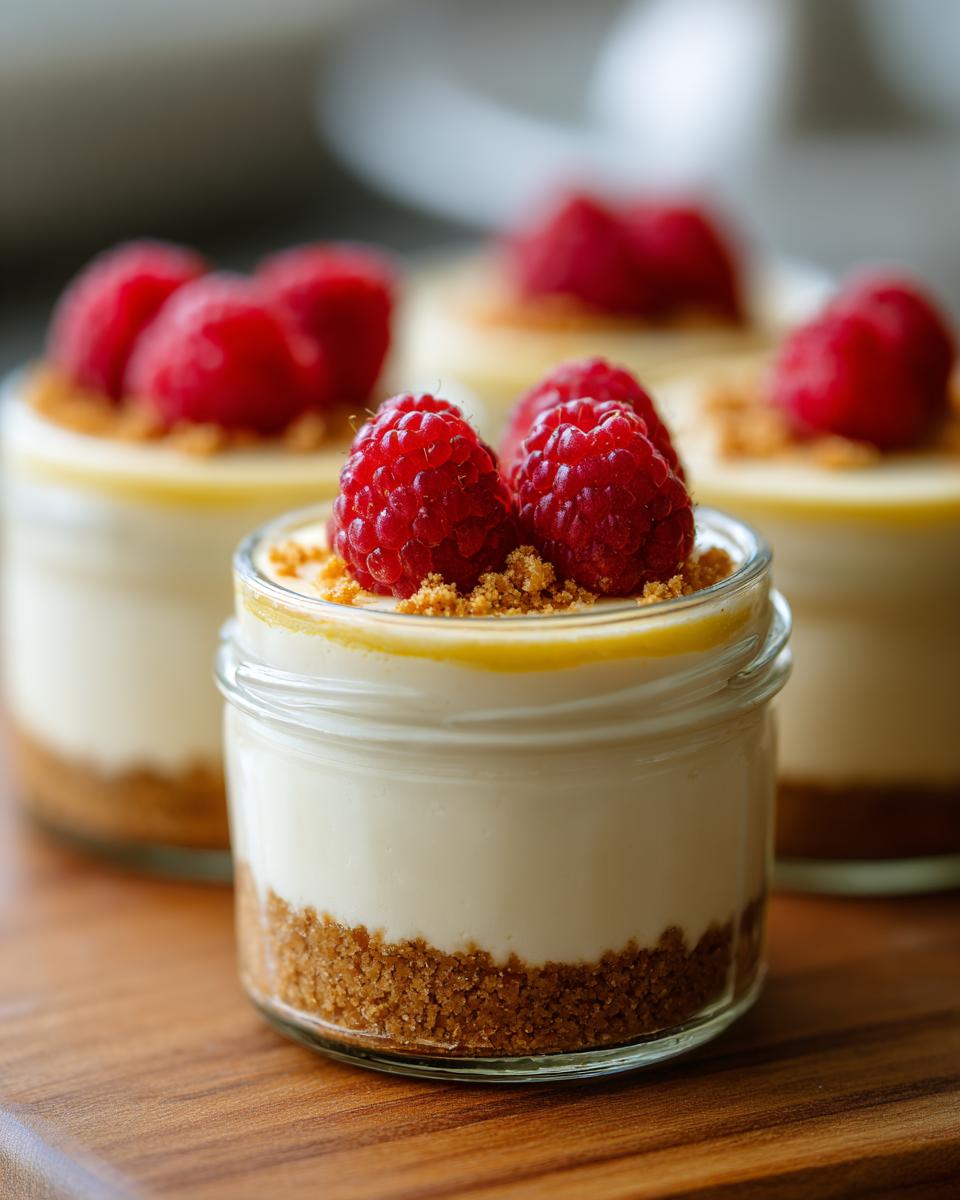
For the crust, grab a quarter cup of graham cracker crumbs. If you’re keeping things low-carb, just swap those crumbs out for almond flour and a bit of sweetener mixed with the melted butter. Simple swaps make a huge difference!
Step-by-Step Instructions for Perfect High Protein Cheesecake Jars
Don’t let the clean list of ingredients scare you—putting these together is almost laughably easy, which is why I keep them on rotation. Just follow these steps, and you’ll have perfect, high protein cheesecake jars ready to grab later. Remember, the secret to any good no-bake treat is patience during the chilling phase!
Preparing the Crust Base for High Protein Cheesecake Jars
First things first, we build the foundation! Grab a small bowl and mix up your graham cracker crumbs (or your almond flour blend if you’re going low-carb) with that tablespoon of melted butter or coconut oil. You want it to look like slightly damp sand. Then, divide this mixture between your two small jars or ramekins. Use the back of a spoon or your fingers to press that mixture in firmly and evenly across the bottom. This keeps the crust from falling apart when you dig in!
Creating the Smooth High Protein Cheesecake Filling
Now for the magic! In a separate, larger bowl, beat that softened cream cheese until it is absolutely lump-free. This is non-negotiable; if you skip this, your protein filling will have lumps, and we want creamy, smooth goodness. Once it’s perfectly smooth, gently mix in the Greek yogurt, your protein powder, your sweetener, and that splash of vanilla. Don’t over-mix it once the powder is in; just mix until everything is just combined and looks like delicious, thick frosting.
Assembling and Chilling Your High Protein Cheesecake Jars
Time to layer! Spoon that amazing filling right over your crust base in each jar. If you want super clean lines—and who doesn’t?—I highly recommend scooping the filling into a Ziploc bag, snipping off a corner, and piping it in smoothly. It looks so professional! Once they are all layered, cover them up and stick them in the fridge. They need at least two hours to firm up properly. If you can wait overnight, amazing, but two hours is the minimum for a good, sturdy dessert. Once they are cold, top them with some fresh berries or a drizzle of sugar-free jam, and dig in! For more tasty no-bake ideas like this, check out this no-bake Oreo dessert recipe.
Tips for Success When Making High Protein Cheesecake Jars
These little jars are so forgiving, but there are a couple of tricks I’ve learned over the years that will take them from *good* to absolutely *must-make-it-again* status. The biggest challenge in any no-bake recipe, especially one involving protein powder, is texture, so let’s focus on keeping things silky smooth!
First, let’s talk temperature. I can’t stress this enough: your cream cheese needs to be truly soft. If it’s cold, you’ll be beating it forever and you’ll still end up with little cream cheese mountains floating in your yogurt mix. Set it out for at least an hour before you start. It should yield just a little when you press it gently.
Now about that protein powder—it loves to clump up, doesn’t it? The trick here is adding it *after* you’ve thoroughly smoothed out the cream cheese and yogurt base. Think of the cream cheese/yogurt mix as the “glue.” If you try to mix the powder into the dry cream cheese first, you’re just asking for trouble. Incorporate it slowly and gently, making sure the liquid base is ready to soak it up evenly.
If you want to try something really fun with the crust, which sometimes gets a little too crumbly, make sure you bind it well with the butter. Sometimes pressing the crust down with the bottom of a drinking glass helps solidify it before you even get to the chilling stage. For another great way to use cream cheese, you have to check out these strawberry cookies with cream cheese frosting—they are divine!
Finally, don’t try to rush the chill time! Those two hours are essential for the fat in the cheese and the protein to set up properly. If you don’t let them firm up, serving them means you’ve got liquid soup instead of cheesecake!
Customizing Your High Protein Cheesecake Jars: Flavor Variations
Since this recipe is so simple and uses a plain flavor base, it’s basically begging you to mess with it! I love that you can switch up the flavor profile entirely just by changing one or two ingredients. Because these are single-serving jars, you can make one a chocolate version and the other a lemon version without committing to a whole batch of one flavor. How fun is that?
The protein powder is your biggest playground here. If you swap out that vanilla powder for a fun chocolate flavor, you instantly have a chocolate cheesecake jar! If you are feeling zesty, a scoop of lemon cake protein powder works wonders, and you can skip the vanilla and add a squeeze of fresh lemon juice instead.
When it comes to toppings, this is where you can really personalize it. If you happen to have some leftover sugar-free jam—maybe raspberry or strawberry—a dollop right on top after chilling is so much better than nothing! Remember that note about adding fresh berries? I always keep a little container of mixed blueberries and raspberries handy just for this purpose. They melt slightly into the cold cream cheese layers, and it’s heaven.
For something really decadent (and still surprisingly good for you), try swirling in a teaspoon of peanut butter into the filling of one jar before you stick it in the fridge. It makes it slightly denser, richer, and just totally unnecessary but totally delicious. If you love cheesecake concepts but want something fruitier, you absolutely must look at these cheesecake deviled strawberries—they are fantastic!
The beauty of these jars is that you can make two totally different desserts with the exact same hands-on effort. Go wild with your favorite extracts or powders!
Storage and Make-Ahead Options for High Protein Cheesecake Jars
One of the best things about making these High Protein Cheesecake Jars is that they are fantastic for meal prepping! Since there’s no baking involved, they are actually better when made ahead of time because they need that chilling period to set up properly. You’re essentially making dessert for the next few days in one quick, 15-minute session. Score!
You absolutely must keep these covered tightly in the refrigerator. Because they contain yogurt and fresh dairy, they are best eaten within about four to five days. I try to keep them closer to the three-day mark just to be safe, but they hold up really well, especially if you used a good quality protein powder that doesn’t break down quickly.
Now, here’s a tip about toppings: if you plan on eating them over several days, only top the jar you plan on eating that day! If you pile fresh berries or sugar-free jam on all of them when you make the batch, the moisture from the topping will start to weep into the cheesecake layer after day two, and we don’t want that watery texture.
Can you freeze them? You know, I tried it once, and honestly, I wouldn’t recommend it for the filling. The yogurt and cream cheese get a little weird and grainy when they thaw out completely. If you absolutely must freeze one, leave off the crust and perhaps use a lower-fat yogurt. But for the best results, just stick to making enough for about four days and keeping them chilled—that’s the sweet spot for this recipe.
If you want to see another amazing no-bake recipe that stores really well, you should try out this no-bake Oreo mint cheesecake. That one freezes like a dream, but for these jars, the fridge is your best friend. Just cover them tight and enjoy your healthy snacks until they are all gone!
Serving Suggestions for High Protein Cheesecake Jars
This is the moment where you get to play stylist with your dessert! Since the cheesecake itself is so perfectly balanced—tangy, sweet, and creamy—you want toppings that add texture or brightness without overwhelming that lovely protein filling. Don’t feel like you have to stick to just powdered sugar; presentation makes a huge difference!
My favorite thing to do is add fresh fruit. Strawberries, raspberries, or sliced peaches really pop against the white filling. If you use berries, just slice them thin and arrange them artfully over the top. It adds natural sweetness and moisture, so you don’t need anything else heavy.
If you’re feeling a little more indulgent, a drizzle is where it’s at. A tiny swirl of sugar-free caramel sauce—just a teaspoon—looks incredible and tastes heavenly. Or, if you’re like me and love nuts, toast some chopped pecans or slivered almonds slightly in a dry pan. That bit of crunch and nutty flavor pairs beautifully with the graham cracker crust. It makes the whole jar feel like it came from a fancy dessert shop.
For pairing, these jars are great on their own, but if you’re serving them after a meal, a small cup of black coffee or an herbal tea really cuts through the richness of the cream cheese. Speaking of beautiful presentation, I recently made a big boy’s fresh strawberry pie that uses a similar principle for maximizing fruit appeal—you’ll love the method!
Remember, since these are single-serving jars, keep the toppings confined to the top layer so it doesn’t seep down and make the crust soggy later. A little bit goes a long way!
Frequently Asked Questions About High Protein Cheesecake Jars
It’s totally normal to have questions when you’re swapping ingredients, especially when you’re aiming to keep the protein high and the sugar low! I’ve gathered the questions I get asked most often about these little jars. Don’t worry if you aren’t sure about the protein powder—it’s usually the trickiest part!
Can I use whey protein instead of casein in my High Protein Cheesecake Jars?
Yes, absolutely, you can use whey! That’s one of the great things about this recipe; it’s pretty flexible. However, you need to know that casein protein tends to absorb liquid a bit slower and thicker than whey. If you swap your powder for whey, your filling might turn out slightly softer.
My advice? If you use whey, stick to the recipe amounts, but then check the consistency before you stop mixing. If it looks a little too loose, just add another tiny spoonful of powder until it looks right. If you see any hint of graininess, it means you need to give that cream cheese a better beating first! For a classic, foolproof texture, I still lean toward casein, but whey works just fine if you’re attentive.
What is the best sweetener to use for low-sugar High Protein Cheesecake Jars?
When we are talking low-sugar, you have a few fantastic options that mimic sugar almost perfectly when baked or chilled. Erythritol is my favorite because it causes very little digestive upset for most people and measures almost 1-to-1 with traditional sugar.
Stevia is great too, but you have to be careful because it’s super concentrated. The recipe calls for a quarter cup, which assumes you are using a granular, cup-for-cup style substitute, or maybe a half-teaspoon of pure stevia drops. If you’re measuring pure stevia, start small! If you’re using regular cane sugar because you don’t mind the carbs, the texture will be fantastic, but you lose that low-sugar benefit. For the best low-sugar *High Protein Cheesecake Jars*, stick with erythritol or monk fruit blends.
Overall, these jars are so simple, but getting that texture right makes all the difference. If you want to see another great recipe that really nails the no-bake feel, you should check out my recipe for an easy cheesecake recipe—it uses a slightly different base but great tips!
Estimated Nutrition for High Protein Cheesecake Jars
I always like to give you guys a general idea of what’s going into these jars nutritionally, because that’s half the reason we make these healthier swaps, right? I ran the numbers based on using non-fat Greek yogurt and a standard vanilla whey blend, but you need to take this information with a grain of salt. Seriously, your exact numbers depend so much on what protein powder you use—casein versus whey makes a huge difference!
Also, if you’re using a low-carb crust made with almond flour instead of graham crackers, your carb count will drop significantly, which is great news!
Here is the general breakdown for one single-serving jar, assuming standard recipe ingredients:
- Calories: Around 300
- Protein: A whopping 28 grams! This is why we love them.
- Fat: About 15 grams total.
- Carbohydrates: Roughly 15 grams.
- Sugar: We kept that nice and low, around 5 grams!
Just keep in mind that these are estimates. If you load yours up with high-sugar jam or use full-fat yogurt, those calorie and sugar counts absolutely change. For a fun, low-carb twist that plays heavily on maximizing healthy fats and reducing sugar even further, you have to check out this keto berry cheesecake salad recipe—it uses similar concepts but swaps out the base entirely!
The main takeaway is that you’re getting a huge protein hit in a satisfyingly creamy, low-sugar package.
Print
High Protein Cheesecake Jars
- Total Time: 15 min
- Yield: 2 servings 1x
- Diet: Low Fat
Description
Simple, single-serving cheesecake jars providing a high protein dessert option.
Ingredients
- 8 oz cream cheese, softened
- 1/2 cup Greek yogurt, plain, non-fat
- 1/4 cup protein powder, vanilla or unflavored
- 1/4 cup sweetener (stevia, erythritol, or sugar substitute)
- 1 teaspoon vanilla extract
- 1/4 cup graham cracker crumbs (or low-carb alternative)
- 1 tablespoon melted butter (or coconut oil)
Instructions
- Mix the graham cracker crumbs and melted butter in a small bowl.
- Press the crumb mixture evenly into the bottom of two small jars or ramekins.
- In a separate bowl, beat the softened cream cheese until smooth.
- Add the Greek yogurt, protein powder, sweetener, and vanilla extract to the cream cheese.
- Mix until all ingredients are fully combined and the mixture is smooth.
- Spoon or pipe the cheesecake filling over the crust layer in the jars.
- Refrigerate for at least 2 hours, or until firm.
- Top with desired toppings before serving.
Notes
- You can use any flavor of protein powder you prefer.
- For a low-carb crust, use almond flour mixed with sweetener and butter.
- Add fresh berries or sugar-free jam as a topping.
- Prep Time: 15 min
- Cook Time: 0 min
- Category: Dessert
- Method: No Bake
- Cuisine: American
Nutrition
- Serving Size: 1 jar
- Calories: 300
- Sugar: 5
- Sodium: 250
- Fat: 15
- Saturated Fat: 9
- Unsaturated Fat: 6
- Trans Fat: 0
- Carbohydrates: 15
- Fiber: 1
- Protein: 28
- Cholesterol: 50
Keywords: high protein, cheesecake, jars, no bake, dessert, protein powder, low sugar