Oh my gosh, are you ready for spooky season? I’ve been baking for Halloween parties since I was tall enough to reach the mixer, and let me tell you, I finally landed on the absolute perfect creepy-but-delicious treat! Forget giant messy desserts; these are all about bite-sized fun.
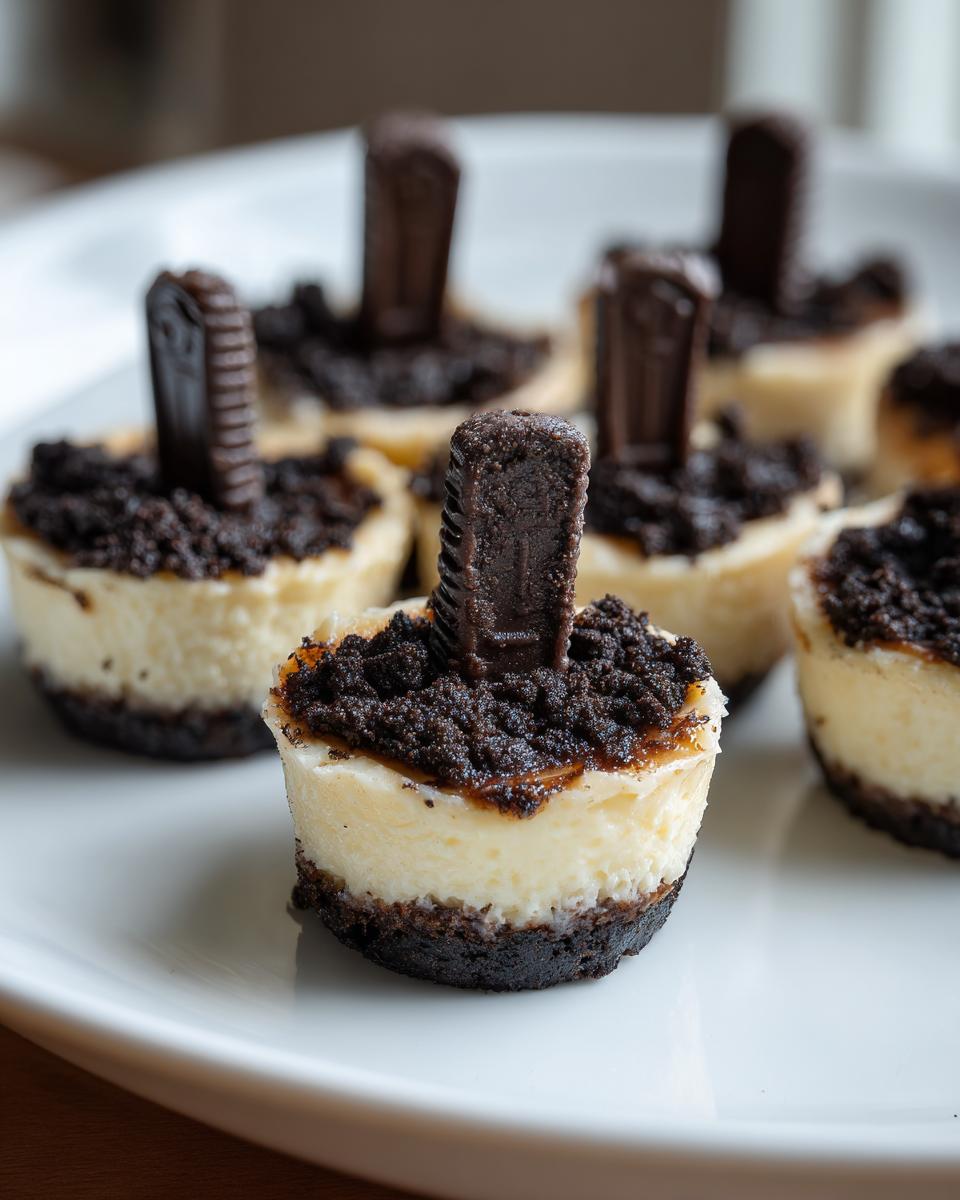
I’m talking about my **Classic Halloween Graveyard Cheesecake Bites**. They look like tiny tombstones popping out of dark cookie dirt, but underneath that spooky disguise is the creamiest little cheesecake you’ve ever had. I’ve been tweaking this mini-cheesecake formula for years—making sure the crust is sturdy and the filling sets just right—so trust me when I say these little graves are worth the effort!

Because they are individual servings, serving is so easy, and I can guarantee everyone will want two! They are a guaranteed crowd-pleaser when you need something impressive that’s secretly simple.
Why You Will Love These Classic Halloween Graveyard Cheesecake Bites
I know, I know, you might look at the decoration and think, “Oh no, this is complicated.” But honestly, the best part of this recipe is how easy cleanup is!
Here’s why I insist you try these for your next ghoulish gathering. They check every single box:
- Perfect Portion Control: Since they sit right in the muffin liners, there’s no messy slicing or fighting over the last piece. Everyone gets one perfect, scary little bite.
- Total Theme Win: They are spooky, fun, and absolutely scream Halloween. Your guests will snap photos before they even take a bite—that’s how cute they are!
- Simple Components: We are using a basic, sturdy graham cracker crust and an incredibly smooth, classic cheesecake filling. Nothing fancy needed for the base, which means less chance of disaster.
- Great Make-Ahead Treat: You bake them one day, decorate them the next. That gives you so much freedom when the actual party day rolls around. You can find lots of other great inspiration for easy desserts when you look at easy cheesecake recipes, but this one has the Halloween edge!
Seriously, if you need a dessert that minimizes serving stress on Halloween, this little graveyard setup is the answer.
Gathering Ingredients for Classic Halloween Graveyard Cheesecake Bites
Okay, so for these bites, we need two main groups of ingredients: the stuff for the solid little cheesecake base and the fun decorative bits. When you’re shopping, make sure you grab everything on this list so you don’t have to make a last-minute run to the store.
This is where setting yourself up for success happens, so pay attention to the *state* of the ingredients—especially that cream cheese!
Don’t forget, having extra tips on substitutions, like how folks use homemade dairy alternatives sometimes, helps build trust, but for this recipe, stick to the basics for the best texture.
Here is exactly what you need for 12 perfect little graveyard portions:
- The Crust Crew: 12 graham crackers (you need to crush these yourself, not the pre-made crumbs!)
- 3 tablespoons melted butter (unsalted is best, but whatever you have works)
- The Creamy Core: 8 ounces cream cheese, and I mean *fully* softened—let it sit on the counter for an hour, seriously!
- 1/4 cup granulated sugar
- 1 large egg yolk (just the yolk, reserve the white for something else!)
- 1 teaspoon vanilla extract
- 1/4 cup sour cream (full fat is always my preference for richness)
- The Graveyard Dirt: About 12 chocolate sandwich cookies (like Oreos, filling and all).
- The Tombstones: Chocolate wafer cookies (these are flatter and thinner than sandwich cookies).
- A little secret weapon: Black food coloring (this is totally optional, but it makes the dirt look extra spooky and deep later on).
That’s it! Simple pantry staples combined with fun candy bits. Once you have these laid out, you’re halfway to Spooky Town!
Preparing the Crust for Classic Halloween Graveyard Cheesecake Bites
Alright, now that we have all our goodies assembled, we have to build a sturdy foundation, because a graveyard needs solid ground, right? We’re starting with the graham crackers, and this is where you put in a tiny bit of muscle.
First things first: get your oven preheated to 325 degrees Fahrenheit. We aren’t baking these for long, but we want them hot enough to set that crust nicely. And grab your 12-cup muffin tin, lining it with paper liners. I always do this first, even before mixing, because once the crust is mixed, you want to get it into those cups fast!
Crushing the Crackers and Mixing the Butter
You need those graham crackers crushed up finely—we’re talking sandy texture, not chunky bits. I usually toss them into a sturdy Ziploc bag and use the bottom of a heavy pan or rolling pin. If you have a food processor, great, but sometimes the manual method gives you a better feel for the texture.
Once they look like coarse sand, pour them into a bowl and drizzle in your 3 tablespoons of melted butter. Stir it around until every crumb looks moist. You want it to hold together if you squeeze a bit in your palm—that’s the sign it’s ready. If it crumbles apart, add just a tiny bit more melted butter, sneaky little bit at a time!
Pressing and Pre-Baking
Now, take about a tablespoon of that mixture and press it right into the bottom of each paper liner. Don’t be timid here! You need to pack it down well so it stays put when we pour the creamy filling on top. A flat-bottomed glass works perfectly for tamping it down evenly.
Once all 12 crusts are pressed, those babies go into the 325°F oven for exactly 5 minutes. This short pre-bake helps prevent the crust from getting soggy later on. Seriously, don’t skip this little action!
When those five minutes are up, pull them out and let them cool on a wire rack for just a minute while you mix up that glorious cheesecake filling. This little time buffer is important before we move on to the next stage of making these perfect little cheesecake bases!
Mixing the Creamy Cheesecake Filling for Classic Halloween Graveyard Cheesecake Bites
Okay, the crusts are cooling down, and now comes the best part: making that rich, velvety smooth cheesecake center. If you take one thing away from all my holiday baking adventures, let it be this: you *must* make sure your cream cheese is perfectly softened.
Expert Tip: Soft Cream Cheese is Non-Negotiable
I cannot stress this enough! If your cream cheese is cold when you start mixing, you end up with little white lumps in your final product, and nobody wants lumpy graveyard dirt, right? You want it squishy to the touch—like room temperature butter, but maybe a tiny bit cooler. I usually leave mine out for a full hour. If you forget, you can carefully zap it in the microwave for just ten seconds at a time, but watch it like a hawk!
The Essential Mixing Order
The order you add ingredients matters, especially with cheesecake, because we aren’t looking for huge fluffy air pockets like a sponge cake. We want density and silkiness.
Grab your mixer—I use the electric hand mixer for this—and put the softened cream cheese and granulated sugar right in the bowl. Beat those two together until they look totally uniform. It should be pale yellow and look creamy, not grainy at all. This is your structure building!
Next, gently beat in the egg yolk and the vanilla extract. Mix it just until it disappears into the batter. Don’t go crazy whipping it now; we aren’t trying to over-aerate it.
Folding in the Sour Cream Last
The final secret weapon for these individual cheesecake bites is the sour cream. It adds just a touch of necessary tang and keeps the texture from being too heavy, making those cheesecake fillings truly luxurious.
Add your 1/4 cup of sour cream and mix on low speed until *just* combined. Stop the moment you don’t see streaks anymore. Overmixing at this stage is what causes cracks during baking, and since we are going for perfect little **Classic Halloween Graveyard Cheesecake Bites**, we want smooth tops!
Now, take that creamy mixture and spoon it gently over your slightly cooled graham cracker crusts. Make sure you fill them evenly, keeping them about two-thirds full, so you have room left for that delicious cookie dirt layer later on!
Baking and Cooling the Classic Halloween Graveyard Cheesecake Bites
Time to get these little guys into the heat! This is probably the stage where people get nervous about baking cheesecake, but stick to my method, and you’ll end up with perfectly set, crack-free tops. Remember, we only baked the crusts for five minutes, so now we’re working with the full cheesecake batter.
Gently place your muffin tin back into that 325-degree oven. You are going to bake these for about 15 to 18 minutes. I know, timing cheesecake is fussy, but watch for the visual cues! When they are done, the edges of the filling should look set—like they aren’t liquid anymore—but the very center should still have a tiny bit of a jiggle to it. Seriously, they should look like they are gently swaying if you nudge the pan.
The Secret to Preventing Cracks: Slow Cooling
This next step is pure gold, and it’s what separates the beginner cheesecake makers from the pros. If you pull them out and slam them onto a cold counter, that rapid temperature change shocks the cheesecake and leads to ugly cracks right in the middle. We don’t want any grumpy ghosts showing up because our cheesecake broke!
When the 18 minutes are up and you see that slight jiggle, turn the oven OFF. Don’t open the door yet! Just turn the heat off, crack that oven door open just a tiny bit—just enough to let a little steam escape but keep the ambient heat in—and let them sit in there for a full 30 minutes. This slow, gentle cooling period is absolutely crucial for maintaining that beautiful, smooth surface for our graveyard decoration. It builds serious trust in your baking skills for when you decide to try something like a triple chocolate cheesecake!
After that half-hour in the warm oven, you can carefully take them out and place them on a wire rack. Let them cool completely to room temperature. We aren’t decorating until they are totally cool, which sometimes means getting them into the fridge for an hour or so just to firm everything up before we start building our edible spooky scenes!
Decorating Your Classic Halloween Graveyard Cheesecake Bites
Alright, this is the fun part where these simple cheesecake bites transform into masterpieces of the macabre! Once those cheesecake tops are completely cool—we mean stone-cold, preferably after a good chill—it’s time to decorate them into the perfect **Classic Halloween Graveyard Cheesecake Bites**.
We need three things for the decorations: the dirt, the grass (which we will skip with the dirt!), and the tombstones. It’s all about volume control here so you don’t smother the lovely cheesecake. If you’ve ever tried decorating my popular strawberry crunch topping, you know texture is everything. The same rule applies to graveyard dirt!
Creating the Edible Graveyard Scene
First, let’s make the dirt. Take those chocolate sandwich cookies—yes, the whole thing, cream filling included—and toss them into a sturdy plastic bag. Now, grab that rolling pin or heavy glass again. You want fine crumbs here. Pulse and mash until you have something that looks genuinely like dark, dry earth. This is where you get to be bossy with your ingredients!
Now for my little trick: If they look a little light brown, grab your black food coloring. Put just a tiny dot on a napkin, then dip your finger or a toothpick in it and rub it into the crumbs inside the bag. Mix it until that dirt layer is deep, dark, and perfectly ominous. Don’t worry if you get your fingers dirty—it’s Halloween!
Take a spoon and gently layer a nice little mound of that dark, rich ‘dirt’ right on top of each cooled cheesecake. Spread it out a bit so it covers the entire surface, leaving a small border of cheesecake showing, maybe?
Next up, the tombstones! Take your flat chocolate wafer cookies and use a small, sharp knife to carefully cut them into rectangular grave shapes. Don’t make them too perfect—crooked tombstones look way more authentic!
Here’s a personal tip: Sometimes, I grab a toothpick dipped in melted chocolate (or even writing icing if I’m feeling fancy) and quickly write tiny ‘RIP’ letters on the wafers before they hit the dirt. It takes concentration, but it makes the finished **Classic Halloween Graveyard Cheesecake Bites** look incredibly detailed.
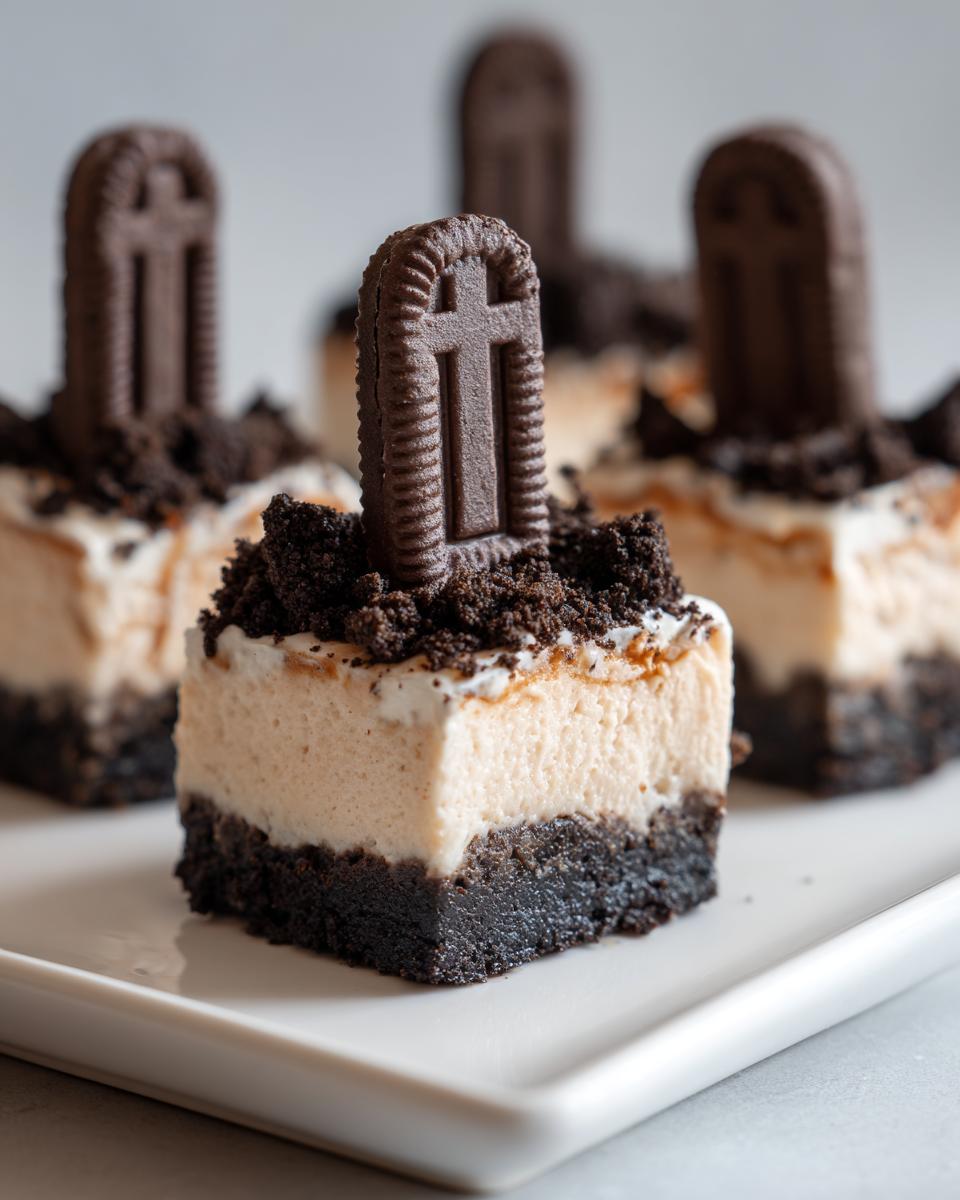
Gently push one or two of those tombstones right down into the cookie crumbs on each bite. Make sure they stick up tall, like they’re ready for a ghostly visitation!
That’s it for the assembly! Now, the hardest part: patience. You *must* chill these for at least 2 hours. Don’t even think about taking a sneak taste before then! That chilling time lets the cheesecake firm up completely and helps the wafer tombstones stay secured in their freshly dug graves. Once they’re chilled, they are ready to haunt your party!
Tips for Perfect Classic Halloween Graveyard Cheesecake Bites
So, you’ve baked them and you’ve decorated them—now let’s just make sure everything goes off without a hitch! Even with simple recipes like these **Classic Halloween Graveyard Cheesecake Bites**, a couple of insider tips can elevate them from good to legendary.
I’ve probably made 50 batches of mini-cheesecakes over the years, trying every trick in the book, and these three things always make the difference between a decent dessert and a stunning one. You can check out other great tips over at easy cheesecake recipes, but these are specific to our spooky lineup!
Tip One: Temperature Control Stops Cracks
We talked about the slow cool-down in the oven—that’s the big one for preventing cracks. But another temperature point that is huge is the initial mixing. If your cream cheese is too cold when you mix it, and then you bake it (even briefly), the batter expands unevenly, leading to settling and cracking later when it cools down too fast.
Make sure that cream cheese is super soft, and equally important, don’t rush moving the hot, just-baked bites straight onto a cold granite countertop. Let them cool on the rack first, then maybe move them to a wooden cutting board before they hit the fridge. Little gentle steps prevent disaster!
Tip Two: Your Dirt Needs to Be Fine Dirt
When you are crushing those chocolate sandwich cookies for the graveyard topping, don’t stop when they still look chunky. If the crumbs are too large, they won’t settle nicely on the cheesecake surface, and you’ll end up with bits that look like little clumps of dirt instead of a smooth, dark layer.
You are aiming for that super-fine powder—almost like cocoa powder but thicker. The black food coloring trick really helps here because it coats every particle evenly, giving you that deep, rich, spooky color we are looking for. If you can crush them fine enough, the graham cracker crust beneath won’t even peek through!
Tip Three: Inserting Tombstones Last
Wait until the cheesecake layer is completely chilled and firm before you try jamming those wafer tombstones in. If the cheesecake is even slightly soft, when you push the wafer down, the filling will squish up the sides of the stone, making it look messy rather than perfectly placed.
If you chill the cheesecake bites first until they are solid, you can push the ‘tombstones’ in easily, and the filling acts like firm cement holding them perfectly upright. This small timing difference makes the final presentation of your **Classic Halloween Graveyard Cheesecake Bites** look professional!
Storage and Make-Ahead for Classic Halloween Graveyard Cheesecake Bites
One of the best things about making these **Classic Halloween Graveyard Cheesecake Bites** is that they are fantastic for planning ahead—a lifesaver when you’ve got a million spooky things to do before the party starts. Cheesecake always tastes better the next day anyway, right?
Since we baked the cheesecake base and then added the crumb topping and decorations, we have a little strategy for keeping everything looking fresh!
Making Them Ahead of Time
You can absolutely make these a day in advance, which is what I usually do. The important thing is timing the decoration. I bake the cheesecake bites one day, let them cool completely, and cover them in the fridge overnight *without* the topping.
Why wait? If you put the cookie crumbs on too early, especially if your fridge is maybe a little humid, that ‘dirt’ can start to soften up, and we want that crumb texture to be delightfully sandy underneath your teeth! It’s a texture thing, you know?
So, my schedule is usually: Day 1 is baking and chilling the plain bites. Day 2 is when you whip up the cookie crumbs, top them, insert those little tombstones, and give them a final chill before serving.
How Long Do They Stay Good in the Fridge?
Because these are mini cheesecakes, they last quite well in the refrigerator. You should keep them tightly covered—I use plastic wrap gently tented over the muffin tin if I’m not taking them out of the liners yet, or transferred to an airtight container if they are already decorated.
They stay perfectly fresh and delicious for about four days in the fridge. That gives you plenty of wiggle room for setting up your Halloween decorations. If you’ve ever made a no-bake Oreo dessert, you know how sturdy they are, and these baked bases are even better at holding up!
If you happen to have leftovers (unlikely, but hey!), they freeze beautifully too! Just make sure you freeze them *before* you put the cookie crumbs on. Wrap each chilling bite tightly in plastic wrap, then foil. They can stay frozen for about a month, but that’s pushing it for a Halloween treat—I like to eat them when they’re fresh!
Frequently Asked Questions About These Cheesecake Bites
I get so many questions every year once I post pictures of these spooky treats online! It makes total sense; everyone wants their **Classic Halloween Graveyard Cheesecake Bites** to turn out perfectly. Here are the most common things folks ask me after they’ve gone through the recipe.
If you are planning a big party, making up your mind on these early is smart because they are such great make-ahead treats. If you’re looking for other easy make-ahead ideas, you might find some inspiration over at no-bake Oreo mint cheesecake recipes!
Can I skip baking the crust for the Classic Halloween Graveyard Cheesecake Bites?
Oh, I wouldn’t recommend skipping that brief five-minute bake! While many recipes use a no-bake crust base, for these rich little cheesecake fillings, a quick pre-bake helps set the butter and the crumbs just enough so they don’t fall apart when you pour the heavy batter on top.
If you skip it, you run the risk of getting a soggy base where the graham cracker crumbs mix too much with the moisture from the filling. Trust me, that little burst of heat makes all the difference in keeping your graham cracker layer sturdy.
How do I make the cookie ‘dirt’ for the graveyard topping?
This is my favorite part of the decorating process! You just need standard chocolate sandwich cookies—the kind with the cream filling inside. Toss about 12 of them right into a heavy-duty plastic bag. You want to crush them until they are a very fine powder. I use a rolling pin at first to break them up, and then I switch to pounding them until they look indistinguishable from actual dirt.
Remember that tip about the black food coloring? If you want that super dark, fresh-dug-earth look for your **graveyard** topping, work a tiny bit of black coloring into the crumbs off to the side until you get the right deep color. You want that loose topping to sit nicely on the cheesecake without dissolving!
What is the best way to serve these individual cheesecake portions?
That’s a great question about serving! Because these are baked directly in paper muffin liners, keeping them in the liner is the easiest way possible, especially for a buffet setup. They are treated like little cupcakes, and guests can just peel the paper down as they eat. That keeps your hands clean!
However, if you want a slightly cleaner, more elegant look for your **individual cheesecake** portions, you can chill them longer—say, 4 to 6 hours or overnight—until they are rock solid. Once fully chilled, gently peel away the paper liner from the sides, and the cheesecake should hold its shape perfectly. I prefer serving them slightly firmer, but either way works perfectly for a Halloween party!
Nutritional Estimate for Classic Halloween Graveyard Cheesecake Bites
Okay, let’s get real for a second. When you’re eating something topped with chocolate tombstones and cookie dirt, you probably aren’t thinking about counting macros, but I know some of you dedicated bakers want the numbers!
I’ve run the numbers based on the classic ingredients we used—the cream cheese, the butter, the sugar, and the cookies—using standard measurements. Just remember, this is an estimate! If you use a different brand of cream cheese or swap out the graham crackers, your final count will shift a little bit. It’s good to know these estimates, especially if you’re trying to plan snacks alongside something lighter, like that keto berry cheesecake salad I shared last summer.
Here is what one of these adorable **Classic Halloween Graveyard Cheesecake Bites** should clock in around:
- Serving Size: 1 bite (This recipe makes 12 servings!)
- Calories: Roughly 220 calories
- Total Fat: About 14 grams (Remember, butter and cream cheese are doing the heavy lifting here!)
- Saturated Fat: Around 8 grams
- Carbohydrates: Approximately 20 grams
- Sugar: About 15 grams (A mix from the cream cheese filling and the cookie topping)
- Protein: Just hitting 4 grams
- Sodium: Around 150 mg
See? Not too terrible for a holiday treat! They are perfectly portioned, which helps stop me from sneaking a third one before I even realize what I’m doing. These are rich, dense, and satisfying, so one is usually enough to win over the spooky crowd!
Print
Classic Halloween Graveyard Cheesecake Bites
- Total Time: 145 min
- Yield: 12 servings 1x
- Diet: Vegetarian
Description
Small, individual cheesecake bites decorated like miniature graveyards for Halloween.
Ingredients
- 12 graham crackers
- 3 tablespoons melted butter
- 8 ounces cream cheese, softened
- 1/4 cup granulated sugar
- 1 large egg yolk
- 1 teaspoon vanilla extract
- 1/4 cup sour cream
- Chocolate sandwich cookies (about 12, for ‘dirt’)
- Chocolate wafer cookies (for ‘tombstones’)
- Black food coloring (optional, for darker ‘dirt’)
Instructions
- Preheat your oven to 325 degrees Fahrenheit. Line a 12-cup muffin tin with paper liners.
- Crush the graham crackers finely. Mix the crumbs with the melted butter. Press about 1 tablespoon of the mixture into the bottom of each muffin liner. Bake the crusts for 5 minutes. Let them cool slightly.
- In a medium bowl, beat the softened cream cheese and sugar until smooth. Beat in the egg yolk and vanilla extract. Mix in the sour cream until just combined.
- Spoon the cheesecake batter evenly over the cooled crusts, filling each liner about two-thirds full.
- Bake for 15 to 18 minutes, or until the edges are set but the centers still jiggle slightly. Turn off the oven, crack the door open, and let the cheesecakes cool in the oven for 30 minutes. Remove and cool completely on a wire rack.
- Prepare the topping: Place the chocolate sandwich cookies in a plastic bag and crush them into fine crumbs (this is your ‘dirt’). If you want darker dirt, mix in a drop of black food coloring.
- Once the cheesecakes are cool, top each one with a layer of the cookie crumbs.
- Use a small knife to carefully cut the chocolate wafer cookies into rectangular ‘tombstones’. Insert one or two ‘tombstones’ into the cookie crumb topping of each bite.
- Chill the cheesecake bites for at least 2 hours before serving.
Notes
- You can use a toothpick dipped in melted chocolate to write ‘RIP’ on the wafer tombstones before inserting them.
- For a smoother texture, make sure your cream cheese is fully softened before mixing.
- Prep Time: 20 min
- Cook Time: 25 min
- Category: Dessert
- Method: Baking
- Cuisine: American
Nutrition
- Serving Size: 1 bite
- Calories: 220
- Sugar: 15
- Sodium: 150
- Fat: 14
- Saturated Fat: 8
- Unsaturated Fat: 6
- Trans Fat: 0
- Carbohydrates: 20
- Fiber: 1
- Protein: 4
- Cholesterol: 45
Keywords: cheesecake bites, Halloween dessert, graveyard, individual cheesecake, graham cracker crust, no-bake topping